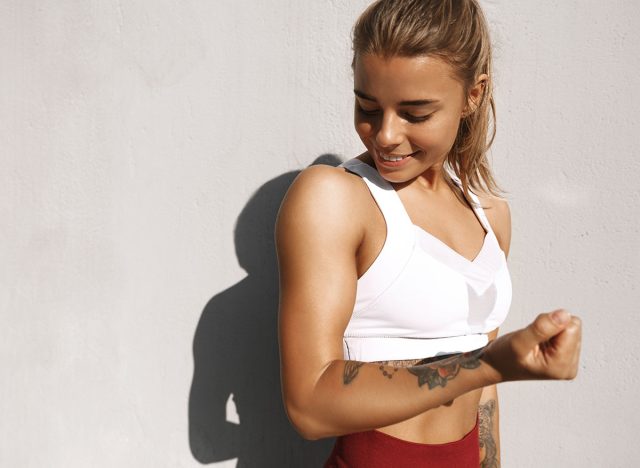
If You Can Complete These 3 Morning Exercises After 55, You’re Stronger Than Most People Your Age
Waking up with stiff joints and tight muscles is something most people over 55 know all too well. The good news is that a simple morning routine can change how your entire day feels. Morning bodyweight exercises hit a little differently for people over 55, but in a good way. As we age, we lose some natural lubrication in our joints, blood flow naturally slows down, and balance becomes more crucial for preventing falls. But with the right movements at the right time, you can warm up your body, boost your energy, and build the strength that keeps you independent. Here are three simple, reliable bodyweight tests I use for clients over 55—and exactly what each one tells you about your fitness level.
Why Morning Exercise Works Differently After 55

Joints are stiffer first thing in the morning. Light movement early in the day helps warm up our bodies, reduce stiffness and make the rest of the day feel a little bit easier.
It jumpstarts circulation and energy. Blood flow naturally slows down with age. A short morning routine wakes up the whole system—muscles, brain, and metabolism.
Better for balance and stability work. The nervous system is at its best about 30 to 45 minutes after waking up, so practicing balance, core activation, and controlled movements is safer and more effective this time of the day. This is crucial for fall prevention as we age.
It supports hormone balance. Regular movement provides the opportunity for cortisol to run its natural course to rise, lower, and then come into balance. There are several benefits of exercise on disease risk, and one contributor can be the reduction in the chronic elevated levels of cortisol.
It sets the tone for the day. Consistency is everything. Starting the day with bodyweight movement increases the chances of staying active, eating better and keeping momentum.
The Benefits You’ll Notice Right Away

You get rid of stiffness as the day begins. Joints and muscles tend to feel tighter with age. Moving early warms everything up, reduces aches and helps you feel looser for the rest of the day.
Energy levels are more stable. A short morning walk boosts circulation and wakes up your brain and body. That means better focus, more energy and less of the midday crash.
It supports balance and mobility. The nervous system is fresh in the morning, making it a great time to work on stability, core strength, and coordination. This is huge for preventing falls and injuries.
It builds consistency. Life gets busier as the day goes on. Morning workouts make it more likely to stick with your routine and hit your goals long-term.
Better recovery. Gentle strength and mobility work early in the day is easier on joints and connective tissue and helps keep inflammation down.
Sit to Stand (Chair Stand)
What it tests:
- Primary: Lower body (hip and knee) concentric strength—mostly quads and glutes
- Secondary: Hip mobility, core stability, balance, and functional fitness (standing from a chair = everyday movement)
- Also gives an idea of work capacity and how joints tolerate repeated loading
Step-by-Step (30-Second Test):
- Sit in a standard chair where your hips are level with your knees, feet hip-width apart, toes forward
- Cross your arms across your chest
- Stand fully upright to full hip extension, then sit back down with control
- Repeat as many times as possible for 30 seconds
- Keep a steady, safe tempo—no bouncing
- Stop if pain occurs or form is lost
Benchmarks (Practical Guidelines):
- Elite/Very strong for this age group: More than 16–18 stands in 30 seconds
- Strong/Functional: 12 to 16 stands in 30 seconds
- Needs improvement/at risk: Fewer than 12 stands in 30 seconds
(Keep in mind, these are coaching guidelines, not medical diagnoses.)
Avoid These Mistakes:
- Don’t use momentum or rock your trunk to rise up—use your leg strength instead
- Don’t push off with your hands—this hides your true leg strength
- Don’t do incomplete stands—make sure you reach full hip extension every time
- Don’t use a chair that’s too high or too low—this changes the difficulty drastically
- Don’t rush with a fast, uncontrolled tempo—this increases your fall and injury risk
How to Make It Easier or Harder:
- Easier: Use your arms to push, use a higher chair, or do single reps with a pause
- Harder: Use a lower chair, add a small weighted vest, hold a dumbbell at your chest, or perform single leg sit-to-stand reps
Tips: Keep your chest up, drive through your heels, squeeze your glutes at the top, and go slow and controlled on the way down.
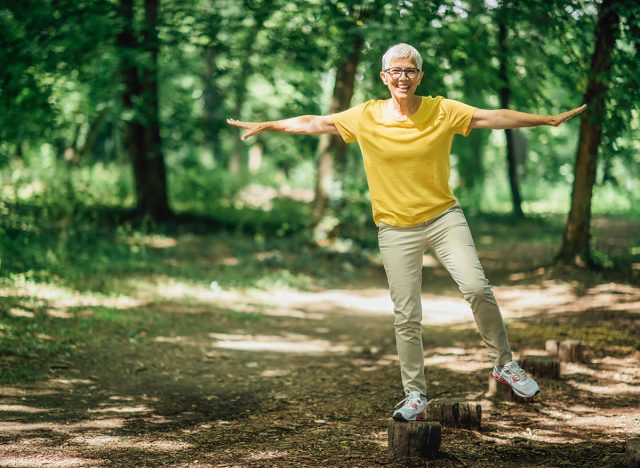
Single Leg Balance With Reach
What it tests:
- Single leg balance and proprioception (fall risk relevance)
- Posterior chain strength (glutes, hamstrings) when performed as a single leg hinge
- Hip mobility, ankle stability and coordination
- Stresses core anti-rotation and control
Step-by-Step (Balance Test Version):
- Stand by a chair or wall for safety if needed
- Shift your weight onto one foot
- Keep a soft knee on your standing leg
- Slowly hinge (bend) at your hips, reaching your opposite hand toward the floor or a cone in front while letting your free leg move straight back
- Keep your spine long and aim for a straight line from your head through your back leg, if mobility allows
- Return to upright without touching your free foot down—that’s one controlled rep
- For extra balance work, simply stand on one leg and time it
- Perform 6 to 8 controlled reps each side for strength testing and hold single leg balance for time duration
Benchmarks (Timed Balance and Controlled Reps):
Balance Hold:
- Elite: More than 45–60+ seconds single leg
- Strong: 20–45 seconds
- Needs improvement: Fewer than 15–20 seconds
Single-Leg Hinge Reps (Control + Depth):
- Elite: 8–12 clean reps each side with good hip hinge and little wobble
- Strong: 5–8 reps each side
- Needs improvement: Fewer than 5 reps or major loss of balance
(Again, use these as coaching benchmarks; medical conditions change norms.)
Avoid These Mistakes:
- Don’t let your standing hip drop—this indicates a weak glute medius
- Don’t bend your free leg’s knee or collapse your trunk—focus on hinging from your hips
- Don’t look down—this breaks your alignment and increases instability
- Don’t rush through your reps—maintain control on your return up
How to Make It Easier or Harder:
- Easier: Hold onto a stable support lightly, perform a supported single leg stand, or reduce your reach depth
- Harder: Increase your reach depth, slow your tempo (three-second hinge down, one-second up), or close your eyes for an extra challenge
Tip: Stand tall on one leg and reach with your hips—think hinge from the hips, not rounding the back. Keep your weight through the center of your foot and your eyes forward.
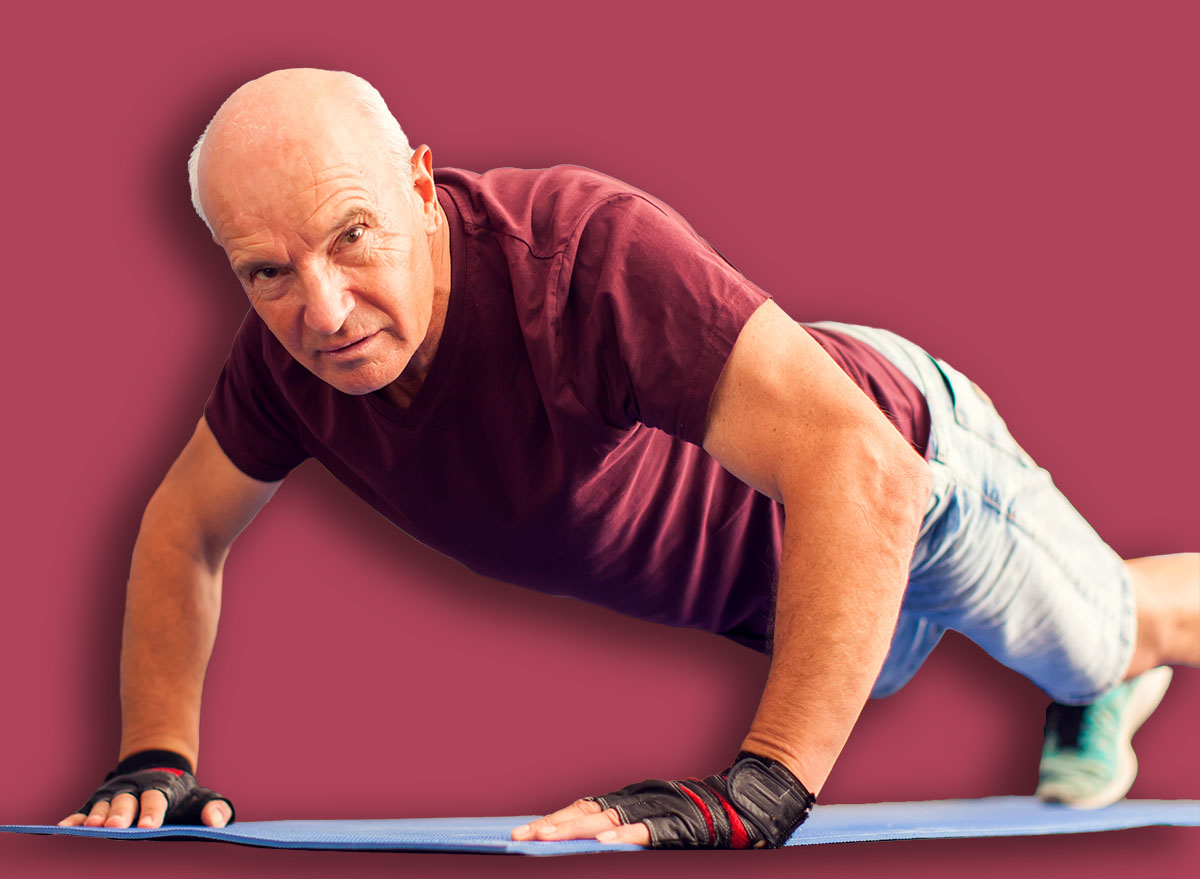
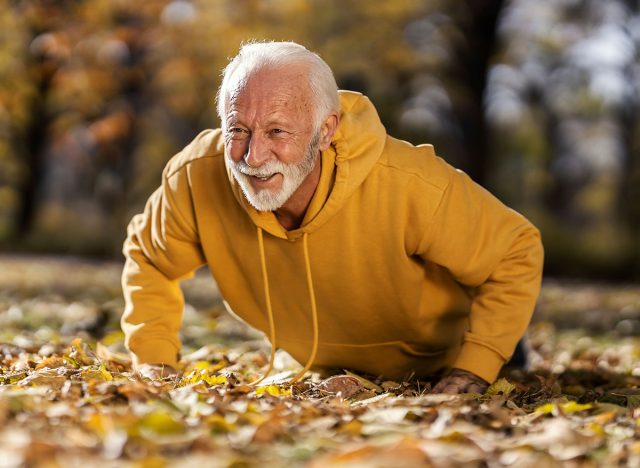
Push-Up (With Progressions)
What it tests:
- Upper body pushing strength (chest, anterior delt, triceps)
- Core and shoulder girdle stability—ability to hold a rigid plank while generating force
- Functional upper body capacity for daily tasks (pushing, getting up from the floor, carrying items)
Step-by-Step (Progression From Easiest to Hardest):
Wall Push-Up (Regression):
- Place your hands on a wall at chest height, feet back
- Lower your chest toward the wall, then push back
Incline Push-Up (Progression From Wall):
- Place your hands on a bench or table (45° angle)
Knee Push-Up:
- Place your hands shoulder-width apart, knees on the ground
- Keep your body in a straight line from knees to head
- Lower your chest to approximately fist distance from the floor, then press up
Full Push-Up:
- Keep your toes on the floor, body rigid
- Lower your chest to approximately 2 inches from the floor, then press up
Benchmarks (Reps With Good Form):
Full Push-Up (Standard):
- Elite: More than 20 full push-ups
- Strong: 10 to 20 full push-ups
- Needs improvement: Fewer than 15
(These are practical coaching tiers; many over 55 will start on inclines or knees and progress safely.)
Avoid These Mistakes:
- Don’t let your hips sag or hike up—this loses core tension and loads your lower back
- Don’t flare your elbows out wide (90°)—this stresses your shoulders; keep them at approximately 45° from your body
- Don’t cheat the range of motion—lower fully and lock out at the top
- Don’t jut your neck forward—keep a neutral spine
Tips: Keep a straight line from your head to your heels (or knees), draw your belly button toward your spine, lower with control, and keep your elbows at a comfortable angle.
Why These Three Exercises Work Together
Between them, you cover lower body strength and function (sit to stand), single leg balance and hip control (single leg reach), and upper body pushing and core control (push-up).
These bodyweight exercises can be done anywhere and map directly to daily tasks (standing up, walking on uneven ground, pushing doors/objects).
Together they flag weaknesses that increase fall risk, reduce independence, or limit exercise progress.
How to Build These Into Your Routine:
- Test yourself every 4 to 6 weeks to measure your progress
- Focus on quality over quantity: consistent, controlled reps beat sloppy, higher rep counts
- If you need improvement, start with the easier versions and do 2 to 3 short sets (e.g., 3 sets of 5 to 6 reps) 2–3 times per week, plus add short balance holds daily
- Always pay attention to pain; if you experience shoulder, knee, or back pain, switch to an easier version and consult a doctor as needed
How to Interpret Your Results
Look at the pattern, not just the number. Your scores show how well your body is performing in the three pillars of healthy aging:
- Strength (upper and lower body)
- Balance and stability
- Mobility and control
Most people over 55 are stronger in one category and weaker in another, so what matters most is seeing where you’re solid and where you need support.
What Elite, Strong, and Needs Improvement Really Mean
Elite:
If you landed in the top range, you’re performing above average for your age. This means:
- Your daily activities likely feel easier
- Your strength and balance are protecting you from falls or injuries
- You have strong muscular endurance and good movement quality
This is a level where people often feel younger than their age.
This does not mean you can stop training. It means you’ve built a solid foundation worth maintaining.
Strong:
If your score sits in the strong range, you’re doing very well compared to typical adults over 55. This means:
- Your functional strength is solid
- You’re moving with control
- Your risk of falls or mobility issues is lower
People on this train usually benefit from building consistency and slowly adding progressions.
Needs Improvement:
If you’re below the ideal range, you’re not failing—you’re simply identifying opportunities. Your results usually indicate one or more of the following:
- Lower body strength needs support (sit to stand)
- Balance or hip stability needs training (single leg work)
- Upper body and core strength need development (push-ups)
Most adults over 55 fall somewhere in this category at first, especially if they’ve been inactive, dealing with joint pain, or just haven’t trained consistently. These are the people who typically make the fastest progress once they start working on the right things.
What Your Performance Says Compared to Others Your Age
Here’s a simple translation:
- Above the strong range: You’re doing better than the majority of people your age
- In the strong range: You’re right on track with good functional fitness and aging well
- Below the strong range: You’re not alone, and you’re actually the person who benefits most from strength and mobility work. Progress is expected and normal
Nothing about these tests is about perfection—it’s about understanding where you are today and how to move forward safely.
If you can’t do these exercises, that tells you exactly where you should start. Modifications aren’t easy versions—they are the stepping stones that build strength safely and consistently. Most adults over 55 improve quickly once they train at the level that their body is ready.