The 10-Minute Morning Routine That Smooths Back Rolls Faster Than Gym Machines After 55
Back rolls cause a lot of self-consciousness — and as we get older, they become far more likely. I’ve worked as a personal trainer for over 35 years and have assessed other PTs training older clients for TRAINFITNESS, the UK’s leading fitness education company. One belief I run into constantly is that back rolls are almost inevitable after 55, and that once you have them, they’re impossible to shift. That’s simply not true. With a smart bodyweight exercise programme and sensible eating, it’s more than achievable to reduce them and eventually get rid of them completely. These six exercises can help you rebuild the strength and posture that make the difference — and you don’t need to leave your home to do it.
Why Back Rolls Get Stubborn After 55
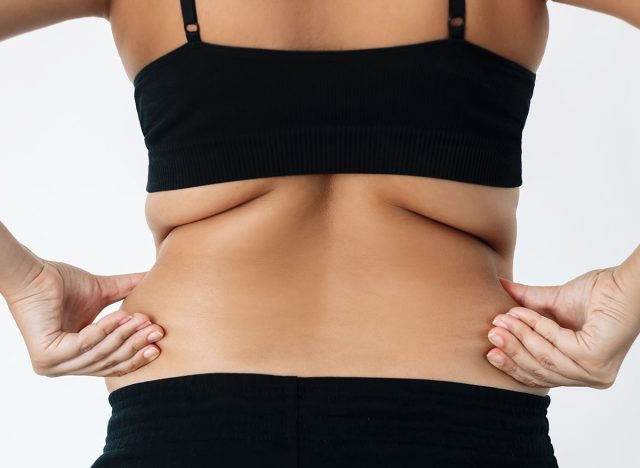
Back rolls aren’t just about gaining weight — although that can play a part. Three things happen at the same time that make this area particularly difficult.
The muscles in your upper back, including your rhomboids, middle trapezius and posterior deltoids, weaken with age. When this happens, your shoulders hunch forward and your upper back becomes increasingly curved. This results in skin and any fat in the region folding and bulging over into a roll.
You also lose between 3–8% of muscle mass each decade after 30, accelerating after 50. As you lose mass in your back, the muscles become less firm and sculpted. The fat doesn’t necessarily increase — but with less muscle beneath the skin, the same amount of fat appears more prominent.
Women, especially during and after menopause, experience a decrease in oestrogen levels that shifts fat distribution from the hips and thighs toward the abdomen and upper back. Men experience similar effects from declining testosterone. Both men and women become more likely to store fat around the midsection and upper body rather than the lower body.
The stubbornness comes from the fact that your back isn’t an area you naturally use much in daily life anymore. When you sit at a desk, drive a car, or scroll through your phone, you’re reinforcing that rounded-forward position for hours each day. Your back muscles get weaker, your posture gets worse, and the problem compounds itself.
You can’t spot-reduce fat from any single area — anyone who tells you otherwise is wrong. But you can absolutely rebuild the muscle, fix your posture, and create a smoother, stronger back.
Why Morning Training Works Better

I’ve been training at 6 am for over 25 years. Morning training isn’t magic — but it does have some real advantages, especially for people over 55.
Morning cortisol levels are naturally higher. Cortisol is often demonised as the “stress hormone,” but at optimal levels it aids fat loss, improves energy, and mobilises fat from storage. Training in the morning works in concert with your own body.
There’s also fasted or semi-fasted training to consider — and you don’t have to skip breakfast for this to apply. It simply means your body has had 8–10 hours without food. Fasted training has been shown to increase fat oxidation during exercise. You don’t burn more calories, but you train your body to use fat stores more efficiently.
The biggest advantage, though? Consistency. If you leave exercise until later in the day, life gets in the way. Work runs late, you’re tired, someone needs your help, or you simply can’t be bothered after a long day. When you train first thing, it’s done before your day even starts.
I’ve watched thousands of clients try both approaches. The ones who train in the morning stick with it. The ones who plan to train “later” usually don’t. Consistency beats perfection every single time.
That said, if mornings genuinely don’t work for you, training at any time is better than not training at all. The best time to exercise is whenever you’ll actually do it regularly.
Why Skip the Gym Machines
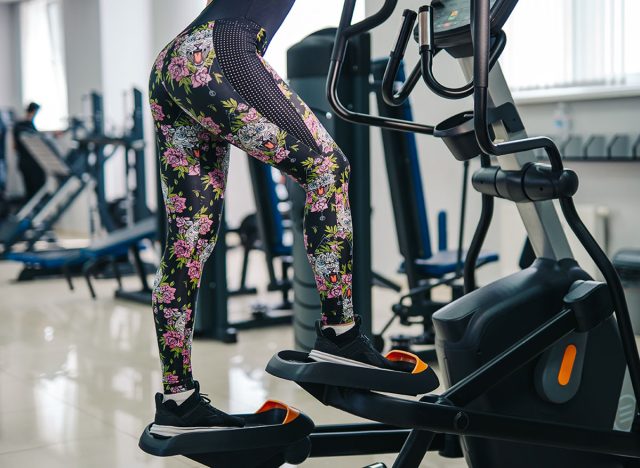
Machines aren’t useless, but they’re not the best tool for this job. Back rolls develop partly because of weak postural muscles, and these muscles need to work together to hold your body in the right position.
Gym machines isolate single muscle groups and lock you into fixed movement patterns. A lat pulldown machine works your lats, but it doesn’t teach your shoulder blades to move properly or your upper back to hold good posture.
Bodyweight exercises force your muscles to work as a system. When you do a wall angel or a prone Y raise, every stabilising muscle in your upper back has to fire. Your body learns to move the way it should in real life. You’re not just building strength in isolation — you’re teaching your nervous system to use that strength functionally.
Machines also require a gym. That means travel time, membership fees, and the effort of actually getting there. A 10-minute routine at home removes every single barrier. You can do it in your pyjamas if you want.
The one limitation of bodyweight work is progressive overload. Eventually you’ll need to make exercises harder to keep seeing results. With machines, you just add weight. With bodyweight, you need to change the angle, slow the tempo, or add variations. It’s doable — but it requires more thought.
Wall Angels
This opens up your chest, strengthens your upper back, and teaches your shoulder blades to move properly. Most people over 55 have shoulders that roll forward from years of sitting. Wall angels reverse that pattern.
Muscles Trained: Rhomboids, middle trapezius, posterior deltoids, rotator cuff
How to Do It:
- Stand with your back against a wall, feet about 10cm away from the base
- Press your lower back, upper back, and head against the wall
- Raise your arms into a “goal post” position with elbows bent at 90 degrees, backs of your hands against the wall if possible
- Slowly slide your arms up the wall, keeping contact the whole time
- Go as high as you can without your lower back losing contact with the wall or your ribs arching away
- Slide back down to the starting position — that’s one rep
Avoid These Mistakes:
- Don’t arch your lower back to get your arms higher — keep your ribs down and core engaged
- Don’t rush; take 3 seconds up, 3 seconds down
- Don’t worry if your hands can’t stay flat on the wall — go as close as you can
Modifications: If you can’t get your arms into the starting position without pain, place your hands at shoulder height and just focus on sliding them a few inches. If your lower back won’t stay flat, move your feet further from the wall. If shoulder issues make this painful, skip it and add an extra set of Prone Y Raises instead.
Recommended Sets and Reps: 2 sets of 10 reps.
Prone Y Raises
This targets the exact muscles that smooth out your upper back — the middle and lower trapezius. These are the muscles that pull your shoulder blades down and together, creating that toned look.
Muscles Trained: Middle trapezius, lower trapezius, rear deltoids
How to Do It:
- Lie face down on the floor or on your bed
- Extend your arms straight out in a Y position, hands wider than your head
- Turn your thumbs up toward the ceiling
- Squeeze your shoulder blades together and lift your arms off the ground, keeping them straight
- Hold for 2 seconds at the top
- Lower back down with control — that’s one rep
Avoid These Mistakes:
- Don’t lift your head and shoulders too high — 5–10cm off the ground is enough
- Keep your head neutral, looking at the floor
- Don’t bend your elbows to make it easier — keep your arms straight; if it’s too hard, narrow the Y by bringing your arms closer to your body
Modifications: If lying on the floor hurts your neck or hips, lie across your bed with your upper body hanging off the edge. If you can’t lift your arms at all, just squeeze your shoulder blades together without lifting. If that causes shoulder pain, place your hands by your sides instead of in a Y position.
Recommended Sets and Reps: 2 sets of 12 reps.
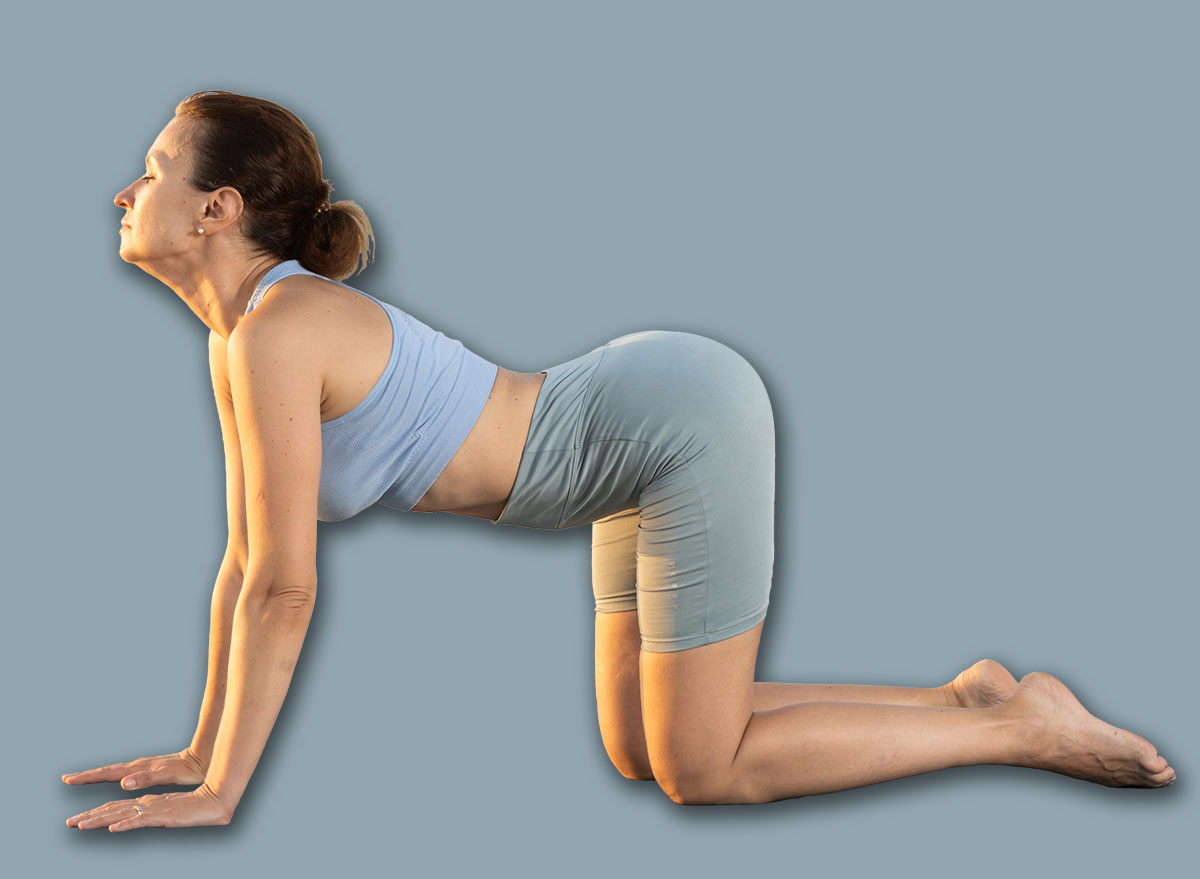
Cat-Cow Stretch
This mobilises your entire spine, improves flexibility in your upper back, and helps reduce the appearance of rolls by creating better spinal movement. Stiffness in your thoracic spine makes back fat look worse — this directly addresses that.
Muscles Trained: Erector spinae, multifidus, thoracic extensors
How to Do It:
- Start on your hands and knees — hands under shoulders, knees under hips
- Arch your back, dropping your belly toward the floor and lifting your head and tailbone up (cow position)
- Hold for 2 seconds
- Round your back, tucking your chin to your chest and pulling your belly button toward your spine (cat position)
- Hold for 2 seconds — that’s one round
Avoid These Mistakes:
- Don’t move too fast — take your time with each position
- Don’t limit your range of motion; really arch and really round — make it exaggerated
- Don’t shrug your shoulders up toward your ears; keep your shoulder blades down
Modifications: If your wrists hurt, make fists and put your knuckles on the ground instead of flat palms. If your knees hurt, place a folded towel under them. If you can’t get on the floor, do this standing with your hands on a kitchen counter — same spinal movement, just vertical instead of horizontal.
Recommended Sets and Reps: 10 slow rounds.
Reverse Snow Angels
This strengthens the muscles between your shoulder blades while also working your rear deltoids. It’s one of the best exercises for pulling your shoulders back and smoothing out upper back fat.
Muscles Trained: Rhomboids, middle trapezius, rear deltoids
How to Do It:
- Lie face down on the floor, arms by your sides, palms facing down
- Lift your arms slightly off the ground — just a few centimetres
- Keeping them straight and hovering, sweep them out to the sides and up toward your head in a snow angel motion
- When your arms are overhead, pause for 2 seconds
- Sweep them back down to your sides — that’s one rep
- Your arms stay off the ground the entire time
Avoid These Mistakes:
- Don’t touch the ground between reps — the constant hover is what makes this work
- Don’t lift your arms too high at the start, then struggle to maintain it; start small
- Don’t hold your breath — breathe normally throughout
Modifications: If you can’t keep your arms off the ground for the full movement, break it into two parts: sweep out to the sides and lower, rest, then sweep overhead and lower. If shoulder pain is an issue, reduce the range of motion and only sweep halfway up. If lying flat doesn’t work, do this standing facing a wall with your arms moving up and down the surface.
Recommended Sets and Reps: 2 sets of 10 reps.
Thread the Needle
This adds rotation to your thoracic spine and stretches the muscles along your upper back. Rotation helps smooth everything out and improves how you move in daily life.
Muscles Trained: Thoracic rotators, rhomboids, rear deltoids
How to Do It:
- Start on your hands and knees
- Take your right hand and reach it under your left arm, threading it through the gap
- Your right shoulder and head will lower toward the ground as you rotate through your spine
- Go as far as is comfortable
- Hold for 5 seconds, then return to the starting position — that’s one rep
- Complete 5 reps on the right side, then switch to the left
Avoid These Mistakes:
- Don’t just reach with your arm — the movement should come from your mid-back twisting; really emphasise the rotation
- Don’t force this stretch; if you feel pinching or sharp pain, back off — it should feel like a comfortable stretch
Modifications: If this bothers your wrists or knees, do it standing. Place your left hand on a wall at shoulder height, then thread your right arm under your left arm and reach toward the wall behind you, rotating through your spine. If rotation causes back pain, skip this entirely and add an extra set of Wall Angels instead.
Recommended Sets and Reps: 5 reps per side.
Superman Holds
This strengthens your entire posterior chain — lower back, glutes, upper back, and shoulders. It’s the finishing move that ties everything together and builds endurance in all the muscles that keep your posture strong.
Muscles Trained: Erector spinae, glutes, lower trapezius, rear deltoids
How to Do It:
- Lie face down on the floor, arms extended straight overhead
- Simultaneously lift your arms, chest, and legs off the ground
- Hold this position for 10 seconds — you should look like Superman flying
- Lower everything back down and rest for 10 seconds — that’s one set
Avoid These Mistakes:
- Don’t lift too high and compress your lower back — a small lift with a strong squeeze is all you need
- Don’t hold your breath
- Don’t jerk up into position — lift smoothly and with control
Modifications: If the full Superman bothers your lower back, lift just your upper body and keep your legs on the ground. If even that’s uncomfortable, just lift your arms. If lifting overhead causes shoulder pain, place your hands behind your lower back and lift only your chest. The movement matters more than the arm position.
Recommended Sets and Reps: 3 sets of 10-second holds.
How to Progress When It Gets Easy

The first progression is adding time under tension. Instead of holding positions for 2 seconds, hold for 5. Slow down each wall angel so the rep takes 8–10 seconds. This makes your muscles work harder without changing anything else.
The second progression is adding reps. If you’re doing 2 sets of 10, move to 2 sets of 15, then 2 sets of 20. Your muscles adapt to volume, so more reps create more stimulus.
The third progression is changing angles. For prone Y raises, lie on an incline with your upper body elevated on pillows or the edge of your bed. For wall angels, move your feet closer to the wall — harder to maintain proper position.
Adding light resistance comes next. Hold a small tin of beans in each hand for prone Y raises or reverse snow angels. Even 400g makes a difference. You don’t need dumbbells.
The final progression is more challenging variations. Wall angels become standing Y raises with bands. Prone Y raises become bent-over Y raises. Thread the needle becomes thoracic rotations with a resistance band.
Only progress when the current routine feels genuinely easy for at least a week. If you’re still feeling muscle fatigue or your form breaks down toward the end of any exercise, stay where you are.
Most people over 55 should focus on time under tension and reps before adding any resistance. Building endurance in these postural muscles matters more than maximal strength.
What to Expect in 4 to 8 Weeks

In the first two weeks, you won’t see visual changes yet — but you’ll feel different. Your upper back will feel less tight. You’ll notice you’re not slouching as much when you sit. Getting out of bed or out of a chair will feel easier because your posture is already starting to improve.
At four weeks, the first visible changes arrive. The area around your shoulder blades will look more defined. Your upper back will sit flatter when you stand sideways to a mirror. The rolls won’t be gone, but they’ll be noticeably smoother. Your shoulders will look broader because they’re no longer rounding forward.
At eight weeks, other people will start commenting. Your posture will be obviously better. Your clothes will fit differently across your upper back and shoulders. The combination of stronger muscles, improved posture, and the slight fat loss that comes from consistent movement will create real visible change.
Daily Habits That Speed Up Results

The habits that accelerate results are straightforward. First, nutrition matters. You can’t out-exercise a poor diet. Focus on protein — aim for roughly 1.2–1.6g per kilogram of body weight daily — eat plenty of vegetables, and don’t go overboard on processed foods. You don’t need a perfect diet, just a reasonable one.
Second, your daily movement outside this routine matters. Take walks. Move regularly throughout your day. Every hour you spend sitting in a rounded position works against what you’re building in your morning routine.
Third, sleep matters more than most people realise. When you sleep, your muscles recover and adapt. Aim for 7–8 hours. If you’re only getting 5–6, your results will be slower.
Fourth, your water intake affects how your skin looks. Dehydrated skin emphasises every lump and roll. Drink roughly 2 litres a day, more if you’re active or it’s hot.
Fifth, stress levels affect cortisol, which affects where your body stores fat. Chronic stress makes everything harder. Find ways to manage it — walking, reading, whatever works for you.
None of these habits needs to be perfect. Small improvements across all of them add up faster than perfection in one area.
When to Check With Your Doctor First

For the vast majority of healthy people over 55, this routine is safe. It’s low-impact, bodyweight-based, and designed specifically for this age group. But there are a few situations where it’s worth checking with your GP before starting.
Talk to your doctor or physio first if you have any existing shoulder injuries or conditions — rotator cuff tears, frozen shoulder, or shoulder impingement. These exercises shouldn’t make those problems worse, but it’s better to confirm.
Get clearance first if you have diagnosed osteoporosis or severe osteopenia, especially in your spine. The spinal extension and flexion movements here are generally safe, but your doctor might want to suggest modifications.
Don’t start without medical advice if you have spinal stenosis, herniated discs, or chronic back pain that radiates down your legs. Some of these movements involve spinal extension, which can aggravate certain conditions.
If you’ve had recent surgery — within the last six months — on your shoulders, spine, or anywhere in your upper body, wait until your surgeon or physio clears you for exercise.
If you have uncontrolled high blood pressure or cardiovascular issues, check with your doctor. These exercises aren’t high-intensity, but any new exercise programme is worth discussing if you have heart-related conditions.
And if you experience sharp pain, dizziness, chest pain, or severe breathlessness during any of these exercises, stop immediately and see your doctor. Mild muscle fatigue is normal. Pain is not.
- Source: https://www.health.harvard.edu/exercise-and-fitness-1/age-and-muscle-loss-YAQZ7EMP
- Source: https://pubmed.ncbi.nlm.nih.gov/10702775/
- Source: https://academic.oup.com/jcem/article/107/5/e1954/6501484
- Source: https://www.gssiweb.org/en/sports-science-exchange/Article/regulation-of-fat-metabolism-during-exercise