The Simple Ball Drill That Trains Your Brain to Prevent Falls After 60


If your goal is better balance after 60, I wouldn’t tell you just to walk more. I’d tell you to spend a few minutes on an exercise ball instead. That might sound surprising, but here’s why.
Balance isn’t just about bigger muscles. Balance is about training your nervous system.
You may think balance is something you either have or you don’t, or that it comes from having stronger or bigger legs. Strength matters, but your muscles only do what your brain tells them to do. Your nervous system is the conductor of the whole orchestra. Every second you’re standing, your brain is collecting information from your eyes, your inner ear, your feet, your joints, your muscles, and even your fascia. Then, in fractions of a second, it decides which muscles need to turn on, which ones need to relax, and how much force is needed to keep your body upright. That’s balance. It’s not just the strength of the muscle; it’s the communication of the whole system.
Why Walking Isn’t Enough
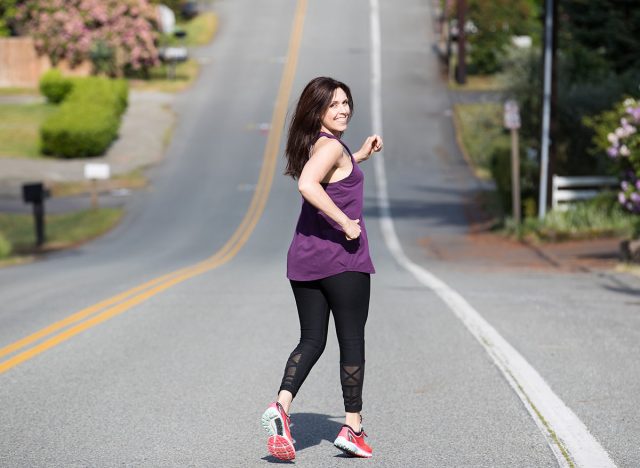
Walking is one of the healthiest things you can do, and I encourage almost everyone to walk. But walking is also predictable. Your body moves forward one step after another, and after a while you go on autopilot.
An exercise ball is completely different. Every second you’re on it, your body is making hundreds of tiny adjustments. The ball never gives your nervous system the exact same challenge twice, and that constant problem-solving is what keeps the nervous system sharp.
Train the Nervous System First

One thing I learned years ago through the Czech Institute is that exercise should challenge the nervous system before it challenges the muscles. The most neurologically demanding exercises should usually come first, while the brain is still fresh, because balance, coordination, timing, and movement quality all begin in the nervous system. If the nervous system gets fatigued, those skills decline long before your muscles are actually tired. Training on an exercise ball isn’t just exercise, it’s teaching your nervous system to become more efficient.
When Muscles Forget How to Fire

Another fascinating concept is sensory motor amnesia. It sounds complicated, but the idea is simple: after pain, surgery, or long periods of inactivity, the brain can essentially forget how to properly recruit certain muscles or muscle groups. The muscles aren’t necessarily weak, they’re just not communicating well with the brain anymore. Think of it like calling someone when the phone signal keeps cutting out. The message never gets through clearly.
The constantly changing environment of an exercise ball encourages your brain to reconnect with smaller stabilizing muscles that may have gone underused for years.
Two Kinds of Balance You Use Every Day
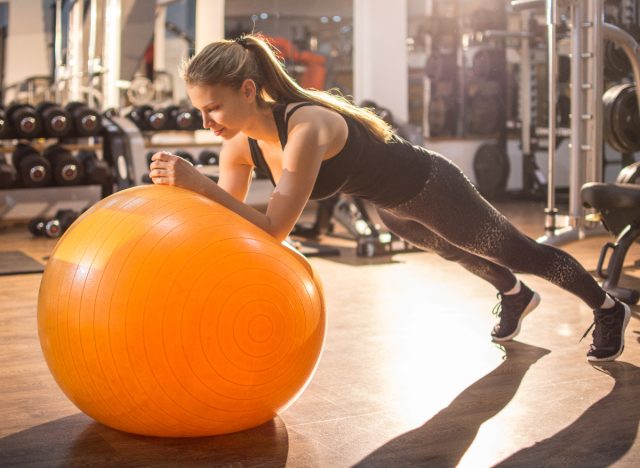
The ball also challenges two types of balance you use every day. Righting reflexes are automatic reactions that keep you upright when you’re in motion and the ground beneath you is stable, like stepping off a curb and catching yourself, tripping over your own feet, or getting bumped from behind.
Tilting, or equilibrium, reflexes keep you balanced when the surface beneath you becomes unstable or your center of gravity shifts, like stepping on ice or standing on a moving bus or airplane.
Get Ready to Move
Instead of teaching your body one fixed pattern, a Swiss ball introduces constant variability. It teaches adaptability, so your nervous system learns to respond instead of simply repeating old habits. That’s valuable whether you’re recovering from pain or just trying to move better as you age.
Before I start many of my balance sessions, I like to wake up the body’s sensory system first. I’ll often use a simple self-massage technique to stimulate the feet and improve awareness before we even touch the ball. It’s a small addition, but it dramatically improves the quality of the balance training that follows.
Walking is one of the healthiest activities you can do, so please keep walking. But if your goal is to improve balance, don’t stop there. Your nervous system needs variety, unpredictability, and opportunities to solve new movement problems, and that’s exactly what an exercise ball provides. Below are four of my favorite exercise ball drills that challenge every aspect of your nervous system and help you build balance you actually use in everyday life. The goal isn’t to get better at sitting on an exercise ball. The goal is to build a nervous system that automatically keeps you upright when life throws something unexpected your way.
Seated March
Our first exercise in the series is the seated march. Before you start marching, there’s one principle to nail down: your gravity line. That’s your ear, shoulder, and hip stacked in one line. As you start moving, the ball is going to shift and you’re probably going to lose it. The goal is to keep coming back to that gravity line.
How to Do It:
- Start with an isometric hold. Lift one leg and hold it anywhere from 10 to 30 seconds.
- Bring that leg down with control, keeping your gravity line, then lift the other leg and hold for 10 to 30 seconds.
- Work back and forth between legs for a total of 90 seconds to 3 minutes.
- Once you’ve mastered the isometric holds, move into the march: lift and lower your legs continuously, then start integrating your arms into the motion.
- Stabilize the ball with your core the whole time, and work back and forth between the isometric version and the dynamic version.
Avoid These Mistakes:
- Don’t chase the ball’s movement. When you lose your gravity line, reset your ear, shoulder, and hip stack instead of fighting the wobble.
Sets and Reps: 90 seconds to 3 minutes, 1 to 3 rounds.
Form Tip: Keep your ear, shoulder, and hip stacked in one line throughout, and reset that line whenever the ball throws you off it.
Two-Point Prone Balance
This one is just like it sounds. You go prone on the ball, on your belly, and you’ll work down from four points of contact to two by lifting your opposite arm and opposite leg. One side is going to feel more stable than the other, and that’s the point. The goal is to build balance between the right and left hemispheres of your brain and the right and left sides of your body.
How to Do It:
- Start prone on the ball with four points of contact: both hands and both feet down.
- Lift the opposite arm and opposite leg, just a little off the ground to start.
- As you get more comfortable, bring your lifted arm and leg all the way up.
- Tuck your pelvis into the ball slightly so you’re not crunching or compressing your lower back.
- Keep your lifted arm lengthened with your fingers spread, and spread the toes on your back foot.
- Hold anywhere from 30 to 90 seconds, then bring it down with control and switch sides.
Avoid These Mistakes:
- Don’t crunch or compress your lower back. Tuck your pelvis into the ball instead.
- Don’t skip your weaker side. Notice which side is less stable and give it equal work, since that imbalance is exactly what this drill is meant to fix.
Sets and Reps: 3 to 5 minutes per side, broken into 30, 60, or 90 second holds.
Form Tip: Keep your lifted arm lengthened with your fingers spread, and spread the toes on your grounded foot.
Swiss Ball Twister
This is one of the more challenging exercises in the series, but it’s very good for your equilibrium reflexes. Once you get comfortable going slow, it becomes a dynamic, reactive exercise where you have to respond to the speed of the ball as you move.
How to Do It:
- Start on the ball with four points of contact: both hands and both feet down.
- Step your left leg under your right leg, pick up your right arm, and twist and rotate onto your back.
- Continue the rotation: step your right leg under your left leg and roll onto your belly. That’s one repetition.
- Repeat in the opposite direction, stepping your right leg under first, then your left, controlling the roll each time.
- Practice slow and controlled until you’re comfortable, then start picking up speed.
Avoid These Mistakes:
- Don’t rush the speed before you’re ready. Go too fast before you’ve built control, and you can guess what happens.
- Don’t skip the controlled reps. Stay slow and controlled until the movement feels comfortable, then add speed.
Sets and Reps: 90 seconds to 3 minutes, rolling back and forth continuously.
Kneeling Balance
The final exercise in the series is kneeling on the Swiss ball. If you’re a beginner, have someone stand beside the ball to help stabilize it, or set the ball in a corner of the room so you can put your hands on the wall for support.
How to Do It:
- Start with two points of contact: both hands on the ball.
- Put one shin on the ball, then bring your other shin up with control.
- Once you feel steady with both shins on the ball, slowly bring yourself up nice and tall.
- If you need more of a challenge, add a dribbling basketball, juggling, or tossing a tennis ball while you balance.
Avoid These Mistakes:
- Don’t skip the wall or a spotter as a beginner. Use one until you have real control on the ball.
- Don’t rush standing up tall. Get steady on both shins first, then rise slowly.
Sets and Reps: 90 seconds to 3 minutes.
Bonus: Great Toe Mobilization
This week’s bonus technique is mobilization of the great toe, and it’s one of the most important features of balance and gait. Underneath the big toe are two small sesamoid bones embedded in the tendon, similar to how your kneecap sits in the tendon at your knee. When you walk and push off into what’s called the toe-off phase, your big toe extends and those sesamoid bones get pulled forward. That’s what creates a ramp to push off of, called the windlass mechanism. For that to work well, you need good mobility, especially extension, in your big toe.
How to Do It:
- Grab the very top of your big toe with one hand.
- Grab the base of your first metatarsal head with your other hand, at about the middle of that second knuckle.
- Treat your metatarsal hand as a fixed point that stabilizes the joint.
- With your other hand, gently pull long and turn the toe in, then relax.
- Hold again, pull, and turn the toe the other way, then relax.
- Repeat from the bottom of the foot using the same stabilize, mobilize, and pull pattern.
Form Tip: Keep one hand as a fixed, stabilizing point and the other as the mobile point doing the pulling and turning. Done smoothly, it should look like a steady, rhythmic pull and twist.