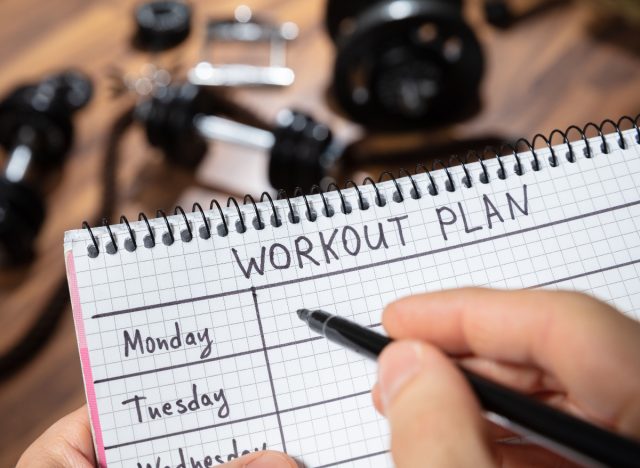
5 Exercises You Can Do in Your Bedroom That Restore Full-Body Strength After 60

I’ve been a personal trainer for over 30 years, and for the past 25 of those I’ve been training PTs at TRAINFITNESS. If there’s one thing I hear constantly from people over 60, it’s that they want to get stronger but don’t know where to start. The gym feels intimidating, classes move too fast, and most exercise content online isn’t made with them in mind.
What I’ve found, working with thousands of older adults over the years, is that the best place to start is often the room you wake up in every morning. These five bedroom exercises require no equipment, no commute, and no gym membership. They target the muscles and movement patterns that matter most as we age — the ones that keep you getting up from chairs easily, climbing stairs without dread, and moving through your day without pain or hesitation. Done consistently, three times a week, they work. I’ve seen it hundreds of times.
Why Starting Is the Hardest Part

The No. 1 obstacle I see, after 30-plus years of working with people in this age group, is simply putting it off too long. You’ve been losing muscle slowly for years, adjusting your behaviour to compensate for it without even realising it. Then something bad happens — a fall, a diagnosis, a scary moment when you can’t do something you used to find simple — and suddenly the work in front of you seems overwhelming. It doesn’t have to be. But that mindset stops a lot of people from ever beginning.
In terms of the physical act of exercise itself, muscle loss is the top issue. We lose muscle tissue after age 60 faster than at any other stage of adult life. We lose power — the speed and force with which we can move — even faster. This impacts everything from getting out of a chair to catching yourself when you trip. It’s not just a question of strength in a weightlifter’s sense. It’s about functional capacity. The ability to live life independently.
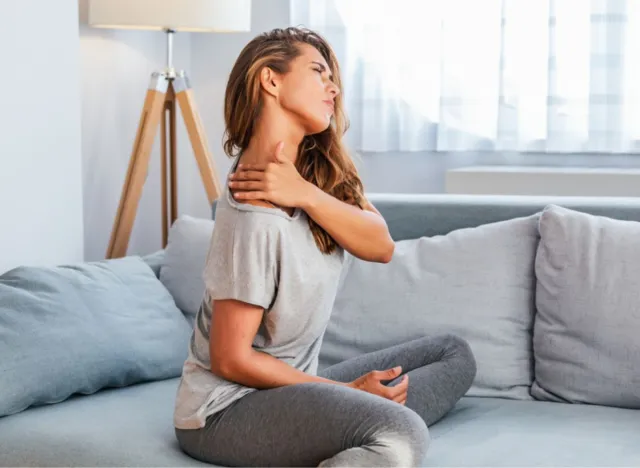
Pain and past injuries play a big role as well. A lot of people over 60 have knee pain, hip replacements, back problems, or shoulder injuries accumulated over the decades. These aren’t reasons to not exercise. They’re reasons to be thoughtful about your exercise. But they do cause hesitation, and that hesitation turns into extended periods of inactivity — which makes everything worse.
Confidence is an underrated issue. People feel unsteady on their feet. They’re afraid of falling. They feel like exercise is for younger, more fit people. That lack of confidence has a direct impact on their movement. They move more cautiously, they move less, and their bodies decondition faster as a result. It’s a cycle that’s hard to break without a few early wins to build on.
Why the Bedroom Works

The most effective exercise programme is the one you actually do. It sounds obvious, but it’s the single most important factor in any training context. If getting to a gym is complicated, if class times don’t suit you, if transport is an issue, or if leaving the house feels like an event, that friction will eventually win. Bedroom-based exercise removes nearly all of it.
You wake up. The training environment is right there. No commute, no kit bag, no waiting for equipment. That kind of accessibility matters enormously when you’re trying to build a new habit, especially in the early weeks when motivation is still fragile.
Low-impact exercise is great for those over 60 because it decreases the stress on joints while maintaining it on the muscles. Running, jumping, and other high-impact exercises involve placing repeated force on joints such as the knees, hips, and ankles — all of which may already be dealing with some level of degeneration. Low-impact exercise allows us to load our muscles sufficiently without placing this additional stress on joints. We can still work hard but protect the joints that we need.
There are a few other reasons exercising in the bedroom works well. A bed or chair is always available for support and modification. The floor is readily accessible for any mat-based exercise. No special equipment is needed for a great workout. For those starting from a very low level, bodyweight exercise done regularly is more than enough to achieve meaningful improvements in strength, stability, and mobility. And exercising in private removes any inhibition some people have about training in a public place. People are more likely to attempt new movements, work at their own pace, and rest when needed. This in itself results in better workouts, especially in the early stages.
Chair-Assisted Squat
The squat is the most functional movement pattern we have. Every time you get up from a chair, get out of a car, or lower yourself onto the toilet, you’re performing a version of a squat. Strengthening this pattern directly improves your ability to live independently. It targets the quadriceps, glutes, and hamstrings — the muscles most responsible for mobility and fall prevention — and training it with a chair behind you removes the fear of falling backwards, which is what stops most people from squatting properly.
Muscles Trained: Quadriceps, glutes, hamstrings
How to Do It:
- Place a sturdy chair behind you
- Stand in front of it with your feet roughly hip-width apart, toes pointing slightly outward
- Keep your chest up and your weight through your heels
- Slowly push your hips back and bend your knees, lowering yourself as if you’re going to sit down
- Go as low as you comfortably can — ideally until you just touch the seat
- Press through your heels and stand back up
If getting up and down is difficult, start by just standing up from a seated position and sitting back down with control. That is the exercise. Use your arms as little as possible. As you get stronger, the chair becomes a safety net rather than a starting point, and you’ll find yourself going lower with more confidence over time.
Avoid These Mistakes:
- Don’t let your knees cave inward — keep them tracking over your toes throughout
- Don’t lean too far forward, which shifts load onto the lower back; keep your chest up and the movement will feel much more controlled
- Don’t rush — a slow, controlled descent is far more productive than a fast one
Recommended Sets and Reps: 2–3 sets of 10–15 reps
Form Tip: The descent should be slow and deliberate. Speed is not your friend here.
Glute Bridge
The glutes are the largest muscle group in the body, and in most people over 60 they are significantly underworked. Weak glutes directly affect posture, lower back pain, knee stability, and the ability to climb stairs or stand up from low surfaces. The glute bridge is done lying on your back, which makes it accessible even for people with balance issues or joint pain. It’s one of the safest and most effective exercises for this age group.
Muscles Trained: Glutes, hamstrings, lower back
How to Do It:
- Lie on your back with your knees bent and your feet flat on the floor, hip-width apart, roughly a foot from your backside
- Press your feet into the floor and squeeze your glutes as you lift your hips up towards the ceiling
- Hold at the top for two seconds — your body should form a straight line from your shoulders to your knees
- Lower slowly back down
If getting down onto the floor is difficult, this can be done on a bed. The softer surface reduces the range of motion slightly, but the muscle activation is still there. If your lower back aches during the movement, focus on squeezing the glutes more deliberately before you lift. This tends to correct the pattern and reduce back strain.
Avoid These Mistakes:
- Don’t push the hips up using your lower back — drive through your glutes; if you feel it mainly in your lower back, slow down and focus on the squeeze before you lift
- Don’t let the hips drop unevenly — both sides should rise and fall together
Recommended Sets and Reps: 2–3 sets of 12–15 reps
Form Tip: Squeeze the glutes before you lift. That one cue fixes most problems with this exercise.
Wall Push-Up
Upper body strength is often neglected in older adults, but it matters more than people think. The ability to push yourself up from a low surface, carry shopping, or push yourself out of a chair all depends on it. The wall push-up builds strength in the chest, shoulders, and triceps with zero floor work and very little joint stress. It’s a proper strength exercise, not a throwaway beginner movement, and it can be progressed as you get stronger.
Muscles Trained: Chest, shoulders, triceps
How to Do It:
- Stand facing a wall, roughly an arm’s length away
- Place your palms flat on the wall at shoulder height, slightly wider than shoulder-width apart
- Keep your body in a straight line from head to heel
- Slowly bend your elbows and bring your chest towards the wall
- Pause just before you touch, then push back to the start
- Keep your core lightly braced throughout
The closer you stand to the wall, the easier it is. Moving your feet further back increases the load. Start with your feet close and progress gradually. If shoulder pain is an issue, try bringing your hands slightly closer together or lowering them a little. Small adjustments in hand position can make a notable difference to how the shoulder feels.
Avoid These Mistakes:
- Don’t let your hips drop or stick out — the whole body should move as one unit
- Don’t flare your elbows wide, which puts unnecessary stress on the shoulder joint; keep them at roughly a 45-degree angle from your body
Recommended Sets and Reps: 2–3 sets of 10–15 reps
Form Tip: Think of it as a moving plank. If your hips are sagging, the exercise has broken down.
Standing Calf Raise
The calves are sometimes called the body’s second heart, and not without reason. They play a major role in pumping blood back up from the lower limbs, and strong calves also directly support ankle stability, balance, and walking efficiency. Calf weakness is one of the less obvious contributors to poor balance in older adults. This exercise requires no equipment, minimal space, and is low-risk for almost everyone.
Muscles Trained: Calves (gastrocnemius and soleus), ankles
How to Do It:
- Stand behind a chair and hold the backrest lightly for balance — use it for support, not to push yourself up
- With feet hip-width apart, slowly rise up onto the balls of your feet as high as you comfortably can
- Hold for a second at the top
- Lower slowly back down — the lowering phase is just as important as the rise
If you have achilles or ankle issues, reduce the range of motion and work through what’s comfortable. You don’t need to go all the way up on day one. For those who find both legs too easy after a few weeks, try doing one leg at a time. It’s a notable step up in difficulty and will challenge your balance at the same time.
Avoid These Mistakes:
- Don’t rush — fast, bouncy reps remove the muscle from the equation and put strain on the tendon instead; slow and controlled is the way
- Don’t lean heavily into the chair; think of it as a light guide rather than a crutch
Recommended Sets and Reps: 2–3 sets of 15–20 reps
Form Tip: The lowering phase is where most of the muscle work happens. Don’t skip it.
Seated Overhead Reach
Shoulder mobility and upper back strength decline noticeably with age, and both have a direct impact on posture, the ability to reach overhead, and the chronic neck and shoulder tension that many people over 60 experience. This exercise targets the shoulders, upper back, and the muscles that draw the shoulder blades together — areas that are almost universally weak in people who spend long periods seated. Done seated, it’s accessible for people with balance concerns while still delivering a real training stimulus.
Muscles Trained: Shoulders, upper back, shoulder blade stabilisers
How to Do It:
- Sit upright on the edge of a chair with your feet flat on the floor
- Start with your arms bent, elbows at shoulder height and palms facing forward — like a goalpost position
- Slowly press both arms straight up overhead, bringing them close to your ears at the top if you can
- Hold briefly, then lower back to the goalpost position with control
No weights needed to begin with. The movement itself is the work.
If full overhead range is restricted or painful, go as high as is comfortable — that range will improve over time. If one shoulder is more restricted than the other, work within the comfortable range for that side. There’s no benefit in pushing through pain. For those who find this straightforward after a couple of weeks, a light tin of food in each hand is enough to add resistance.
Avoid These Mistakes:
- Don’t arch your lower back to get the arms higher; keep your core lightly braced and your lower back in a neutral position throughout — if your back arches, reduce the range until your shoulder mobility improves
- Don’t hold your breath; breathe out as you press up, breathe in as you lower
Recommended Sets and Reps: 2–3 sets of 12–15 reps
Form Tip: If your lower back arches before your arms reach the top, that’s your current range. Work to that point and no further.
How to Structure Your Week
Three days a week is the right starting point for most people. Not because more would be harmful, but because three sessions gives your muscles enough stimulus to adapt while leaving adequate time for recovery. That recovery is where the actual change happens. The session is just the trigger.
A good structure would be Monday, Wednesday, and Friday, or any three days with at least one day of rest between each. Each session should take between 20 and 30 minutes, including a few minutes of gentle movement to warm up — marching on the spot, arm circles, gentle hip rotations — before you start.
For each exercise, aim for two to three sets of the recommended repetitions with about 60 seconds of rest between sets. In the first week, two sets of each is plenty. Add a third set in week two or three as your body adapts. By week four, you can start thinking about progressing individual exercises — going slightly lower on the squat, slowing down the glute bridge, or adding light resistance to the overhead reach.
On the days between sessions, light activity is beneficial. A 20 to 30 minute walk is ideal. It supports circulation, aids recovery, and adds to overall fitness without putting additional strain on muscles that are adapting to the new training load.
After six weeks, if three sessions feels manageable and you’re recovering well, you can consider adding a fourth day. But three done consistently is far more effective than four done sporadically. Consistency over frequency, every time.
Safety Tips to Know Before You Start
If you have any existing heart conditions, have recently had surgery, or are managing a health condition that affects your ability to exercise, speak to your GP before you start. That’s not a disclaimer. It’s genuinely good advice. A quick conversation can either confirm that you’re fine to go, or help you understand if there are any specific movements to avoid.
Pain is the most important signal to pay attention to. There’s a difference between the discomfort of muscles working hard — which is normal — and joint pain, which is not. If you feel sharp pain in a joint during any of these exercises, stop. Adjust the movement, reduce the range, or swap to the modified version. If the pain persists, get it assessed before continuing.
Dizziness or shortness of breath that seems disproportionate to the effort involved is a signal to rest and, if it doesn’t pass quickly, seek medical advice. Some breathlessness during exercise is normal. Struggling to catch your breath for several minutes after a gentle set of wall push-ups is not.
Balance is a genuine consideration for this age group. Always have something stable within reach when doing standing exercises. The chair is there for a reason. Use it. If you feel unsteady at any point, stop, steady yourself, and rest before continuing.
And start lighter than you think you need to. The first week should feel manageable. If you’re significantly sore for more than two days after a session, you’ve done too much too soon. Dial back the volume and build up gradually. The goal in the early weeks is consistency, not intensity.
What to Expect in 4 to 6 Weeks

The first thing you’ll be aware of — probably after the first week or two — is that you generally feel a bit more alert. Not massively so, but a bit. It takes a bit less time to get rid of the morning stiffness. It’s a bit easier to potter around the house. This is because your brain is adapting to the new things you are asking of it. It’s getting better at turning your muscles on.
From about weeks 3 and 4, you’ll start to notice functional improvements. It’s a bit easier to get up out of a chair. The stairs feel a bit easier. You’ll catch yourself not reaching for the handrail. These aren’t huge changes. Just little improvements in the way you move — which is exactly what we want.
From about weeks 4 to 6, other people will start to notice. It won’t be how you look (although you’ll stand a bit straighter and your posture will be a bit better) — it’ll be how you seem. A bit livelier. Moving a bit better. A bit more confident. People notice how you carry yourself before they notice much else.
After 6 weeks, you won’t have developed much muscle mass. That takes a bit longer. But you will have made significant improvements to your nervous system. Your muscles will fire a bit better. Your coordination will be better. You will be measurably stronger in these movement patterns than you were at the beginning. You’ll have a foundation.
So start paying attention to your everyday life. To how you feel outside of your sessions. Are you getting less tired throughout the day? Are you getting around the house a bit easier? Are things you found difficult starting to feel normal? These are the things to pay attention to at the 6-week mark. If you’ve noticed them, you’re doing great.