If You Can Hold a Bridge This Long After 60, Your Core Strength Is Top-Tier
I’ve been a personal trainer for over 35 years and now educate the next generation of trainers through TRAINFITNESS. In that time, I’ve assessed thousands of older adults, and if there’s one test that consistently reveals how well someone is aging physically, it’s the bridge hold. Most people think core strength is about visible abs or hundreds of crunches, but after 60, core strength becomes about something much more fundamental — your ability to move through daily life without pain, injury, or loss of independence. Here’s how to test yours, what your hold time actually means, and how to improve it fast.
Why Core Strength Changes After 60

Core strength after 60 isn’t about aesthetics or athletic performance. It’s about function, stability, and maintaining independence. Your core is the foundation for almost every movement you make: getting out of a chair, bending to pick something up, walking without shuffling, even just standing upright without back pain.
After 60, we start losing muscle mass through a process called sarcopenia. This affects the core muscles just as much as it affects your legs or arms, but the consequences are different. Weak legs might make stairs harder. Weak core muscles affect your entire body’s ability to function properly.
Your core muscles, the deep stabilizers around your spine, pelvis, and hips, are what keep you upright and stable. When these weaken, your body starts compensating. You’ll lean forward when you walk. You’ll hold onto furniture when you stand up. Your lower back will start taking on work it wasn’t designed to do, which leads to chronic pain.
In younger adults, core training is often about creating movement: sit-ups, crunches, rotational exercises. After 60, core strength is about resisting movement. It’s about holding your spine stable while your arms and legs are moving. It’s about maintaining good posture when you’re tired. It’s about not collapsing forward when you bend down.
Why the Bridge Hold Works as a Test
The bridge hold tests exactly what matters most for functional strength after 60. It’s not about how much force you can generate in one explosive movement. It’s about whether your muscles can sustain a stable position under load.
When you hold a bridge, you’re activating your glutes, hamstrings, lower back, and deep core stabilizers all at once. This mirrors real-life movements far better than isolated exercises. Standing up from a chair requires the same muscle activation pattern. Walking up an incline uses the same muscles.
Hold time matters because endurance in these muscles predicts your ability to maintain good movement patterns throughout the day. You might be able to stand up from a chair once with good form, but can you do it ten times without your knees caving inward or your back rounding? That’s what the bridge hold reveals.
Research consistently shows that isometric strength (holding positions) correlates better with functional ability in older adults than dynamic strength. The bridge hold gives you a clear, measurable number. You either hold the position for 60 seconds or you don’t. There’s no room for compensating with momentum or using poor form to hit a target.
It’s also safe. Unlike loaded exercises or tests that require coordination and balance, the bridge hold is performed on the ground with minimal risk. You’re not going to fall if your muscles give out. You simply lower back down.
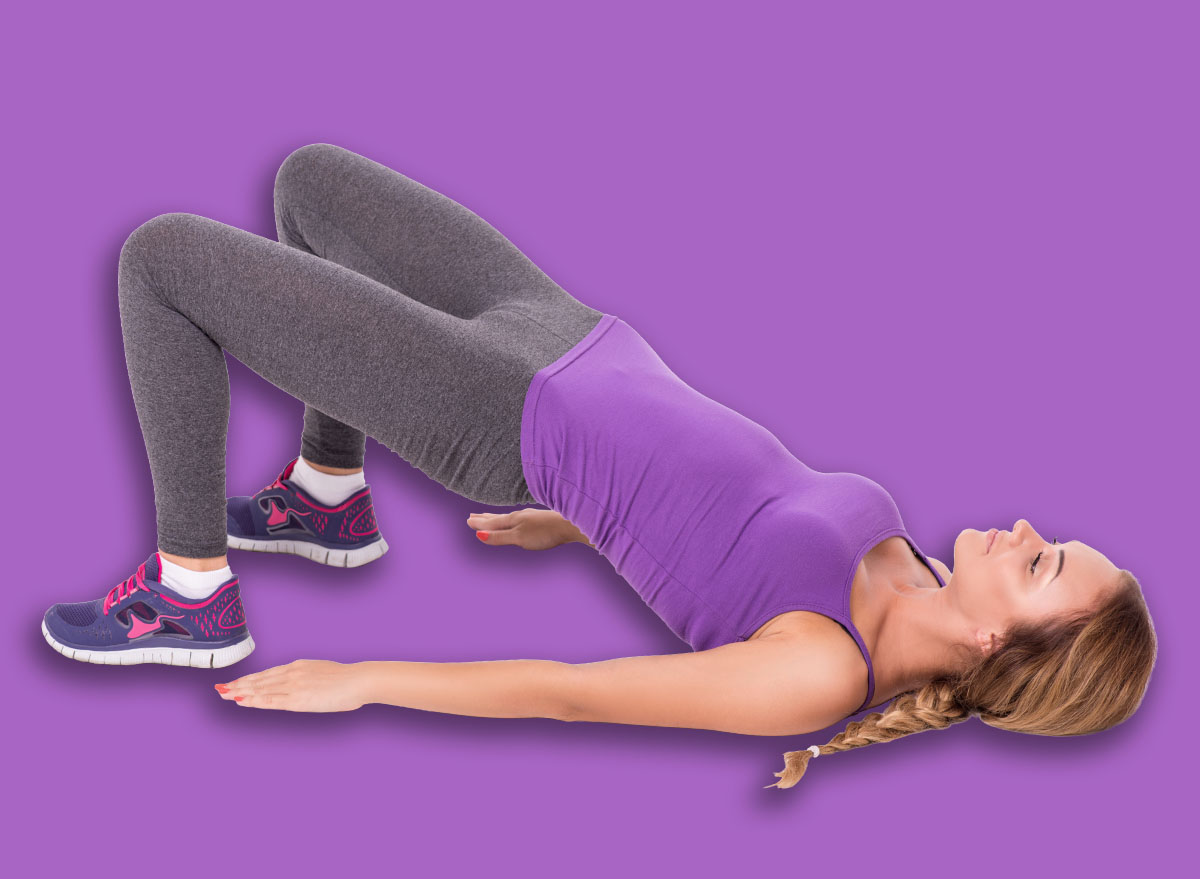
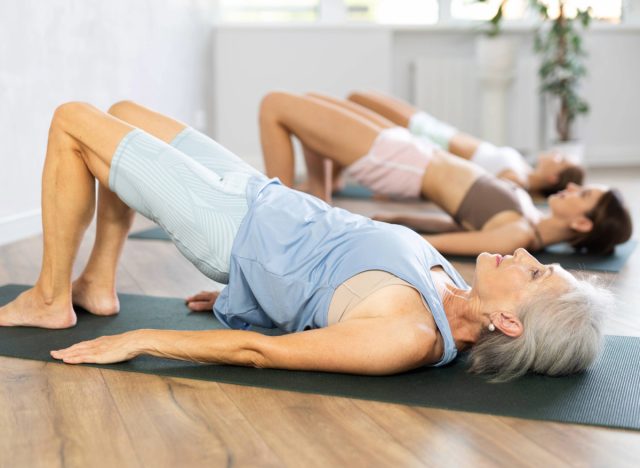
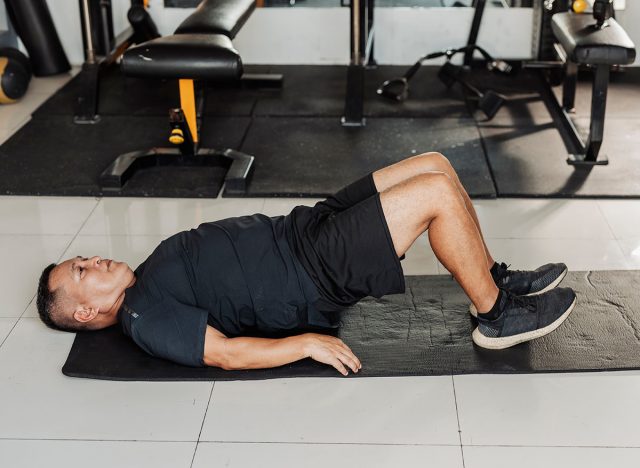
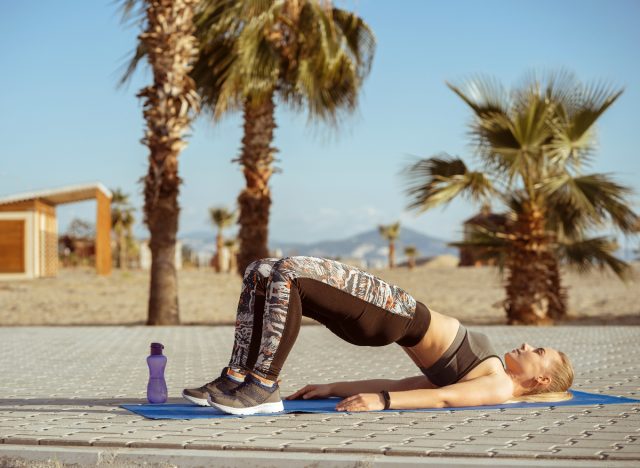
How To Perform the Bridge Hold Test
The bridge hold measures your posterior chain endurance, specifically how long your glutes, hamstrings, lower back, and core stabilizers can maintain a neutral hip position against gravity.
How to Do It:
- Lie on your back with your knees bent and feet flat on the floor, hip-width apart. Your heels should be about 6-8 inches from your bottom.
- Place your arms by your sides, palms down on the floor for stability.
- Engage your core by gently pulling your belly button toward your spine. Don’t suck in hard, just create gentle tension.
- Press through your heels and lift your hips off the ground until your body forms a straight line from your knees to your shoulders. Your shins should be roughly vertical.
- Squeeze your glutes at the top and keep your core engaged. Your lower back should not be arched.
- Hold this position and start timing. Breathe normally throughout. Don’t hold your breath.
- The test ends when you can no longer maintain proper form, either your hips drop, your lower back arches excessively, or you need to rest.
Target Hold Times After 60
- Strong core strength (60 seconds or more): This indicates excellent posterior chain endurance and suggests you have the strength needed for daily activities without fatigue.
- Average core strength (30-60 seconds): You have functional strength but there’s room for improvement. You might notice fatigue during longer periods of activity.
- Weak core strength (less than 30 seconds): This suggests your core muscles are significantly deconditioned and you’re at higher risk for back pain, poor posture, and compensation patterns during movement.
Avoid These Mistakes
- Don’t arch your lower back to make the hold easier. When you arch, you’re shifting the load from your glutes and core onto your lower back muscles and spine. If you feel your lower back working harder than your glutes, you’re doing it wrong.
- Don’t push your hips too high. The goal isn’t to get your hips as high as possible. It’s to create a straight line from knees to shoulders.
- Don’t hold your breath. Real functional strength requires you to maintain stability while breathing normally. If you can only hold the position while holding your breath, your true endurance is much lower than your timed result suggests.
- Keep your knees aligned over your feet throughout the hold. Don’t let them fall inward or push outward, both indicate poor hip stabilizer control.
- Keep your arms relaxed on the floor. Don’t press down hard to assist the hold. If you’re pressing down, you’re compensating for weak glutes and core.
What Your Hold Time Reveals About Your Health
Your bridge hold time is a window into your overall functional capacity. It’s not just about one muscle group; it reveals how well your entire posterior chain is working together.
If you can hold a proper bridge for 60 seconds or more, your glutes are strong and functional (which protects your knees and lower back), your core stabilizers are maintaining good posture without conscious effort, and your hamstrings have the endurance to support your walking pattern and help you get up from chairs easily.
A hold time between 30 and 60 seconds suggests you’re functional but not optimal. You can probably manage daily activities, but you might notice fatigue during longer periods of standing or walking. You might need to use your hands when getting up from low seats. You probably experience some lower back stiffness after periods of inactivity.
If you’re struggling to hold for 30 seconds, it’s a red flag. You’re likely relying on your lower back to do work your glutes should be handling. Your posture is probably compromised. You might already be experiencing chronic back pain, hip tightness, or knee issues. Most importantly, you’re at higher risk for falls because your body doesn’t have the stability to recover from small balance disruptions.
How To Improve Your Hold Time
If you can’t hit 60 seconds, the solution is simple but requires consistency. The good news is that these muscles respond quickly to the right stimulus, especially if they’ve been undertrained.
Start by performing bridge holds for whatever time you can currently manage. If that’s 15 seconds, that’s your starting point. Do three sets of your max hold with 30-60 seconds rest between sets, three to four times per week.
Every week, try to add 5 seconds to your hold time. If you’re starting from 15 seconds, you should realistically hit 30 seconds within three weeks. Getting from 30 to 60 seconds will take another four to six weeks of consistent training.
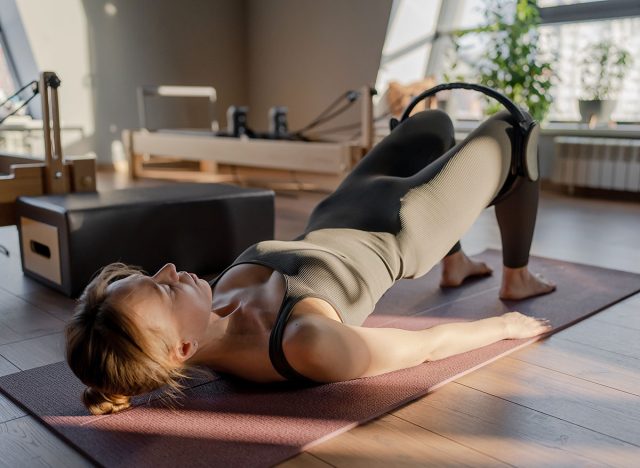
Don’t limit yourself to bridge holds only. Bodyweight squats, step-ups, and single-leg glute bridges work the same muscles and provide variety. Also incorporate core stability exercises like dead bugs, bird dogs, and planks to teach the core to stabilize the spine while your arms and legs are moving.
You also need to stretch out tight hip flexors, which tend to pull the pelvis out of neutral position. If you sit for long periods, try the kneeling hip flexor stretch: hold 30-60 seconds on each side, 3-4 times a week.
Recommended Sets and Reps: 3 sets at your current max hold time, 3-4 times per week, adding 5 seconds weekly.
When To Expect Results
You should see improvements within 2-3 weeks. You’ll notice your glutes firing more during the hold, your lower back will be less painful, and you’ll hold the position longer and more steadily. After 6-8 weeks of consistent practice, you should see a big jump, often a 2x to 3x improvement.
After 3 months, other areas of your life may start to change. Getting up and down from chairs won’t hurt as much and won’t require your arms. Standing for long periods won’t bother your back. You won’t slump over as you walk because your posture is much better. These are the real benefits, and the bridge hold is just a way to measure how much better these functions are working for you.