5 Standing Exercises That Restore Hip Mobility After 55, According to a Trainer
As we get older, one of the most common and debilitating issues for older adults is a lack of mobility in their hips. I’ve been a personal trainer for 35 years and have been running PT courses for the last 20, and it’s been one of the things I’ve seen in the majority of older adults I work with. The good news is that targeted standing exercises can make a real difference — and they tend to work faster and more practically than yoga or floor-based stretching for most people in this age group. These five moves can help you restore that range of motion without ever getting down on the floor.
The Most Common Hip Problems After 55

Restricted range when bringing the knee up towards the chest (hip flexion) and struggling with hip external rotation, which is important for movements like getting out of a car comfortably without having to turn your entire body. These tend to occur together, and once that range of motion starts to reduce it will be noticeable in ways that have nothing to do with exercise. Going up the stairs feels harder. Standing up from a low chair needs help from your arms. You start to avoid putting on your shoes while standing.
People who sit for a long time each day — so most of us — tend to see reduced hip extension, meaning the ability to move the leg backwards. If our hips can’t extend properly, our lower backs generally take over, which can lead to pain and injury. Our bodies are fantastic at compensating like that; they will move the load where they can to keep us moving rather than flagging where the initial restriction has occurred.
Along with these issues, hip flexors are almost always tight in older adults. From sitting, the psoas and iliacus muscles — which run from the lower spine through the pelvis to the femur — have been in a shortened position for decades. The younger we are, the more these muscles will lengthen again, but as we get older, they don’t do this in the same way. The result is tightness that leads to an anterior pelvic tilt, changing posture and compressing the lower lumbar spine. Walking starts to feel stiffer and less fluid.
All of these issues lead to a narrowing of the things you can do without discomfort or thinking carefully. You start to feel like a long walk needs recovery time. Picking things up from the floor requires calculation. It’s not inevitable, but it’s gradual — which is why it catches people off guard.
Why Standing Exercises Beat the Floor
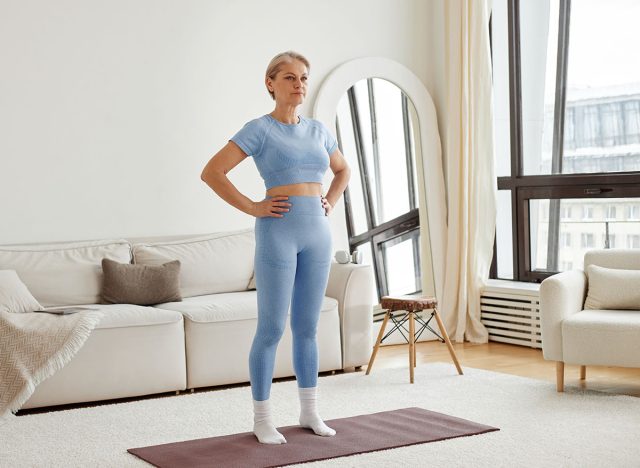
Exercises on the floor have their place, but for a lot of people over 55, getting down on the floor and back up is challenging. The general effort of lowering and raising the body’s weight can make it feel like more trouble than it’s worth — leading to people simply not doing the exercises.
Standing exercises remove that barrier. Your body is in a position it’s already comfortable with, and the movements are closer to the ones the hips need to perform in daily life — stepping, shifting weight, rotating when reaching, and walking. Training in the same position you spend the majority of your time generally gives a more direct carryover to how you feel each day.
When you perform standing exercises, balance and coordination also come into play. There will always be some degree of shifting weight or loading of a single leg, which means the stabilising muscles around the hips, feet, and ankles are also being worked. This combination can’t be replicated by floor exercises and matters a lot for fall prevention — something that becomes a bigger concern as we age.
Traditional yoga is really beneficial to most people, but it often requires the body to get into positions like deep lunges, seated forward folds, and pigeon pose that place a lot of demand on joints and connective tissue that potentially aren’t ready for that load. There’s also a certain amount of range needed that can exceed what a person with restricted mobility can safely reach, without the lower back or knee starting to compensate. Hip work carried out while standing meets the body where it is, rather than asking the body to reach an ideal shape.
Standing Hip Circles
This is probably the most direct way to work through the hip’s full available range of motion in one movement. The hip joint is a ball-and-socket joint, meaning it’s designed to move in every direction — not just forward and back — and standing circles remind the body of that range, lubricating the joint through movement and gently working the muscles and connective tissue that control rotation in all planes. It’s low-load, which means the joint isn’t being asked to take much stress, and that makes it a good starting point before moving into anything more demanding.
Muscles Trained: Hip flexors, hip rotators, glutes, connective tissue of the hip joint
How to Do It:
- Stand near a wall or chair and hold it lightly with one hand for balance
- Shift your weight onto one leg, keeping a very slight bend in the standing knee rather than locking it out
- Lift the opposite knee to about hip height
- Begin drawing slow, deliberate circles with that knee — going forward, out to the side, back behind you, and then closing the circle back to the front
- Focus on making the movement come from the hip rather than just swinging the lower leg around
- Do eight to ten circles in each direction on each side
- Aim to make each circle a little larger than the last as the hip warms up
Avoid These Mistakes:
- Don’t let the whole pelvis rock and tilt to compensate for limited range — when the hip can’t complete the circle, the body tends to cheat by tilting the trunk sideways or rotating the pelvis, which means the hip itself isn’t actually doing the work
- Keep the pelvis level and the standing leg steady — if the circle has to get smaller to achieve that, that’s the right trade-off.
Standing Figure-Four Stretch
This targets hip external rotation and the piriformis muscle — a small but often tight muscle that runs diagonally across the back of the hip and can press on the sciatic nerve when contracted. External rotation is one of the first ranges to go as we get older, and once it’s restricted, you start to notice it in sitting cross-legged, getting in and out of vehicles, and in the way the whole leg feels stiff. The standing version lets you control how much weight — and therefore how much stretch — you’re applying, which makes it safer and more adjustable than the floor version.
Muscles Trained: Piriformis, hip external rotators, glutes
How to Do It:
- Stand in front of a sturdy chair or counter and hold it for support
- Cross one ankle over the opposite thigh, just above the knee, so the crossed leg forms a rough figure-four shape
- Stand tall through the spine with your weight distributed across the standing foot
- Slowly sit back and down as though you were going to sit into a chair — but stop before you actually do
- Hold the lowest point you can reach with a long spine for 30 to 45 seconds
- Switch sides and repeat
Recommended Hold: 30–45 seconds per side
Avoid These Mistakes:
- Don’t round forward through the upper back to compensate for limited range or a lack of balance — when the spine rounds, the stretch shifts away from the hip and into the lower back, which isn’t where you want it
- Keep the chest lifted and the spine long to put the work into the hip where it belongs — if that means the sit-back isn’t very deep, that’s fine, and it’ll improve with repetition.
Standing Hip Flexor Stretch
The hip flexors — particularly the psoas — tend to spend so many of our waking hours in a shortened position that they stop returning to full length even when we stand. That shortening tilts the pelvis forward, compresses the lower lumbar discs, and changes how the entire leg moves during walking. Stretching the hip flexors in a standing position, with the body upright, is much closer to the functional position in which these muscles actually work, which makes the stretch more relevant than doing it lying on a table.
Muscles Trained: Psoas, iliacus, hip flexors, quadriceps
How to Do It:
- Take a generous step forward with one foot so you’re in a split stance, with both feet facing forward
- Lower your back heel so both feet are flat on the ground (if that’s not comfortable, a slight heel lift on the back foot is fine)
- Keep your spine tall and your tailbone gently tucked under, rather than letting the lower back arch
- Shift your weight slowly forward onto the front leg until you feel a gentle lengthening through the front of the back hip and thigh
- Keep the movement small and controlled rather than lunging forward aggressively
- Hold for 30 to 45 seconds per side, breathing through the stretch rather than holding your breath
Recommended Hold: 30–45 seconds per side
Avoid These Mistakes:
- Don’t let the lower back arch as the pelvis tips forward — this is the body’s way of making the stretch feel deeper than it is, but what’s actually happening is the lower back is taking the tension rather than the hip flexor
- Apply a light tuck of the pelvis at the start of the movement and maintain it throughout — this makes a real difference to where the work lands.
Lateral Leg Raises
The hip abductors — the gluteus medius and minimus that run along the outer hip — are muscles that tend to weaken noticeably as we get older, partly because day-to-day life rarely asks us to move sideways. That weakness shows up in instability when standing on one leg, a noticeable drop in the pelvis when walking (sometimes called a Trendelenburg gait), and a general feeling of the hips being unsupported. Strengthening these muscles in a standing position also trains the standing leg’s stability at the same time — which is the position in which that strength actually gets used.
Muscles Trained: Gluteus medius, gluteus minimus, hip abductors
How to Do It:
- Stand beside a wall or chair with one hand resting on it lightly — enough for balance, but not so much that you’re leaning into it
- Keep a very slight bend in the standing knee and stand tall through the spine
- Slowly lift the outer leg out to the side, keeping the toes pointing forward or very slightly down (not upward, which often brings the hip flexor in to help)
- Lift to about 30 to 40 degrees — the movement doesn’t need to be large
- Focus on the movement coming from the outer hip rather than from a hitch in the pelvis
- Lower slowly and with control
- Repeat 10 to 12 times per side
Recommended Sets and Reps: 10–12 reps per side
Avoid These Mistakes:
- Don’t hike the hip upward as the leg rises — this shifts the work from the abductors to the quadratus lumborum (a lower back muscle) and reduces the effectiveness of the exercise
- Keep the hip on the standing side level throughout, even if that means the range of the lift is limited.
Standing Hip Internal Rotation (Clock Steps)
Internal rotation — the ability to turn the leg inward, which is what happens when the knee falls inward during walking or going downstairs — is often the most neglected movement direction in hip work, and one of the first to become restricted. Poor internal rotation at the hip places extra stress on the knee, particularly on the inner structures, and can contribute to the kind of knee pain that gets attributed to the knee itself when the real restriction is further up in the hip. This exercise introduces internal rotation in a weight-bearing context, which is where it actually matters.
Muscles Trained: Hip internal rotators, gluteus medius, stabilising muscles of the standing leg
How to Do It:
- Stand with feet about hip-width apart, both hands resting on a surface for balance
- Imagine a clock face on the floor around your right foot
- Keeping the right foot planted and the right knee soft, step the left foot slowly to different positions on the clock — to 9 o’clock (directly left), then to 6 o’clock (behind), then to 3 o’clock (crossing in front)
- Each time you step, pause and allow the right hip to rotate gently with the movement rather than resisting it
- You’ll feel the rotation most when stepping behind or across the body
- Go through the clock positions five to six times on each side, moving deliberately rather than quickly
Recommended Sets and Reps: 5–6 full clock sequences per side
Avoid These Mistakes:
- Don’t allow the planted foot to pivot and swivel on the floor — this means the hip isn’t actually rotating, the foot is
- Keep the foot as still as possible while the femur rotates within the hip socket — that’s where the movement needs to happen.
How Often to Do These Exercises

Three to four sessions a week tends to be a good target, and each session probably runs to about 15 to 20 minutes if you’re moving through all five exercises with adequate holds and repetitions. Daily work is fine too — unlike strength training, hip mobility work generally doesn’t need recovery days in the same way, because it’s not placing the kind of load on the muscles that causes breakdown and repair.
For some people, doing a shorter version every day — two or three exercises, ten minutes — is more sustainable than doing a longer session less often, and that consistency is what tends to produce results.
The exercises are also manageable to break up. A few minutes of hip circles and the flexor stretch in the morning, and the figure-four and lateral raises later in the day, is a perfectly reasonable way to accumulate the work without needing a dedicated block of time. Fitting mobility work around whatever else you’re already doing — a walk, a swim, another exercise session — tends to make it more likely to actually happen.
What probably matters less than the specific frequency is whether the work is genuinely regular. The hip, like most joints, responds to repeated exposure to range rather than occasional intense sessions. Doing something four times a week for a month will generally produce more noticeable change than doing an hour-long session once a week.
What to Expect in the First 30 Days
The first thing most people notice, usually within the first week or two, is that the exercises themselves start to feel less effortful — the hip circles get a bit smoother, the figure-four sit-back gets a little deeper, the lateral raises feel less wobbly. That’s partly the nervous system adapting, partly the muscles and connective tissue beginning to respond to the repeated input.
By the end of 30 days of consistent work, it’s reasonable to expect some genuine improvement in daily comfort — less stiffness when getting up from sitting, a feeling of more ease when climbing stairs or walking on uneven ground, and often a reduction in the low-grade hip or lower back ache that many people in this age group have normalised without quite registering it.
What’s less likely in 30 days is dramatic visual postural change or complete resolution of longstanding stiffness. Connective tissue changes slowly, and the hips of someone who’s spent years in certain patterns don’t remodel quickly. Progress at this stage tends to be felt more than seen, and it tends to be incremental. The value in tracking it is noticing those functional improvements: being able to put shoes on without sitting down, walking without hip fatigue on routes that used to cause it, or just the sense that the body moves with a bit more give than it did a month ago.
When to See a Doctor First

A sharp or stabbing pain in the hip joint during any of these exercises is worth paying attention to, particularly if it’s accompanied by a clicking or clunking sensation that also hurts. Some clicking in the hip is very common and often harmless, but when it comes with pain it can indicate impingement — a structural issue where the ball and socket aren’t clearing each other properly — and pushing through that kind of sensation can make things worse rather than better.
If you have pain that moves down from your hip into your leg, especially if it follows a specific line to your knee or below, or if you experience numbness or tingling, get it looked at before continuing. Pain like this can involve nerves which these exercises might aggravate.
If you’ve had a hip replacement, check with your surgeon before starting any hip mobility work. Post-surgical precautions vary, and some movements — especially deep internal rotation and extreme flexion — might be on your restriction list depending on the prosthesis and how it was implanted. If you’ve recently had a fracture of the hip or pelvis, or have been told you have advanced hip osteoarthritis, speak with your surgeon first as well.
Pain at rest (rather than just with movement), pain that’s getting progressively worse over days or weeks, unexplained swelling around the joint, or pain following a fall are also signs to see your doctor or physiotherapist before proceeding.
Most people over 55 with general hip stiffness that has appeared gradually and is lifestyle-related from age and inactivity can generally tolerate these exercises well. Starting gently and building up slowly will take care of most of the risk.
- Source: https://www.orthopt.org/uploads/content_files/files/koc_et_al_2025_hip_pain_and_mobility_deficits_hip_osteoarthritis_revision_2025.pdf
- Source: https://pubmed.ncbi.nlm.nih.gov/33188982/
- Source: https://pubmed.ncbi.nlm.nih.gov/41245959/
- Source: https://pmc.ncbi.nlm.nih.gov/articles/PMC11606565/
- Source: https://link.springer.com/article/10.1186/s12891-021-04519-8