5 Standing Exercises That Shrink Belly Fat and Build Core Strength After 55
Misinformation is everywhere in fitness, and one of the most persistent myths is that getting lean and strong after 55 is out of reach. I’ve spent decades coaching clients and educating trainers through Train.Fitness, and I’ve seen the same thing again and again: the fundamentals still work, they just need to be smarter, more joint-friendly, and easier to stick with. That’s why I like standing core work. It trains your midsection the way you actually use it in daily life, recruits more muscle to increase calorie burn, and removes the barrier of having to get down on the floor. Ahead are five standing moves I recommend to build real core strength and support steady fat loss after 55.
The Real Challenges After 55

The biggest challenge that older adults are fighting is that their metabolism has really slowed down. After 55, our bodies burn approximately 200-300 fewer calories a day than they did in our 30s. The diet that kept us lean 20 years ago will now lead to slow but sustained weight gain—especially around the middle.
Our hormones also change. Men’s testosterone levels are lower, and oestrogen levels are reduced in women. Both of these lead to increased fat storage around the abdomen. Muscle loss is happening at the same time, at a rate of around 3-5% a decade after 30—further reducing the metabolic rate. This double hit makes belly fat incredibly stubborn.
Our cores weaken from sitting for decades. The majority of people over 55 have spent years sitting in office chairs, cars, and on sofas. The deep core muscles—the ones that hold the stomach in and protect the spine—have pretty much switched off. Traditional core exercises like crunches or planks lead to compensating with the hip flexors or lower back—completely missing the right muscles.
Getting down on the floor becomes a barrier. Many people avoid core work entirely because they dread getting down and back up again. If you have knee issues, balance problems or simply find floor exercises uncomfortable, you’re likely skipping core training altogether. This creates a cycle where your core gets weaker, making floor exercises even harder.
Your balance has deteriorated. The systems that control balance—your inner ear, vision processing and proprioception—all decline with age. This makes unstable exercises feel risky rather than challenging. When an exercise feels unsafe, you won’t push yourself hard enough to see results.
Why Standing Beats Floor Work

Standing exercises match how you actually use your core in real life. Your core doesn’t work in isolation when you’re lying on a mat. It works while you’re standing, walking, reaching and carrying things. Standing core exercises train the exact movement patterns you need for daily activities.
They burn more calories because more muscles are working. When you’re standing, your legs, glutes and core all work together to keep you upright while you move. A standing exercise can burn 2-3 times more calories than the equivalent floor exercise because your whole body is engaged. For fat loss, this matters.
Standing exercises are safer for your spine. Floor exercises like sit-ups and crunches put repeated stress on your lumbar spine through flexion. After 55, your spinal discs have less cushioning and more wear. Standing exercises work your core without that repetitive spinal stress, minimising your risk of back pain or injury.
They’re more accessible. You don’t need to worry about getting down to the floor or back up again. You can do them anywhere—at home, in the park, even at work. This accessibility means you’re more likely to actually do them consistently, which is what drives results.
Standing exercises build functional strength. The core strength you develop from standing exercises transfers directly to activities like carrying shopping, playing with grandchildren or getting in and out of chairs. Floor exercises build strength in positions you rarely use in daily life.
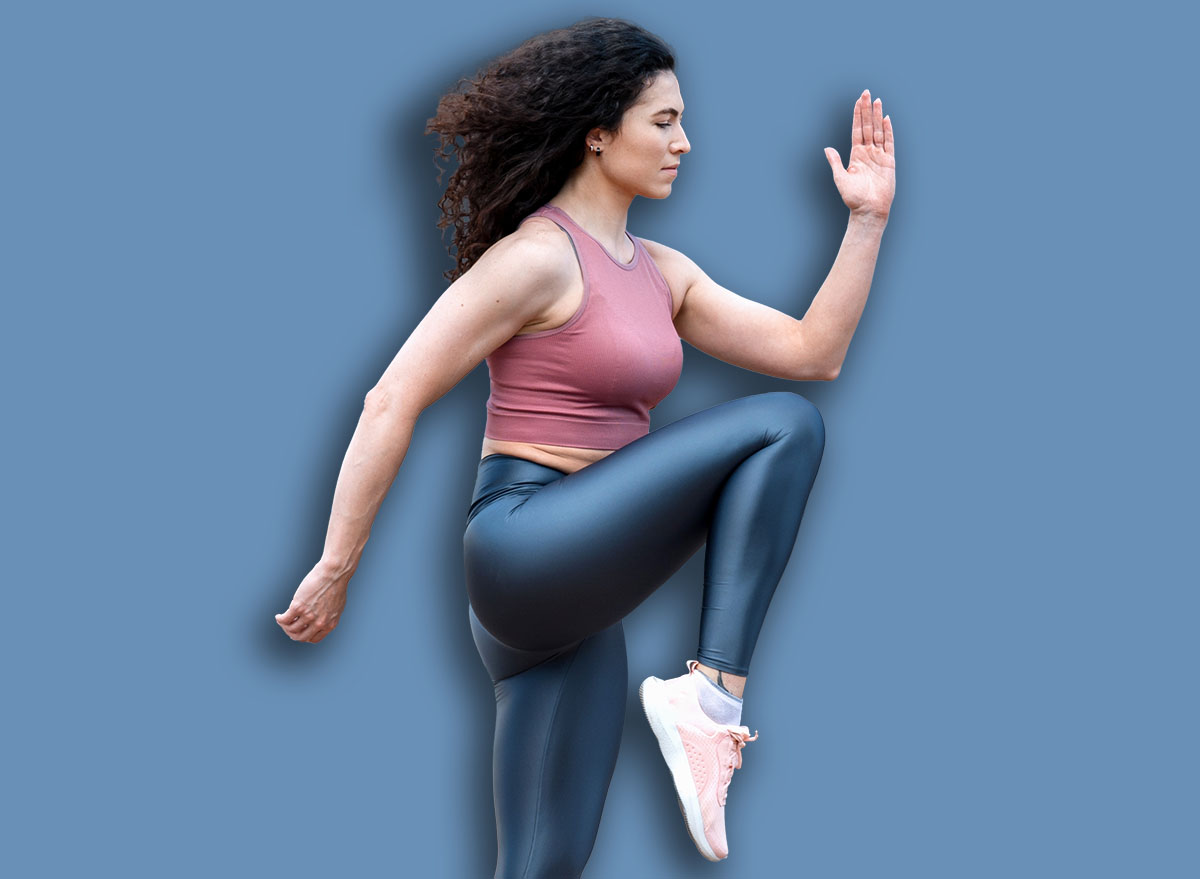
Standing Knee Drive
This exercise activates your deep core muscles while raising your heart rate for fat burning. The standing position means your supporting leg is working hard, your glutes fire to stabilise you and your core works to keep your torso upright. The knee drive movement engages your hip flexors and lower abs without the spinal stress of a traditional crunch.
Muscles Trained: Lower abs, hip flexors, glutes, deep core stabilisers
How to Do It:
- Stand with your feet hip-width apart, hands behind your head with elbows wide
- Shift your weight onto your right leg and engage your core by pulling your belly button towards your spine
- Drive your left knee up towards your chest while bringing your right elbow down to meet it
- Focus on using your core to lift the knee rather than just swinging your leg up
- Return to standing and repeat for 12-15 reps before switching sides
- Keep your supporting leg slightly bent throughout to protect your knee
Avoid These Mistakes:
- Don’t round your upper back forward to meet your knee. Keep your chest lifted and shoulder blades back.
- Don’t lean back as you lift your knee, which defeats the core engagement. Stay tall through your spine.
- Don’t rush the movement—control is more important than speed.
- If you find yourself wobbling excessively, slow down or hold onto a chair with one hand until your balance improves.
Recommended Sets and Reps: 2-3 sets of 12-15 reps per side
Form Tip: Stay tall through your spine and use your core to lift the knee, not momentum from swinging your leg.
Standing Wood Chop
This rotational movement targets your obliques (the muscles at your sides) which are often neglected in traditional core work. Strong obliques pull your waist in and create that defined look. The wood chop also burns calories effectively because it’s a full-body movement that elevates your heart rate. The rotation strengthens the muscles you use for everyday twisting movements like reaching into the back seat of your car or looking behind you.
Muscles Trained: Obliques, transverse abdominis, shoulders, legs
How to Do It:
- Stand with feet shoulder-width apart, holding a light weight with both hands (a water bottle works perfectly)
- Start with the weight above your right shoulder, arms extended
- Engage your core and rotate your torso as you bring the weight down diagonally across your body towards your left hip
- Keep your arms relatively straight and let the movement come from rotating your torso, not just moving your arms
- Your back foot can pivot slightly to allow the rotation
- Return to the starting position with control and repeat for 12-15 reps before switching sides
Avoid These Mistakes:
- Don’t let your arms do all the work. The power should come from rotating your torso. Your arms are just holding the weight.
- Don’t hold your breath—breathe out as you chop down, breathe in as you return to start.
- Don’t round your back or let your shoulders creep up towards your ears. Keep your chest proud and shoulders down throughout.
- If you feel this in your lower back rather than your core, you’re using too much weight or rotating too far.
Recommended Sets and Reps: 2-3 sets of 12-15 reps per side
Form Tip: The power comes from rotating your torso, not from your arms. Your arms just hold the weight.
Standing Marching with Overhead Hold
Holding your arms overhead forces your core to work incredibly hard to keep you stable. This position is particularly effective at activating your transverse abdominis—the deep core muscle that acts like a corset around your middle. The marching component adds a cardiovascular element for fat burning while the overhead position improves your posture by strengthening the muscles that hold you upright.
Muscles Trained: Transverse abdominis, deep core stabilisers, shoulders, hip flexors
How to Do It:
- Stand tall with feet hip-width apart
- Raise both arms straight overhead, palms facing each other
- Pull your belly button towards your spine and engage your core
- Begin marching on the spot, lifting your knees to hip height if possible
- Keep your arms perfectly still overhead—they shouldn’t wave around
- Focus on keeping your ribs down rather than flaring them out
- March for 30-60 seconds, building up duration as you get stronger
Avoid These Mistakes:
- Don’t arch your lower back excessively. Many people let their ribs flare out and lower back arch when they raise their arms overhead. Keep your ribs pulled down and core tight.
- Don’t let your shoulders creep up by your ears. Keep them pulled down and back.
- Don’t lean forward as you march. Stay tall through your spine.
- If your shoulders are too tight to get your arms fully overhead, you can hold them at a 45-degree angle instead.
Recommended Duration: 2-3 sets of 30-60 seconds
Form Tip: Keep your ribs pulled down and core tight to prevent your lower back from arching excessively.
Standing Side Bend with Weight
This exercise directly targets your obliques and the muscles that run along your sides, helping to shrink your waist circumference. The side bend movement strengthens the muscles you use for lateral stability—important for preventing falls and maintaining balance. Holding a weight on one side forces the opposite side of your core to work hard to keep you upright, building strength through resisting the pull of the weight.
Muscles Trained: Obliques, lateral core muscles, deep stabilisers
How to Do It:
- Stand with feet hip-width apart, holding a weight in your right hand (start with 2-3kg)
- Place your left hand behind your head
- Engage your core and slowly bend directly to your right side, lowering the weight down the outside of your right leg
- Don’t lean forward or back—this should be a pure side bend
- Once you feel a stretch along your left side, pause briefly
- Use your left side muscles to pull yourself back up to standing
- Complete 12-15 reps, then switch the weight to your left hand and repeat
Avoid These Mistakes:
- Don’t twist or rotate as you bend. This should be a movement directly to the side.
- Don’t bend too far down—you only need to go until you feel your side muscles working. Going too far can strain your lower back.
- Don’t rush through the movement. The return to standing is where the real work happens, so take 2-3 seconds to come back up.
- Don’t hold your breath. Breathe out as you bend down, breathe in as you return to standing.
Recommended Sets and Reps: 2-3 sets of 12-15 reps per side
Form Tip: The return to standing is where the real work happens—take 2-3 seconds to pull yourself back up using your side muscles.
Standing Bird Dog
This exercise challenges your balance while working your entire core, lower back and glutes. The anti-rotation component (resisting the urge to twist as you lift your leg) is particularly effective at building core stability. This translates directly to better balance and coordination in daily life. The single-leg stance strengthens your stabilising muscles and improves your ability to catch yourself if you trip.
Muscles Trained: Entire core, lower back, glutes, stabilising muscles
How to Do It:
- Stand next to a wall or chair for light support if needed
- Shift your weight onto your right leg, keeping a slight bend in your knee
- Hinge forward slightly at your hips, keeping your back straight
- Extend your left leg behind you while reaching your left arm forward
- Your extended leg, torso and arm should form a relatively straight line
- Keep your hips square—don’t let them rotate open
- Hold for 5-10 seconds, return to standing and repeat for 8-10 reps before switching sides
Avoid These Mistakes:
- Don’t round your back. Keep your spine neutral throughout.
- Don’t lift your leg too high—only go as far as you can while keeping your hips level and your back straight. Many people compensate by rotating their hips open, which defeats the core stability work.
- Don’t hold your breath. Breathe normally throughout the hold.
- Don’t lock out your supporting knee. Keep a slight bend to protect the joint.
- If you can’t balance at all, start by just lifting your heel off the ground rather than fully extending your leg.
Recommended Sets and Reps: 2-3 sets of 8-10 reps per side, holding each rep for 5-10 seconds
Form Tip: Keep your hips square and level—don’t let them rotate open as you extend your leg behind you.
How Often to Train
Three times per week is the sweet spot for most people over 55. This gives you enough training stimulus to see real changes while allowing adequate recovery time between sessions. Your muscles need time to adapt and strengthen, especially if you’re new to this type of training.
Space your sessions out across the week—Monday, Wednesday and Friday works well, or Tuesday, Thursday and Saturday. The day between sessions lets your muscles recover while staying active. On your non-training days, light walking or gentle stretching will help with recovery without interfering with your progress.
Each session should take 15-20 minutes once you’re familiar with the exercises. Start with 2 sets of each exercise and build up to 3 sets as you get stronger. Between sets, rest for 30-60 seconds—just long enough to catch your breath but not so long that your heart rate drops completely.
If you want to do more, focus on adding other types of activity rather than doing this routine more frequently. Walking, swimming or a basic resistance training session for your legs and arms will complement this core work without overtraining. Your core works during almost every activity, so it’s getting indirect work even on your off days.
Consistency matters more than intensity. Three 15-minute sessions you actually complete are infinitely better than planning five sessions and only managing one. Pick three days that realistically work with your schedule and stick to them.
What to Expect
After 4 weeks of consistent practice (doing the routine three times per week), you’ll notice functional improvements before visual changes. Getting out of chairs feels easier. You’re standing taller without thinking about it. Your balance is noticeably better—you’re not grabbing onto things as often when you move around. These improvements happen because your nervous system is getting better at activating your core muscles and your deep stabilisers are waking up after years of being dormant.
Your clothes might start fitting differently around your waist, even if the scales haven’t moved much. You’ll particularly notice this in items with a defined waistband. This happens because your core muscles are pulling tighter, literally holding your stomach in more effectively than before. Some people lose 1-2 inches from their waist measurement within the first month, though this varies considerably based on your starting point and diet.
By 8 weeks, the visual changes become more obvious. Your stomach appears flatter and your waist looks more defined. Other people will start commenting that you look like you’ve lost weight or that you’re standing differently. Your posture improvement will be striking—you’ll see it in photos or reflections.
The exercises that felt incredibly challenging at the beginning will have become manageable. You’ll be able to hold positions longer, complete more repetitions without stopping and probably use heavier weights for the exercises that include them. Many people find they can progress from needing chair support during the standing bird dog to doing it completely unsupported.
Your overall body composition will shift if you’re also watching your diet. The combination of these exercises three times per week plus even modest attention to your eating will typically result in 1-2 pounds of fat loss per week. Over 8 weeks, that’s 8-16 pounds, with a noticeable amount coming from your midsection.
The improvements extend beyond just your appearance. Your back pain will likely have reduced or disappeared entirely. Your confidence in your balance will be substantially higher. Activities that used to tire you out—like playing with grandchildren or doing housework—will feel less exhausting because your core is doing its job of stabilising your body efficiently.
The timeline assumes consistent practice. Missing sessions will slow your progress. If you only manage two sessions some weeks, you’ll still see results, but they’ll take longer to appear. The good news is that these exercises work relatively quickly compared to many other approaches because they’re training your body in functional patterns that immediately transfer to daily activities.