6 Standing Drills That Keep Your Knees Stronger Than Most People Your Age After 50
Working in fitness for 40 years and teaching personal trainer courses for the last 20, I’ve personally trained tens of thousands of trainers and seen just about every fitness challenge imaginable. One issue that comes up again and again, especially in older adults, is knee problems—that general achiness and stiffness that makes people hesitant to move, the creaky feeling after sitting for a while, or needing time to warm up before walking properly in the morning. Here’s what you need to know about keeping your knees stronger and more stable with simple standing drills that directly improve the movements you do every day.
Your Knees Might Be Weaker Than You Think
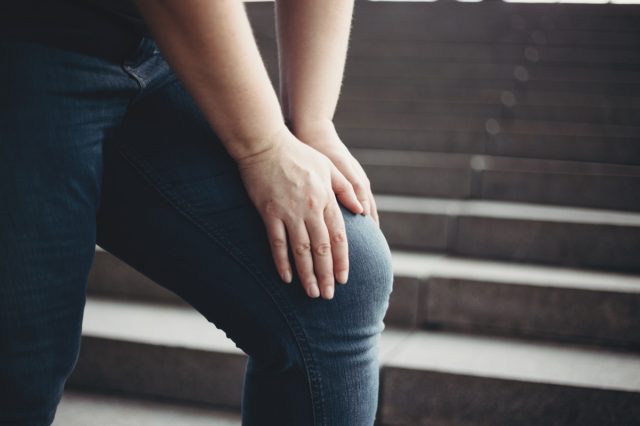
The thing I see most often isn’t actually a specific diagnosis—it’s just this general achiness and stiffness that makes people hesitant to move. They’ll tell me their knees feel creaky or that they need a minute to get going after sitting for a while. Some mornings they wake up and their knees feel like they need warming up before they can walk properly.
Osteoarthritis is a common thing I see. The knee cartilage in the joint gradually wears down and your bones rub together more than they should. We tend to feel it most when we’re going downstairs or getting up from a chair. It’s not always painful—sometimes there’s just a grinding sensation or feeling like the knee isn’t moving as smoothly as it used to.
Another one is patellofemoral pain—pain around or behind your kneecap. It often gets worse with long periods of sitting or when you do movements that bend your knee under load. People tend to notice it most when they are kneeling or squatting.
The thing I see as the biggest problem is that the majority of people respond to knee issues by moving less. Avoiding stairs, stopping gardening, giving up activities they used to enjoy—this creates a cycle where the muscles around the knee get weaker which puts more stress on the joint and the problem gets worse. The knee is then less stable because the supporting muscles aren’t working properly anymore.
What surprises people is that weakness in the hips and core often shows up as knee pain. When your glutes aren’t firing properly or your core isn’t stable, your knee has to compensate for that lack of control. The knee joint ends up taking forces it wasn’t designed to handle.
Why Standing Drills Work Better for Your Knees

Standing drills work because they train your knee in the positions where you actually need it to be strong—when you’re upright and moving. Seated leg extensions might isolate the quadriceps, but they don’t teach your knee how to stabilize when you’re walking or climbing stairs or catching yourself when you stumble.
When you’re standing, your knee has to coordinate with your hip, ankle and core to control movement. This is how it functions in real life. You’re training the whole kinetic chain, not just one muscle group. Your brain learns to activate the right muscles at the right time in the right sequence.
Also, standing drills train your balance and proprioception (the body’s ability to sense where it is in space) at the same time. After we hit 50, this system starts to decline unless we actively work on it. When we do standing exercises, we’re forcing our bodies to make constant tiny adjustments to stay upright. Doing this strengthens the small stabilizing muscles around the knees that can’t be targeted with machines.
There’s also a practical element—standing exercises are functional. They directly improve the movements you do every day. Getting stronger at a standing drill means you’ll find it easier to get out of a chair, carry shopping, walk on uneven ground. The strength transfers immediately to daily life.
The load distribution is better too. When you’re standing and bearing weight through your knee, you’re stimulating bone density and strengthening connective tissue in a way that seated exercises can’t match. Your body responds to the stress by adapting and getting stronger.
Sit-to-Stand (With Controlled Lowering)
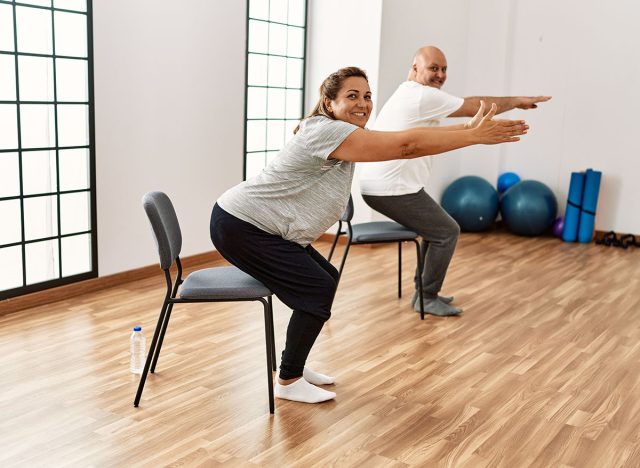
This works because it’s the exact movement pattern that becomes difficult when knee strength declines. The lowering phase (eccentric contraction) is where you build the most strength. Your quadriceps have to control your descent, which trains them to handle bodyweight under load.
How to do it:
- Stand in front of a chair with your feet hip-width apart
- Lower yourself down slowly, counting to three or four on the way down
- Your knees should track over your toes
- Just as you’re about to sit, pause for a second, then stand back up
- The focus is on the controlled lowering—don’t just drop into the chair
Mistakes to Avoid:
Don’t rush the lowering phase, let your knees cave inward, or lean too far forward. Keep your weight balanced through your whole foot, not just your toes. If you can’t control the descent, use a higher surface until you build strength.
Mini Squats (Quarter Squats)
Mini squats build strength in the range of motion you use most often. You’re not trying to go deep—you’re training the first 30-45 degrees of knee bend, which is where most daily movements happen. This range also puts less stress on the knee joint while still building strength effectively.
How to do it:
- Stand with your feet shoulder-width apart
- Bend your knees slightly—only about a quarter of the way down to a full squat
- Hold this position for 2-3 seconds, then straighten back up
- Keep your chest up and your weight distributed evenly through both feet
- Your knees should move forward slightly over your toes, not diving in or out to the sides
Mistakes to Avoid:
Don’t go too deep too soon, hold your breath, or lock your knees at the top. Keep breathing throughout. Think about sitting back slightly as you lower, not just bending forward at the knees.
Step-Ups (Low Step)
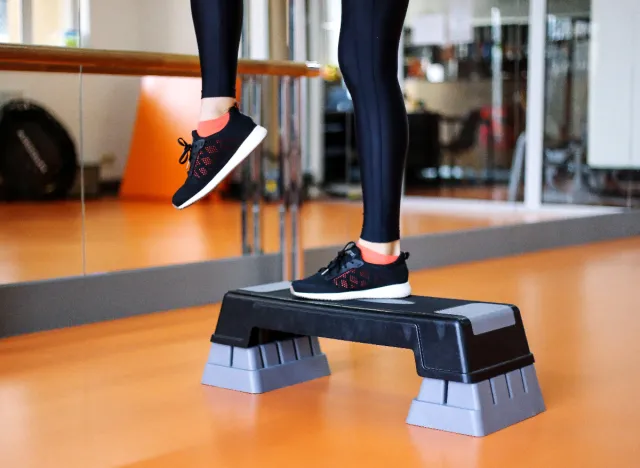
Step-ups train single-leg strength, which is critical for knee health. When you walk or climb stairs, you’re essentially doing single-leg movements. This drill forces each leg to carry your full bodyweight independently, which reveals and corrects imbalances between sides.
How to do it:
- Find a step about 6-8 inches high (a sturdy box or the bottom stair)
- Place one foot completely on the step
- Push through your heel to lift yourself up, bringing your other foot to meet it
- Step back down with the same leg, controlling the descent
- Do all reps on one leg before switching
Mistakes to Avoid:
Don’t push off with the bottom foot instead of lifting with the top leg, rush the movement, or let your knee collapse inward as you step up. The working leg should do all the work. If your knee wobbles or caves in, use a lower step.
Single-Leg Balance (With Reaching)
This drill improves proprioception and strengthens the stabilizing muscles around your knee. When you balance on one leg and reach with the other, your standing leg has to make constant adjustments. These micro-corrections build stability and control that prevents knee problems.
How to do it:
- Stand on one leg with a slight bend in your knee
- Reach your free leg forward, then to the side, then behind you, tapping the ground lightly each time
- Try to keep your standing leg steady without wobbling
- Do 5-6 reaches in each direction before switching legs
- Hold onto something lightly if you need to at first
Mistakes to Avoid:
Don’t lock your standing knee, fail to actually bear weight through the standing leg, or reach so far that you lose balance completely. Keep the reaches small and controlled at first. Your standing knee should stay slightly bent throughout.
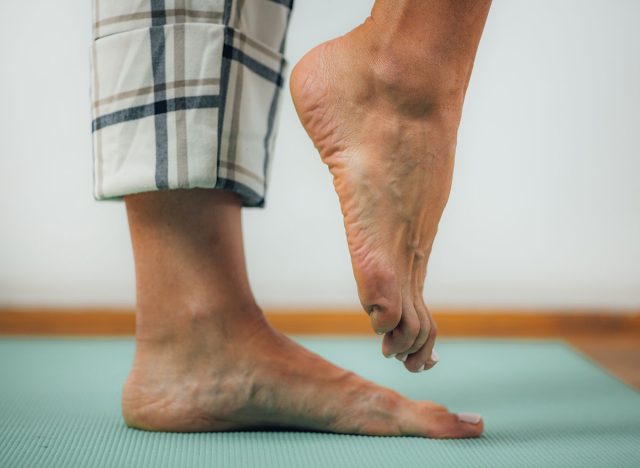
Heel Raises With Knee Bend
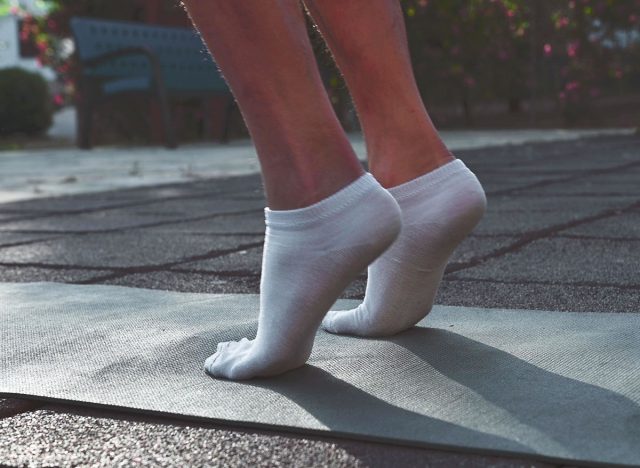
This combines calf strength with knee stability. The bent knee position changes how your muscles activate and puts more demand on your quadriceps to stabilize. Strong calves also reduce stress on your knees during walking and stair climbing.
How to do it:
- Stand with feet hip-width apart
- Bend your knees slightly (about 20 degrees)
- From this bent-knee position, raise up onto your toes, lifting your heels as high as you can
- Lower back down with control
- Keep your knees bent the whole time—they don’t straighten as you rise up
Mistakes to Avoid:
Don’t straighten your legs as you lift up, fail to lift high enough onto your toes, or go too fast. The movement should be smooth and controlled. If you can’t keep your knees bent, you’re not ready for this variation yet—do regular calf raises with straight legs first.
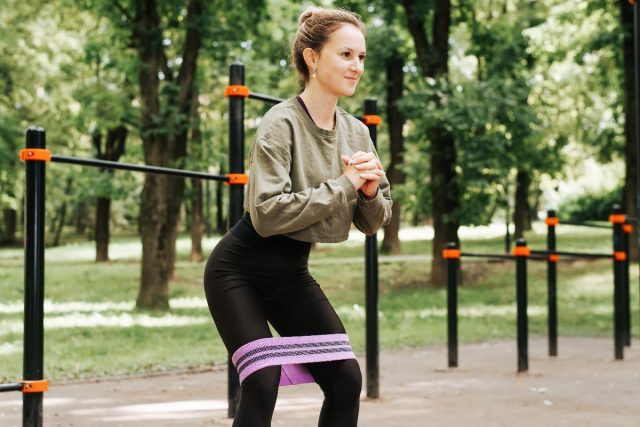
Lateral Steps With Band
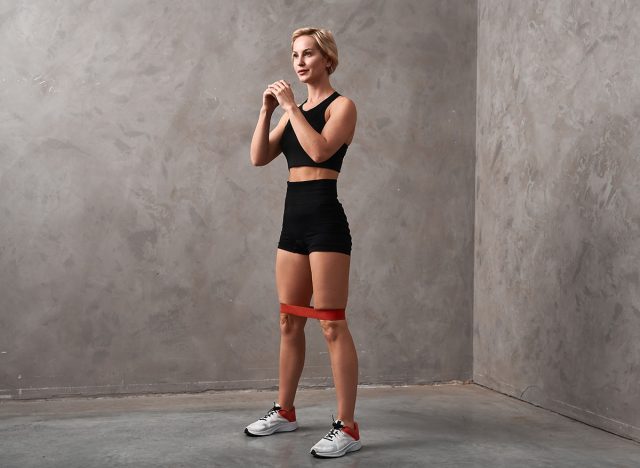
This targets your hip abductors and glutes, which control knee position. When these muscles are weak, your knee caves inward during movement, which damages the joint over time. Strengthening the outer hip muscles keeps your knee tracking properly.
How to do it:
- Place a resistance band around your legs just above your knees
- Stand with feet hip-width apart and knees slightly bent
- Step sideways with one foot, then bring the other foot to meet it
- Take 8-10 steps in one direction, then reverse
- Keep tension in the band the whole time—your feet should never come so close together that the band goes slack
Mistakes to Avoid:
Don’t take steps that are too small (no challenge), stand too upright (your knees should stay slightly bent), or let your knees cave inward against the band resistance. The band should be pulling your knees together and you should be actively pushing out against it.
Here’s How Often You Should Do These Drills

Start with three times a week on non-consecutive days. Your knees need recovery time between sessions, especially in the first few weeks when your body is adapting to the new demands. Monday, Wednesday, Friday works well for most people.
For each drill, aim for 2 sets of 8-12 repetitions. If you’re just starting out or your knees are particularly problematic, begin with just 1 set of 6-8 reps and build up over a couple of weeks. The number matters less than the quality—one well-controlled rep is worth more than five sloppy ones.
The whole routine should take 15-20 minutes. You’re not trying to exhaust yourself. The goal is consistent, controlled movement that challenges your knees without overwhelming them.
Once you’ve been doing this for 4-6 weeks and it starts feeling easier, you can either add a fourth session per week or increase to 3 sets of each exercise. Another option is to slow down the movements even more—a 5-second lowering phase on the sit-to-stand, for example, makes it significantly harder without adding more reps.
Rest for 30-60 seconds between sets. This isn’t about getting your heart rate up. You want your muscles relatively fresh for each set so you can maintain good form throughout.
The Results You Can Expect After 4-6 Weeks
Getting out of a chair gets easier first. Most people notice this around week two or three. You stop needing your hands to push yourself up. No more rocking forward to build momentum. You just stand.
Stairs change by week four. You’ll grip the rail less. Those halfway-up pauses disappear. Going down becomes less of an issue. That’s where weak knees show up most clearly. If stairs feel better, your strength is coming back.
Morning stiffness drops off. Your knees still need to warm up when you get out of bed, but it happens faster. The severity lessens. Maybe it doesn’t go away completely, but it won’t lock you up like before.
Once you’re past the first 6 weeks, your balance will have improved. Uneven ground feels more stable. When you bend over to grab something you aren’t worrying that your knees might buckle. Curbs and slopes don’t make you hesitate as much as before.
The achiness that shows up during or after activities will decrease. If your knees used to hurt after walking for 20 minutes, you might find you can go 30-40 minutes before feeling any discomfort. Or the same walk that used to leave you sore won’t bother you anymore.
You’ll probably notice that you’re choosing to do things you’d been avoiding. Taking the stairs instead of the lift. Gardening for longer periods. Playing with grandchildren on the floor. These are the real markers of improvement—not just reduced pain, but increased confidence in what your knees can handle.
Don’t expect the changes to be dramatic or sudden. They’re gradual enough that you might not notice day-to-day, but when you look back over a month or six weeks, the difference will be clear. The key is consistency—these drills work if you keep doing them.