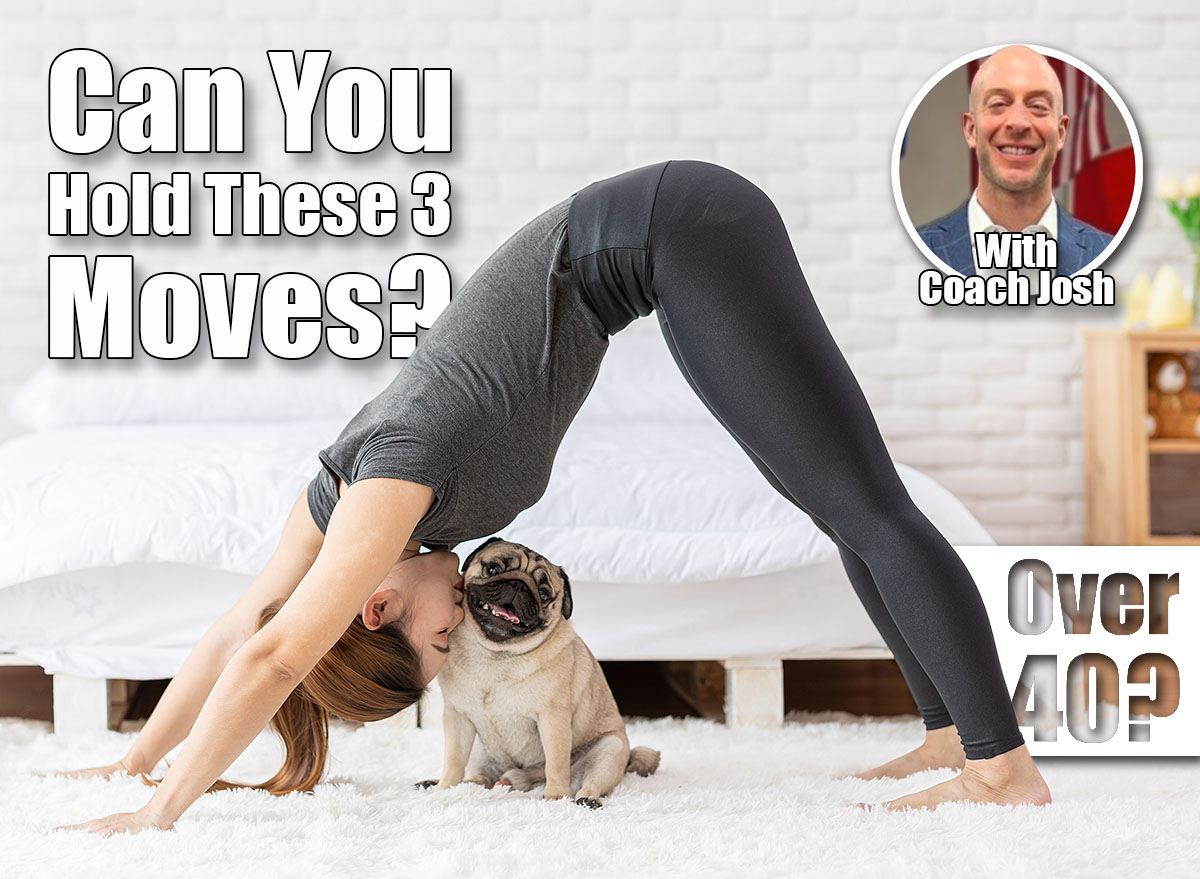
Over 40? If You Can Hold These 3 Positions, You’re Defying Age
Aging doesn’t have to mean accepting a decline in your physical abilities. While it’s true that muscle mass, flexibility, and strength naturally change as we get older, there are ways to measure—and maintain—your functional fitness that go beyond traditional gym metrics. These three simple holding positions can reveal whether you’re truly defying age and staying ahead of the physical challenges that typically come after 40. Test yourself with these moves to discover your real fitness age.
The Challenges You Face After 40

Common challenges seen in people over 40 include decreased muscle mass and strength, reduced flexibility and range of motion, slower recovery time, joint pain and stiffness, cardiovascular and respiratory changes, increased risk of injury, and motivational and behavioral factors. Each of these challenges impacts how I must approach testing functional fitness. For example, the higher risk of injury and decreased strength and flexibility mean that safety must be prioritized first and foremost. Each person has different capabilities, so I had to learn how to tailor tests to everyone, which includes modifications or alternatives as needed. Lastly, it’s critical to monitor any visual signs of pain or discomfort.
Why These Positions Are Perfect Age-Defying Tests

The following specific holding positions are particularly effective because they touch on key bodily functions that naturally decline with age. Each one helps to test one’s mobility, stability, strength, and coordination to create a comprehensive snapshot of one’s overall fitness level.
Deep Squat Hold: Your Hip Mobility Test
Detailed instructions on proper form: Stand with your feet shoulder-width apart. Turn your toes slightly out. Place your hands on your hips or extend your arms straight out in front at shoulder height. Sink your hips down until they are below knee level. Keep your chest upright and heels flat on the ground with your knees over your toes. Gently press your elbows into your knees to open the hips if needed.
How long you should be able to hold it: A beginner should be able to hold this for 20 to 30 seconds, with the goal of working up to a one-minute to two-minute hold with good posture.
Common mistakes to avoid: Some of the most common mistakes include lifting the heels off the ground, knees collapsing inward, and rounding the back or hunching shoulders, and bouncing at the bottom.
Downward Facing Dog: Your Full-Body Strength Check
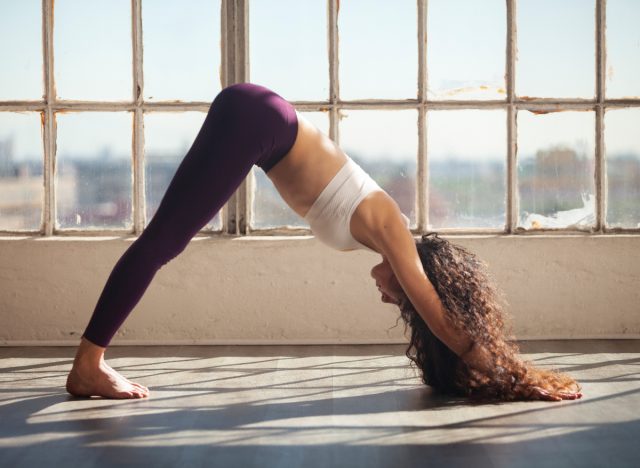
Detailed instructions on proper form: Begin in a high plank position on your hands and toes. Lift your hips towards the ceiling into an inverted V shape. Keep your hands shoulder-width apart and press firmly into the ground. Feet should remain hip-width apart while your heels reach towards the floor. Keep your spine long and shoulders away from your ears.
How long you should be able to hold it: Someone should be able to hold this for 20 to 30 seconds, working towards a 45-second to one-minute hold.
Common mistakes to avoid: People should avoid rounding the back, letting the shoulder creep towards the ears, and collapsing their weight into the wrists instead of distributing it through the hands.
Hollow Body Hold: Your Core Stability Measure
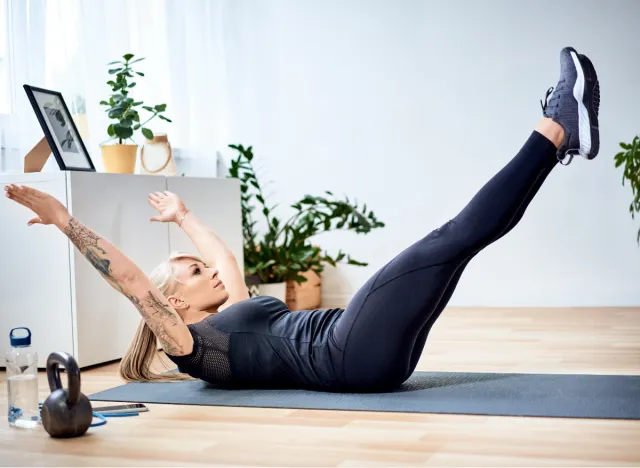
Detailed instructions on proper form: Lie flat on your back. Extend your arms straight overhead. Press your back firmly into the floor. Lift your shoulders and legs slightly off the ground. Keep your core engaged while holding your body in a shallow banana shape.
How long you should be able to hold it: Someone should be able to hold this move for 15 to 20 seconds while aiming to reach the goal of a 30 to 60 second hold with control.
Common mistakes to avoid: Avoid the common mistakes of the lower back arching off the floor, neck straining forward instead of neutral, having the arms and legs too high, and holding your breath.
How to Test Yourself and Track Your Progress

The best way to track progress for all three holds is to use a timer and journal to track your max hold each week to see improvement from week to week. Additionally, the journal can be used to take note of observations such as hips felt looser or heels almost touched the ground. Attention to detailed notes like that can provide knowledge for where you can work on form improvements. This can also be done by filming yourself with your phone to visually see your posture.
When it comes to testing each hold, set a weekly time goal for each exercise that is longer than your previous record. See if you can push your body to hold the move for that allotted time with perfect form.
Your Realistic Timeline for Improvement

It’s important to keep expectations realistic. Seeing improvements through any exercise takes time and consistency. Deep squats can take four to eight weeks to master, while downward-facing dog can take three to six weeks, and four to eight weeks for the hollow body hold.
Getting Started: Your Best Strategy After 40

Start slowly and intentionally with these holds. Focus on the foundational pieces that make up each hold until your form is mastered. Quality holds will maximize your results short-term and long-term, ultimately helping to see results sooner.
Looking for more easy ways to lose fat? Here’s How Long Your Walking Workout Should Be To Shrink Belly Fat.