5 Barefoot Exercises That Strengthen Your Feet Better Than Orthotics After 60

Most people trap their feet inside shoes every single day without ever strengthening them, and that’s a problem. Look at your foot. Nearly one quarter of all the bones in your whole body are right there. As a fitness coach, I can tell you almost nobody knows how to actually strengthen the foot.
By the end of this, you’re going to understand why your feet are designed more like the suspension on a mountain bike than a brick of concrete, and I’ll show you four barefoot exercises that help restore your natural suspension system.
The Engineering Inside Your Foot
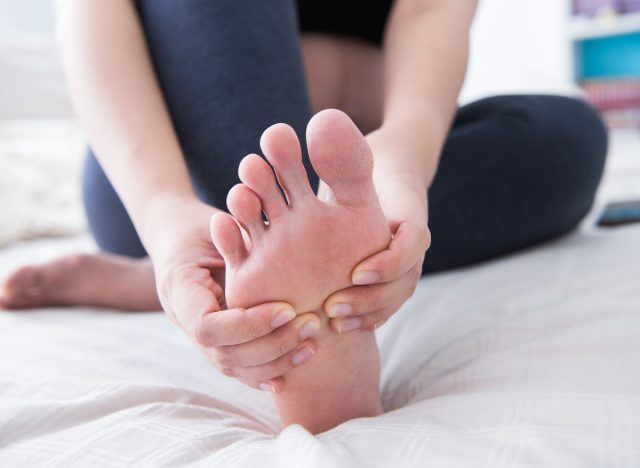
Let’s take a closer look. Each foot contains 26 bones, and 28 if you count the sesamoid bones. There are over 33 joints and well over 100 muscles, tendons, and ligaments all in your foot. That’s an incredible amount of engineering packed into something most of us never even think about.
Most people think they have only one arch in the foot. If this is your right foot and this is the inside, you’d think of the medial arch. So when we talk about the arch of the foot, most people limit their thought to the medial arch. But we also have a lateral arch, and we also have a transverse arch for the rotation of the foot.
These arches don’t simply hold you up. They constantly change every time you take a step. That includes an extension of the big toe, and that includes both of the arches, medial and lateral, and of course the transverse. So every little step you take, all 28 of these bones have to work in conjunction with the ground and all the bones above them to ensure a strong, stable, and efficient gait.
Your Feet Are Suspension, Not Concrete
Imagine you’re driving a pickup truck with no suspension. Every crack in the road would travel straight into the frame. Now imagine driving on the exact same road with premium shocks and suspension. The bumps don’t disappear, right? The suspension simply absorbs and redistributes the force. That is exactly what your feet were designed to do.
Every step you take creates force that can be two to three times your body weight. If you’re running, we’re talking around seven times. And if you’re running on a hard surface like concrete, we’re talking closer to 12 to 15 times. So whatever you weigh, every step you take is two to three times that traveling through your body, and if you’re running, especially on a hard surface, that’s up to 12, sometimes considered 15 times the force from your body weight into the ground and traveling back up your foot and through your spine.
If these forces aren’t distributed throughout the foot with its variety of movements, they travel directly into your knees, your hips, and your spine. Instead of allowing that to happen, your arch flattens slightly, your plantar fascia stores elastic energy, and then your foot becomes rigid again as you push off.
How One Step Actually Works
Every step we take, that big toe has to go into some extension. That then transfers the load into the sesamoid bones, and then that sends it up the foot, and then up the shin, and then your knees, your hips, and so on. Remember, a lot of things have to happen.
So when that toe goes into extension, there’s also a change in the transverse fascia, the rotation of the foot. There’s also a change in the medial arch, which goes internal, and then as we get rigid and we step off the toe, everything transfers out. You have to have all these combined movements of rotation, flexion, and extension to have good force distribution from the foot.
Try to think of the plantar fascia like a heavy-duty winch cable. As your toes extend, that cable tightens, pulling the arch upward and transforming your foot into a powerful lever. It’s really an elegant design.
Shoes Support, They Don’t Strengthen
Unfortunately, most of us spend decades asking our shoes to do the work instead. Before anyone misunderstands me, shoes, socks, even orthotics absolutely have their place. For certain injuries and deformities, and even medical conditions, an orthotic really is valuable.
But for most people, you probably don’t need an orthotic. You just need some manual therapy, and you definitely need some exercises for it.
Here’s the important distinction. An orthotic supports your foot. Socks, to a degree, compress your foot. Shoes support your foot. But none of them actually strengthen the muscles. They don’t improve coordination, and they don’t retrain the nervous system. That’s where barefoot training becomes so valuable.
Your Feet Are Your Body’s GPS

One of the biggest reasons is something called proprioception. The bottom of your foot contains thousands of sensory receptors. Every second, they’re measuring pressure, surface texture, joint position, weight distribution, and movement. All that information is sent directly to your brain. The brain then makes tiny adjustments throughout your ankles, your knees, your hips, and even your spine, long before you’re even aware of it.
I like to think of the feet as your body’s GPS system. The better the signal, the better the navigation.
As we get older, those signals often become weaker. Not because our brain stopped working, but because our feet become less active. We wear supportive shoes nearly all day. We spend very little time barefoot. Those small muscles become weaker, the nervous system receives fewer meaningful inputs, and over time, balance, coordination, and movement quality begin to decline.
What The Research Says About Foot Stimulation
There’s another fascinating aspect of the foot. The sole contains one of the highest concentrations of sensory nerve endings anywhere in the body. That’s one reason practices like foot massage, acupuncture, and reflexology have existed for thousands of years.
Now, the research doesn’t support the idea that pressing on one spot on your foot can directly treat an entire organ or organ system. But there is evidence that stimulating the feet can help improve relaxation, alter pain perception for some people, and increase sensory awareness, whether that’s through massage, acupressure, or simply spending more time moving barefoot.
You’re giving your nervous system richer information to work with, and that’s exactly what these exercises are designed to do. They’re not just strengthening muscles; they’re rebuilding the body’s natural suspension system one step at a time.
Foot Self-Massage
The first exercise in our foot restoration series is self-massage. If you don’t have the flexibility to be on the floor, you can do this sitting in a chair. If you’ve never done this, your foot fascia may be extremely tight and you may not be able to get your fingers all the way in. You can certainly use some lotion to help make the process a little easier.
How to Do It:
- Take your right leg and cross it over your left.
- Interlace each one of your fingers in between each one of your toes, starting by sliding your pinky finger in between your pinky toe.
- Grab your fingers so you can really get it in there, webbing to webbing, the webbing of your fingers into the webbing of your toes.
- Once everything is fully in there, dorsiflex your foot, bending it back.
- Use your other hand to hold your heel so your heel doesn’t move and your ankle doesn’t move.
- Gently twist your foot back and forth, like you’re wringing out a towel.
- Pump by flexing and extending the forefoot, or the front of the foot.
- Combine those two movements into a torsion, which we can also call a lemniscate.
Avoid These Mistakes:
- Don’t let your heel or ankle move. Hold the heel steady with your opposite hand so the motion happens in the forefoot.
- Work both directions. Don’t only twist one way.
- Don’t force your fingers in if the fascia is too tight. Use lotion and work into it gradually.
Sets and Reps: Anywhere from three to five minutes per foot.
Form Tip: When you’re done, look down at your toes and you can generally see a little more space in the foot you just worked. That won’t last through the day, it’ll start to cramp back in. But imagine doing this most every day and starting to restore that natural splay and natural arch just with a little bit of self-massage.
Single-Leg Standing Toe Coordination
Step one is just single-leg balance. Once you’re comfortable balancing on a single leg, then we work the coordination.
How to Do It:
- Stand on one leg. If you need to, hold onto a chair or put your hand on the wall.
- Lift your big toe, then set it down.
- Lift your other four toes, then set them down.
- Work back and forth between the big toe and the other four toes.
Avoid These Mistakes:
- Don’t skip the balance step. Get comfortable on one leg before you add the toe work.
- Don’t force the standing version if you’re not ready. Start seated in a chair, progress to kneeling, and then eventually the goal is to perform the exercise from a standing position.
Sets and Reps: About 60 to 90 seconds each foot, one to three sets.
Form Tip: The progression is seated, then kneeling, then standing. Work the coordination at whatever level you can control it.
The Shuffle Walk
This next exercise I picked up from the Gait Guys. As the toe comes up, I feed all those proprioceptors. I give it even more information by dragging it. And then as it rolls down and the other comes up, I get the coordination phase. That’s the idea with the shuffle walk.
How to Do It:
- Start with your feet nice and square.
- Roll up onto the ball of your right foot.
- Drag it backwards until your big toe is about at the middle of the other foot.
- Roll it down and set it down.
- Roll up onto the other foot, drag it back, set it down.
- Repeat, one, two, one, two, over and over until you’re really comfortable with it.
- Once you’re comfortable, put it into the full motion: as one foot comes down, the other one is already coming up.
Avoid These Mistakes:
- Don’t rush to the full motion. Get comfortable with the one-at-a-time version first.
- Don’t skip the drag. That’s what feeds the proprioceptors even more information.
Sets and Reps: 60 to 90 seconds, one to three sets.
Form Tip: Yes, it looks like the moonwalk. That’s the idea.
Watch the shuffle walk: https://youtube.com/shorts/3VgmhREs9Cs?is=9JO81cNU4m8Gq3z6
March With Calf Raise
The last exercise in our foot restoration series is the march with the calf raise. This is to help us train the toe-off phase of gait so that we’re able to propel ourselves forward more easily and redistribute the forces from the foot as opposed to sending them directly into the knee, hip, or spine.
How to Do It:
- Start flat-footed.
- Go into a march and hold at the top for one to two seconds.
- Set it down, march, and hold again.
- Once that’s easy for you, add the toe raise: go through your march position, then calf raise, then come down.
- March position, calf raise, and down.
- Once you’re comfortable, you’re simply marching with that elevation of the heel, rolling into your big toe.
Avoid These Mistakes:
- Don’t add the calf raise until the marching hold is easy for you.
- Don’t skip the roll into the big toe. That’s the part that trains toe-off.
Sets and Reps: 60 to 90 seconds, one to three sets.
Form Tip: Hold at the top of the march for one to two seconds before you progress to adding the calf raise.