4 Chair Exercises That Strengthen Your Hips Better Than Gym Machines After 60

Getting out of a chair without a struggle is something most people take for granted, until one day it isn’t so easy anymore.
Michael Betts has spent almost 40 years as a personal trainer, and for the last 20 he’s been director and co-founder of TRAINFITNESS, the UK’s leading provider of in-person and online personal training courses. In that time, he’s seen the same pattern show up again and again: hip strength is one of the biggest predictors of independence past 60, and it’s also the area most people have neglected the longest.
The fix doesn’t require a gym membership. These four chair-based exercises, done just a few times a week, can rebuild hip strength faster than most people expect.
Common Hip Problems After 60
Weakness across the whole hip complex is the pattern Betts sees most often. The glutes are the biggest muscles in the body, but decades of sitting have switched them off in most people, and by 60 they’ve forgotten how to fire properly. The hip flexors at the front of the hip are the opposite problem: tight and overactive from all that sitting, which tugs on the lower back.
Then there’s the side of the hip, which almost nobody trains. The muscles on the outer hip, particularly the glute medius, are what stop the pelvis dropping to one side every time you take a step. When those muscles are weak, the whole body has to compensate, and knee pain, hip pain and lower back pain often show up together as a result.
Mobility loss is the other issue. External rotation, the ability to turn the leg outwards, is the range that goes first. Getting in and out of a car, putting socks on, stepping sideways to reach something. All of these need external rotation, and most people over 60 have lost more than they realize.
Underneath it all is the confidence problem. Weak hips lead to wobbles, wobbles lead to caution, caution leads to smaller movements, and smaller movements lead to more weakness. It’s a slow spiral, and the way out is to break it early.
Why Chairs Beat The Gym
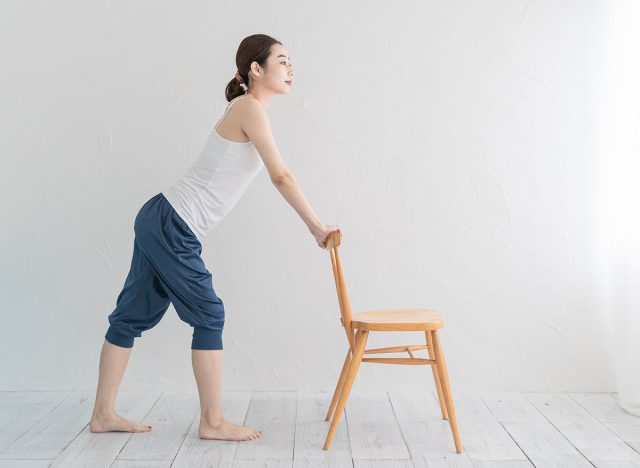
Chairs are already in the room. That’s the first practical advantage. No commute, no membership, no waiting for a machine, no intimidation. And the friction to actually doing the work is what makes the biggest difference to whether change happens.
A chair is also a great progressive tool. You can start with the chair supporting most of your weight, progress to using it lightly for balance, and eventually do standing versions without any support at all. Gym machines don’t offer that same graded progression because they take stability out of the equation entirely.
Hip machines in gyms also train hip strength in isolation, with a padded seat holding everything else still. Real hip strength has to work in coordination with the rest of the body. Chair exercises train the hips while the trunk holds itself upright, which is much closer to what walking, standing, and climbing stairs demand.
Sit-To-Stand
This is the single most useful hip exercise for older adults. It trains the glutes, quads and hamstrings in the exact pattern of standing up from a chair, which is the marker most physios use to predict whether someone will stay independent. Do this well and everyday life gets easier almost straight away.
Muscles Trained: Glutes, quads, hamstrings
How to Do It:
- Sit on a sturdy chair with feet flat on the floor, hip-width apart
- Fold your arms across your chest, or hold them out in front for balance
- Lean slightly forward at the hips
- Push through the heels and squeeze the bottom muscles to stand all the way up
- Sit back down slowly, taking 3 seconds
Recommended Sets and Reps: 10 to 15 reps
Common Mistakes to Avoid:
- Rocking backward to build momentum, then throwing yourself up to stand
- Losing the muscle work by relying on momentum instead of control
Form Tip: If you can’t stand up without rocking, use a slightly higher chair or a firm cushion until you can.
Seated March
This wakes up the hip flexors and trains the trunk to stay tall while the leg moves. It’s the pattern that keeps a normal stride length as you age, which is one of the biggest predictors of remaining independent.
Muscles Trained: Hip flexors, core and trunk stabilizers
How to Do It:
- Sit tall on a sturdy chair, feet flat on the floor
- Rest your hands lightly on the sides of the chair for balance if needed
- Lift one knee up towards the chest, as high as comfortable
- Lower with control
- Lift the other knee
- Alternate for 20 lifts total, 10 each side
Recommended Sets and Reps: 20 lifts total (10 each side)
Common Mistakes to Avoid:
- Slumping backward as the knee comes up
- Letting the trunk drop out of the work
Form Tip: Keep the spine long and the chest tall throughout the movement.
Standing Side Leg Lift
This trains the glute medius, the muscle on the outer hip that stops the pelvis dropping when you walk. It’s the muscle almost no adult over 60 has trained on purpose, and rebuilding it makes an immediate difference to balance and stride.
Muscles Trained: Glute medius (outer hip)
How to Do It:
- Stand behind a sturdy chair, both hands lightly on the back
- Stand tall, feet hip-width apart
- Keeping the leg straight and the toes pointing forward, lift one leg out to the side, no more than 30 degrees
- Hold for a moment, then lower under control
- Do 10 reps on one side, then swap
Recommended Sets and Reps: 10 reps per side
Common Mistakes to Avoid:
- Leaning the trunk in the opposite direction to get the leg higher
- Letting the body sway instead of staying upright
Form Tip: A small controlled lift with the trunk still is worth ten times a big lift with the body swaying.
Standing Hip Extension
This targets the glute max, the largest muscle in the body, in the exact pattern used when walking uphill or climbing stairs. Almost every client over 60 has a weak glute max, and rebuilding it takes load off the lower back for the rest of the day.
Muscles Trained: Glute max
How to Do It:
- Stand behind a sturdy chair, both hands lightly on the back
- Stand tall with a soft bend in the supporting knee
- Keeping the working leg straight, sweep it backward, squeezing the glute at the top
- Only go as far as you can without arching the lower back
- Lower with control
- Do 10 reps on one side, then swap
Recommended Sets and Reps: 10 reps per side
Common Mistakes to Avoid:
- Arching the lower back to swing the leg further behind you
- Prioritizing range of motion over the glute squeeze
Form Tip: Two inches with a strong glute squeeze beats a foot with the back doing the work.
Safety Tips And Precautions
Anyone with recent hip surgery, a hip or knee replacement in the last 12 months, or an active diagnosis of arthritis in the hip should speak to their GP or physio before starting. If you’ve been given specific movements to avoid after surgery, follow that advice first, and use these exercises to fill the gaps rather than override it.
Anyone with balance problems severe enough that they’ve fallen in the last 6 months should also check in with a doctor. Standing exercises are a good long-term answer for balance, but only once someone has ruled out other causes of falls, like blood pressure drops or inner ear issues.
For everyone, the standard safety rules apply:
- Sharp pain is the stop signal
- A steady muscle burn is fine
- Numbness or tingling down a limb means stop and get it looked at
- Dizziness on standing means slow down, sit down, and check in with the doctor if it happens more than once
The chair itself has to be sturdy. No wheels, no folding chairs, no chairs that flex when you lean on them. A solid dining chair is the best piece of kit for all four moves.
How Often To Do These
Three days a week is the sensible starting point. Four to five days is better once you’ve been doing them for a fortnight and know your body handles it well. Daily is fine too, because the loading is low.
Start with two sets of 10 to 12 reps for each of the four exercises. That takes around 12 minutes including short rests, which is realistic for most people. Rest 30 to 45 seconds between sets, or a bit longer if you need it.
After a fortnight, add a third set. After a month, hold the top of each rep for 2 seconds to build strength further, especially on the leg lifts and hip extensions. The extra hold is where the real change starts to compound.
What Results To Expect

By the end of the first fortnight, most people notice that getting out of a chair takes less effort. That’s usually the first sign, and it’s a genuine measurable strength change, not just feeling more energized.
By 4 weeks, walking feels different. The stride lengthens because the hips are firing properly, the pelvis stops dropping to one side, and people often report they’re keeping up with faster walkers without noticing. Family members sometimes comment that you look steadier.
By 6 weeks, day-to-day tasks start to feel easier. Standing up from a low sofa, getting into and out of a car, stepping over a bath edge. These are the movements that creep up on you around 60, and they’re the ones that respond first to hip work.
Strength gains at the 6-week mark are typically 30 to 50 percent on the sit-to-stand, which is a lot. The bit that matters most is what happens next. Keep doing the work through months 2 and 3, and the hip strength keeps building, along with the balance and confidence that come with it.