4 Chair Exercises That Rebuild Lower Back Strength Faster Than Gym Machines After 60


Lower back pain is the single biggest reason people over 60 come to me for training, and it’s also the one most of them believe they can’t do anything about. I’ve been a personal trainer for almost 40 years, and for the last 20 I’ve been director and co-founder of TRAINFITNESS, the UK’s leading provider of in-person and online personal training courses.
Here’s what most people don’t realize: the weakness usually isn’t damage. The muscles haven’t broken down, they’ve just forgotten how to fire after decades of sitting. And fear does the rest. Once someone has had a bad flare-up, they start avoiding any movement that reminds them of the day it happened, and that avoidance shrinks their range further, leaving the back weaker still.
Four chair-based exercises, done a few times a week, can turn that around faster than most people believe.
Why The Back Struggles After 60

The most common issue by a mile is a lower back that’s been asked to do the wrong job for years. When the glutes are asleep, the hip flexors are tight from sitting, and the deep abdominal muscles have switched off, the lower back muscles take over everything. They end up doing the lifting, the standing, the walking and the stabilizing. Nothing was built to do all of those at once, and by 60 it starts to complain.
The weakness sits alongside the pain. Most over-60s can’t hold a plank for 30 seconds or lift a shopping bag off the floor with proper form because they’ve spent decades sitting rather than loading their back muscles.
Why Chairs Beat Machines
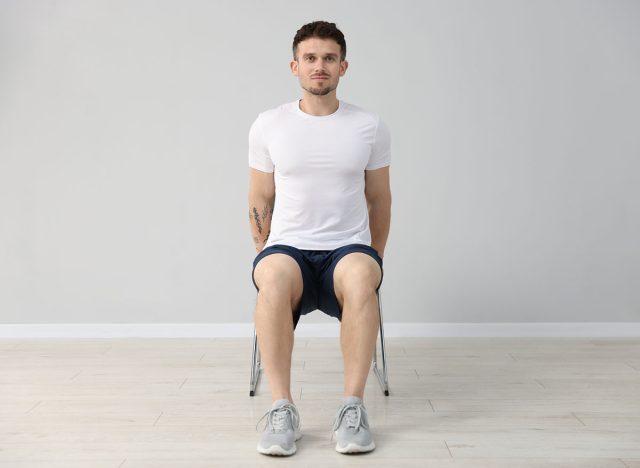
Gym machines for the lower back, the back extension machine in particular, isolate the muscle. You sit in a padded seat, push against a pad, and the machine holds every other muscle still. Real lower back strength has nothing to do with that.
Chair exercises train the back to work with the rest of the body, holding the trunk steady while the arms or legs move. That’s the muscle pattern that protects the back in daily life. When you pick up a shopping bag, reach for something on a shelf, or get up out of a chair, the low back has to stabilize while the limbs work.
Chairs are also available and unintimidating. No journey, no gym membership, no waiting for a piece of kit. And you can start easier than any machine allows, because you can reduce the range or add support with a hand.
Seated Pelvic Tilts
Mobilizes the lower back and wakes up the deep muscles that stabilize it. This is the move that gets the back talking to itself again, and it’s the one to do first because it prepares everything that follows.
Muscles Trained: Deep core stabilizers, lower back muscles
How to Do It:
- Sit tall on a sturdy chair, feet flat on the floor, hip-width apart
- Place hands lightly on your thighs
- Tilt the pelvis forwards, arching the lower back slightly and lifting the chest
- Then tilt the pelvis backward, rounding the lower back and tucking the tailbone under
- Move slowly between the two positions, breathing normally
- Do 10 slow tilts
Avoid These Mistakes:
- Move from the pelvis, not the shoulders. The movement should come from the pelvis rocking under you, not from the upper back rounding and unrounding
- Don’t rush. Moving too fast means you can’t feel the pattern
- Don’t hold your breath
Form Tip: For very stiff backs, reduce the range to whatever feels comfortable and build up over weeks. Small movements done properly train the muscles just as well as large ones.
Seated Hip Hinge
Teaches the low back to stay long while the body bends forward, which is the most useful pattern in daily life for protecting the back. Every time you pick something up off the floor, this is what you should be doing.
Muscles Trained: Lower back, glutes, hamstrings
How to Do It:
- Sit tall on a sturdy chair, feet flat on the floor
- Fold your arms across your chest
- Keeping the spine long and the chest tall, tip forward from the hips
- Only go as far as you can without rounding the lower back
- Return to upright by squeezing the glutes as you come up
- Do 10 reps
Avoid These Mistakes:
- Don’t round the lower back to reach further. The point is to hold the spine long while the hips do the moving
- Don’t tip so far that you fall out of the chair, which nobody thinks will happen until it does
- Don’t forget the glute squeeze on the way up
Sit-To-Stand
Trains the whole posterior chain, the glutes, hamstrings and low back muscles, in the exact pattern of standing up from a chair. This is the move most physios use to measure whether someone will stay independent, and it’s also one of the strongest builders of lower back resilience.
Muscles Trained: Glutes, hamstrings, lower back
How to Do It:
- Sit on a sturdy chair, feet flat on the floor, hip-width apart
- Fold your arms across your chest, or hold them out in front for balance
- Lean slightly forward at the hips
- Push through the heels and squeeze the bottom muscles to stand all the way up
- Sit back down slowly, taking 3 seconds
- Do 10 to 15 reps
Avoid These Mistakes:
- Don’t use momentum to throw yourself up. The value is in making the muscles do the work slowly
- Don’t drop into the chair, which trains nothing on the way down
- Don’t lift the heels at the start, which loads the knees instead of the glutes
Form Tip: If getting down to a normal chair is a challenge in itself, use a slightly higher chair or add a firm cushion to reduce the depth. A higher seat is less demanding on the legs and back.
Standing Hip Extension With Chair Support
Wakes up the glutes, the muscle that should be sharing the load of every hip movement with the lower back. Weak glutes mean the low back is doing double duty. Strong glutes mean the back is left alone.
Muscles Trained: Glutes, lower back
How to Do It:
- Stand behind a sturdy chair, both hands lightly on the back
- Stand tall with a soft bend in the supporting knee
- Keeping the working leg straight, sweep it backward, squeezing the glute at the top
- Only go as far as you can without arching the lower back
- Lower with control
- Do 10 reps on one side, then swap
Avoid These Mistakes:
- Don’t arch the lower back to swing the leg further behind you. The range is small and the squeeze is everything
- Don’t lean forwards over the chair, which takes the glute out of the work
- Don’t lock the supporting knee
Choosing The Right Chair
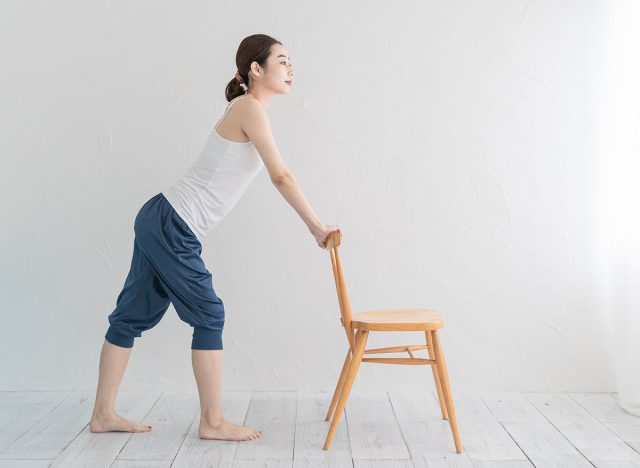
A sturdy dining chair is the ideal piece of kit. No wheels, no folding chairs, no chairs that flex or wobble under load. The seat should be flat and firm, and the height should let you sit with your feet flat on the floor and your knees at roughly 90 degrees.
If balance is a concern, place the chair against a wall so it can’t tip backward, and have a second chair in front of you within arm’s reach for the standing exercises. For the sit-to-stand, use a slightly higher chair or add a firm cushion to reduce the depth.
If getting down to a normal chair is a challenge in itself, start with the pelvic tilts and hip hinge only, and add the sit-to-stand once your leg strength has caught up. There’s no rush. The seated moves alone will make a difference in the first fortnight.
Fitting It Into Your Week
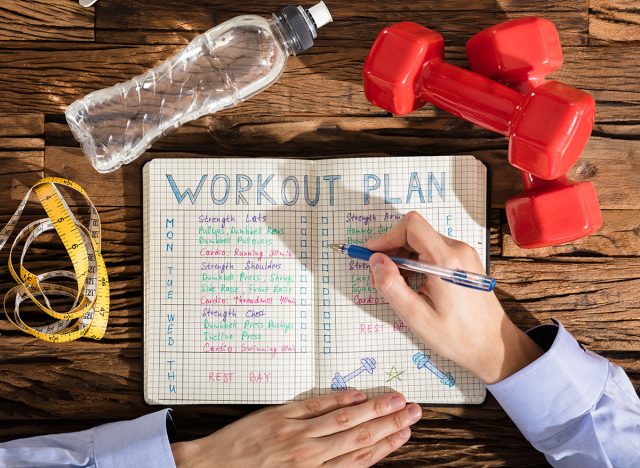
Three to four days a week is the sensible starting point. Daily is fine too, because the loading is low, but three days is enough to see change if that’s what fits your life.
Two sets of the reps described for each of the four exercises is the target. That comes to around 10 to 12 minutes with short rests between sets, which is realistic to fit in before breakfast or after a walk.
After a fortnight, add a third set to the pelvic tilts and the hip extension. After a month, hold each rep of the hip extension for 2 seconds at the top, which sharpens the glute activation and builds strength faster than adding more reps.
What To Expect And When

Two weeks in, most people notice that everyday tasks feel less awkward. Bending forwards to tie a shoelace, reaching down for a dropped remote, standing up from a low chair. These little movements become less of a production.
By 4 weeks, the persistent lower back ache that many over 60s carry around has usually eased. Not always completely, but enough to notice a difference across the day. Walks feel easier because the back is no longer having to do the glutes’ job as well as its own.
By 6 weeks, the back feels genuinely stronger. Family members sometimes comment that you’re moving better or standing taller. Strength gains in the sit-to-stand at this point are typically 30 to 50 percent, which is a real change in one of the most useful movement patterns you have.
The bigger picture is that this isn’t a six-week program. Lower back strength is something you keep for life if you keep doing the work. Twelve minutes a few times a week is a small, ongoing investment for a back that keeps working.
When To Check With A Doctor

Anyone who’s had recent back surgery, a diagnosed disc problem, spinal stenosis, osteoporosis, or a fracture in the past year should speak to their GP or a physio before starting. Some of these exercises might need modifying, and personalized advice is worth having.
Anyone with pain that shoots down a leg, especially past the knee, should also check in with a doctor first. That kind of pain often points to a nerve issue rather than a muscle one, and needs a proper assessment before any exercise program.
The general warning signs to stop are sharp pain rather than a steady muscle burn, pain that lingers more than a few hours after the session, any pain or numbness that spreads down a limb, and any sudden loss of bladder or bowel control. The last one is rare but serious, and needs immediate medical attention.
For everyone else, start gently, build up gradually, and stop any move that produces sharp pain. A steady muscle effort is what you’re aiming for.