4 Gentle Exercises That Rebuild Ankle Mobility Better Than Stretching After 60


Many people over 60 think their ankles are stiff because their muscles are tight. That’s why they spend months stretching their calves and rolling their feet, yet many still struggle with poor balance, limited mobility, and ankles that feel stiff every time they get out of bed.
What if the problem isn’t a lack of flexibility? One of the phrases I often use with my clients is: micro-movements determine macro-movements. The small movements occurring within the foot and the ankle influence how the entire body moves. When those small movements become restricted, unstable, or poorly conditioned, the effect can travel far beyond the ankle itself.
As a fitness trainer, I’ve found the real issue often isn’t tightness at all. It’s that your brain no longer trusts the information it’s receiving from your ankle. These four gentle exercises can help you rebuild lasting ankle mobility by improving that connection, without leaving your chair.
Why Stretching Isn’t Enough
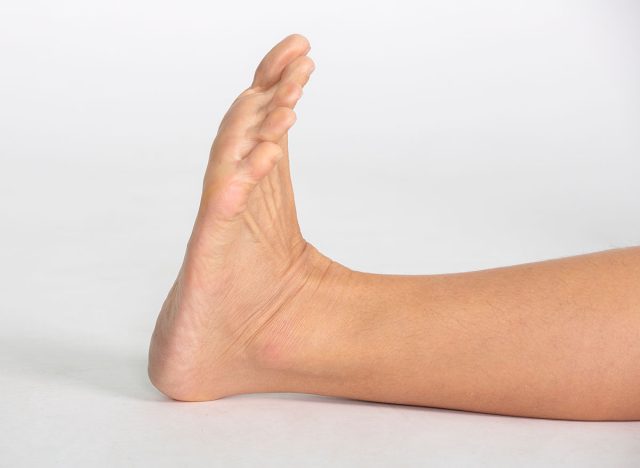
The ankle isn’t just a joint. It’s one of the body’s most important sources of information about balance, position, and movement. The ligaments surrounding the ankle constantly send information to the brain about joint position, movement, and stability.
The brain then uses that information to determine how much mobility and stability to allow. When those signals become distorted, stiffness is often the result. In many cases, one ligament may be functioning in a shortened position, while others may be functioning in a lengthened or less supported position.
The brain receives information suggesting that one side of the joint lacks space, while the other side lacks stability. The result is a protective response, and you experience that response as stiffness. The body is essentially trying to protect the joint from moving into positions that it perceives as unsafe.
This is one reason why stretching alone does not always solve the problem. Stretching can be absolutely beneficial. However, stretching the wrong structure or focusing exclusively on mobility without addressing stability may fail to change the underlying message being sent to the brain. The nervous system must trust a range of motion before it allows you to use it. If that trust is not present, the body often continues producing tension and stiffness regardless of how much stretching is being performed.
Mobility is not something you force into a joint. Mobility is something the nervous system allows.
Use It Or Lose It

What we’re talking about here is called proprioception, and it has one simple rule: use it or lose it. The body becomes efficient at whatever it practices most frequently.
If the ankle is repeatedly exposed to the same movements, the same walking surfaces, and the same loading patterns year after year, sensory awareness can begin to decline. Previous injuries can further complicate the picture.
If you have experienced ankle pain, stiffness, or restricted movement for more than several months, the nervous system may begin treating that pattern as normal. Even after tissues heal, the brain may continue producing the same protective response that was originally created to protect the joint. This is why some people continue feeling stiff long after the original injury is resolved. The old message remains.
One of the goals of proprioceptive training is to help replace that old message with a new one. Instead of reinforcing stiffness, we teach the nervous system that the ankle is capable of both stability and mobility at the same time.
Stability Before Mobility

That distinction matters, especially during gait patterns. Most people focus only on mobility. I generally start with stability, and I get the stability via proprioceptive training.
So before asking the ankle to move further, I want to know what the joint can properly sense and control. The clearer the information coming from the ligaments, the better the brain can organize movement throughout the entire body. Once stability improves, mobility often flows naturally.
This is especially important because the ankle links directly with the foot, which serves as the body’s first point of contact with the ground. Every step you take transfers force through the ankle before that force moves into the knee, hip, pelvis, and spine. To the degree the ankle becomes excessively stiff or excessively unstable, movement quality throughout the entire body can begin to suffer.
Balance declines, walking mechanics change, the risk of falls increases, and over time, the effects can travel upstream into other joints, including your lumbar spine, neck, and shoulders.
Lateral And Medial Ligament Loading
Exercise number one works both the lateral and the medial ligaments. There are several ligaments and even some tendons covering the outside of the ankle as well as the inside of the ankle. You can see exactly which ones we’re targeting here: medial and lateral ankle ligaments. We won’t get into all the names, but what we want to do with this exercise is improve the way that your ankle communicates with your brain.
As I push my knee in, I’m pushing more weight into the outside of my foot, creating a stretch on the lateral ligaments. As I push my knee out, I’m creating stretch on the medial ligaments by loading the inside of my foot. It’s very subtle, but I’m actually moving my foot in the opposite direction that I’m moving my shin and my knee. That’s what allows me to get the different tension into the ankle joint. The whole goal is to start to build fluid mobility and stability by enhancing the proprioception.
Muscles Trained: Lateral and medial ankle ligaments and tendons
How to Do It:
- Start seated with one leg.
- If you can, lift the big toe and hold it into extension. If you don’t have that ability yet, keep the whole foot on the ground.
- Keep the foot completely fixed on the floor.
- Push your knee inward, loading the outside of your foot to stretch the lateral ligaments.
- Push your knee back outward, loading the inside of your foot to stretch the medial ligaments.
- Move only the shin and knee in and out. The foot doesn’t follow.
- Set a timer for 90 seconds and gently work back and forth.
- Complete one leg, then move on to the next.
Recommended Sets and Reps: 90 seconds per leg.
Form Tip: The foot stays completely fixed while the knee moves. That opposition is what creates the tension the ligaments need.
Anterior Ligament Control
Once we’ve completed that, we’re going to work all the anterior ligaments and tendons crossing the ankle joint. You can see them here: anterior ankle ligaments. Again, we’re not going to name all of them. We’re just going to focus on the concept: I want to build better proprioception, better awareness in this part of my ankle.
I’m going slow and pretty meticulous, because remember, the goal isn’t how fast you can go or how many reps you can do. It’s how clear a connection you can get between your brain and, in this case, the ligaments of the front side of the ankle joint.
Muscles Trained: Anterior ankle ligaments and tendons
How to Do It:
- Begin by simply lifting the foot and setting it down, with as much control as you can.
- If that’s easy enough, add resistance by bringing the other foot on top.
- Use the top foot to push down, almost like a dumbbell would for resistance.
- Lift your working foot while keeping pressure on it with the other foot.
- Set a timer for 90 seconds and work slow, controlled repetitions.
- Complete one leg, then move right on to the next.
Recommended Sets and Reps: 90 seconds per leg.
Form Tip: Slow and steady is the way to train this proprioception. Clarity of the connection matters far more than speed or rep count.
Posterior Achilles Work
Our final exercise is for the posterior ligaments, which is predominantly the Achilles tendon. Here’s a look at that area: posterior ankle ligaments. Tendons and ligaments aren’t actually interchangeable, but for the purposes of proprioception, that’s what we’re talking about today. There are lots of proprioceptors in ligaments and tendons, and for this last one, we’re focusing mainly on the Achilles tendon.
What I like to do is bring in a little block. If you don’t have a block, you can use a book or roll up a towel. Then I put my foot on the block and, same as before, use slow and controlled movements. I’m really mentally focusing on the feeling in that posterior chain, in this case the Achilles tendon crossing the ankle joint.
Muscles Trained: Posterior ankle ligaments and the Achilles tendon
How to Do It:
- Stay seated and place a block, book, or rolled-up towel under your foot.
- Roll up onto the block, then slide the foot down.
- Repeat, lifting up onto the block and rolling down.
- Move nice and slow and controlled throughout.
- Set a timer for 90 seconds and do each foot for the full 90 seconds.
Recommended Sets and Reps: 90 seconds per foot.
Form Tip: Mentally focus on the feeling in the Achilles tendon as it crosses the ankle joint. The mind-muscle connection is the point of the exercise.