4 Daily Exercises That Build Full-Body Strength Better Than Gym Workouts After 60

Most people over 60 have spent decades being told to take it easy, and they’ve taken that advice to heart. So when they finally decide to build some strength at home, they reach for exercises that are far too gentle to do anything at all.
After almost 40 years as a personal trainer, and the last 20 running TRAINFITNESS, I’ve worked with thousands of people in exactly this position. They want to get stronger but can’t or won’t go to the gym. Here’s the good news: you don’t need to. Four well-chosen exercises, done at home, can rebuild full-body strength faster than most people expect.
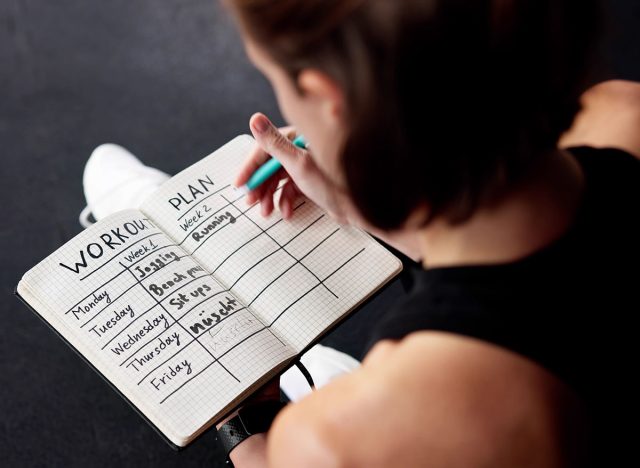
All you need is a sturdy chair, a wall, and about a square yard of floor space. These four exercises can help you rebuild real strength without ever stepping foot in a gym.
The Real Challenge After 60

Honestly, the biggest challenge isn’t physical; it’s mental. Most people over 60 have spent decades being told to take it easy, and they’ve internalized that message. When they finally decide to train at home, they pick exercises that are far too gentle to actually build strength. Wall push-ups for 10 reps, a couple of stretches, maybe some marching on the spot. None of that is bad, but it’s nowhere near enough to trigger the kind of adaptation that builds real strength.
The second issue is consistency. Without a class to attend or a trainer waiting, home workouts get skipped. Life gets in the way, and three sessions a week become one, then none. The exercises themselves aren’t usually the problem; it’s the structure around them.
There’s also a practical issue around space and equipment. Lots of people over 60 don’t have a spare room for a home gym and don’t want to spend hundreds of dollars on equipment they’re not sure they’ll use. The exercises I recommend solve this completely. You need a sturdy chair, a wall, and roughly a square yard of floor space. That’s it.
The final challenge is knowing what “hard enough” feels like. After 60, we tend to stop pushing ourselves physically. When I ask people to rate how difficult a set felt, they’ll often say really tough when their heart rate has barely moved. Your muscles need to feel genuinely worked for them to get stronger. Not painful, not dangerous, but properly challenged.
Why These Exercises Work

The exercises I’m going to take you through work because they’re compound movements. They train multiple muscle groups at the same time and they mirror the things we actually do in daily life. Standing up, sitting down, picking things up, pushing doors open, reaching up to a high shelf. Every one of these is a movement pattern, and the more we train those patterns, the better we get at them.
Isolation exercises, think bicep curls or leg extensions, have their place, but they’re not where you should start at home. You get far more for your time by training movements that work the whole body at once. A sit-to-stand works your quads, glutes, hamstrings, core and balance simultaneously. That’s four or five separate exercises rolled into one, and it transfers directly to getting off the sofa or out of the car.
These exercises also work because they’re scalable. You can make any of them easier or harder without needing different equipment. If a wall press is too easy, you step further back. If a chair squat is too hard, you use a higher seat or hold the back of another chair for support. This means the same four exercises can take you from absolute beginner to genuinely strong without ever needing to change your routine.
The other big factor is bone loading. After 60, particularly for women post-menopause, bone density becomes a serious concern. Weight-bearing exercises where you support your own bodyweight against gravity send signals to your bones to maintain and rebuild density. Sitting in a chair lifting tiny weights won’t do this. Standing up and sitting down 30 times will.
Sit-to-Stand
This is the single most useful exercise I prescribe for people over 60, and it’s the one I’d choose if I could only pick one. It directly trains the movement pattern you use dozens of times every day. Research has repeatedly demonstrated that the ability to stand up from a seated position without using your hands is one of the strongest predictors of independence in older age. Train it, and you’re protecting your ability to live independently.
Muscles Trained: Quads, glutes, hamstrings, core
How to Do It:
- Sit on a sturdy dining chair with your feet flat on the floor, roughly hip-width apart
- Position your feet so they’re slightly behind your knees, not stuck out in front
- Cross your arms over your chest, or hold them out in front for balance
- Lean your chest forward slightly (think nose over toes) and push down through your heels and the middle of your feet
- Stand up fully, squeezing your glutes at the top
- Lower yourself back down slowly, taking around three seconds to sit back down
Common Mistakes to Avoid:
- Don’t rock forward to gain momentum and then flop back down into the chair. The whole point is to make your muscles do the work.
Recommended Sets and Reps: 3 sets of 10 to 15 repetitions
Form Tip: Slow it down on the way down. That’s where the strength is built.
Wall Press
The wall press is a full-body push exercise. It’s the safest way for someone over 60 to start building upper-body pushing strength without any of the wrist or shoulder issues that can come with floor push-ups. As we age, our upper body strength declines faster than our lower body strength because we use our arms for less heavy lifting in daily life. This exercise reverses that.
Muscles Trained: Chest, shoulders, triceps, core
How to Do It:
- Stand facing a wall, around an arm’s length away
- Place your hands on the wall at shoulder height, slightly wider than shoulder-width apart
- Step your feet back so your body forms a straight line from your head to your heels
- Keep your core tight and don’t let your hips sag or stick out
- Bend your elbows and lower your chest towards the wall, keeping your elbows at around a 45-degree angle to your body
- Press back through your hands to the starting position
Common Mistakes to Avoid:
- Don’t let the hips sag or pike up. Your body needs to stay in one straight line throughout the movement.
Recommended Sets and Reps: 3 sets of 10 to 15 repetitions
Form Tip: If you find it too easy, take a step further back from the wall. If it’s too hard, step in closer. That simple adjustment changes everything.
Standing Hip Hinge With Reach
This exercise trains the hinge pattern, which is what you use every time you bend over to pick something up. After 60, the lower back becomes a real problem for a lot of people, and it’s almost always because they’ve stopped using their hips properly and started bending through the lower back instead. This exercise retrains your body to bend at the hips and protect the spine.
Muscles Trained: Glutes, hamstrings, back
How to Do It:
- Stand with your feet hip-width apart, knees soft (not locked, not bent)
- Place your hands on the front of your thighs
- Push your hips backward, as if you’re trying to touch a wall behind you with your bottom
- Let your hands slide down the front of your legs as your chest tips forward
- Keep your back flat, not rounded, and look at the floor about three feet in front of you
- Stop when you feel a stretch in the back of your legs (this might be at your knees or further down, depending on your flexibility)
- Squeeze your glutes to drive your hips forward and stand back up
Common Mistakes to Avoid:
- Don’t bend the knees too much and turn this into a squat. The knees should barely move. The movement is at your hips.
- If you’re seeing your knees travel forward over your toes, you’re squatting, not hinging.
Recommended Sets and Reps: 3 sets of 10 to 12 repetitions
Form Tip: Keep your back flat throughout, never rounded, and let the movement happen at your hips.
Standing March With Arm Drive
This is the cardio and balance element of the routine. It trains your core stability, your single-leg balance, and your coordination, all at once. After 60, balance issues become one of the leading causes of falls, and the only way to keep your balance sharp is to challenge it regularly. This exercise also raises your heart rate enough to give you some real cardiovascular benefit without putting any stress on your joints.
Muscles Trained: Core, hip flexors, plus balance and coordination
How to Do It:
- Stand tall with your feet hip-width apart, near a wall or counter you can touch if needed for balance
- Lift your right knee up towards waist height while driving your left arm forward (opposite arm to leg, like you’re marching)
- Lower your right foot and immediately lift your left knee, driving your right arm forward
- Keep your core tight and stand tall throughout; don’t let yourself slump forward
- Start slow and controlled, then build up speed as you get more confident
Common Mistakes to Avoid:
- Don’t rush the movement and lose form. People start to lean side to side as they march faster, which actually trains poor balance rather than good balance.
Recommended Sets and Reps: 3 sets of 30 to 60 seconds
Form Tip: Slow it down. Stand tall. Make every knee lift count.
Fitting It Into Your Week
Three sessions a week is the sweet spot. Monday, Wednesday, and Friday work for most people because it gives you a day of recovery between sessions and keeps the weekend free. If three days feels like too much to start with, even two sessions a week will give you real results.
A session should take you 20 to 25 minutes or so, including a short warm-up. Start with a couple of minutes of marching on the spot and circle your arms to get the blood pumping. Then work through each of the four exercises in order: sit-to-stand, wall press, hip hinge, and standing march. Do the full 3 sets of one exercise before moving on. Rest for 60 to 90 seconds between sets.
The best time of day depends entirely on you. If you’ve got more energy in the morning, train then. If you find it easier to fit in after lunch or in the early evening, do that. The best time is the time you’ll actually do it. I’d avoid training right before bed because the workout can leave you a bit too alert for sleep.
One thing I’ll say strongly is don’t skip the slow lowering phases. Three sessions a week of these four exercises, done properly with slow, controlled movement, will produce far better results than five sessions a week of rushed, sloppy reps. Quality over quantity, every time.
You can also break the session up if you need to. Two of these exercises in the morning and two later in the day still counts. The body responds to the training, not to whether it’s done in one block or two.
What to Expect in 4 to 6 Weeks

Most people don’t expect how quickly the initial changes happen, and these changes are often the most encouraging. In the first couple of weeks, you won’t really see any strength gains, but you’ll feel different. This is when our nervous systems start firing more efficiently, making the movements feel easier. Sit-to-stand will go from a movement that requires intense concentration to something that just flows. You should also notice your sleep improving and your energy levels feeling more stable through the day. These changes are in the nervous system and circulation, not the muscles, but they are real, and they matter.
By the third and fourth week, the changes get more obvious. Climbing the stairs at home stops being something you notice. You used to get to the top and need a moment; now you’re at the top and carrying on with whatever you were doing. Getting up off the couch happens in one smooth movement rather than two attempts. Carrying the groceries in from the car feels lighter, even though the bags weigh the same. This is your muscles getting stronger and your joints moving more smoothly through their full range.
By the fifth and sixth week, you will see measurable gains in your strength. You should be able to do more reps of each exercise than at the start, and the difficulty level you started at will now feel easy. This is the time to progress: more reps, slower tempo or a harder variation. Things you couldn’t do previously become possible, like standing on one leg while brushing your teeth, bending down to tie your shoes without having to think about it, or putting something in a high cupboard without feeling a twinge in your shoulder.
Overall, the changes after 4 to 6 weeks are just as much about your confidence as they are about strength. No more hesitating before stepping off a curb. You trust your legs again when walking on even ground. Picking up your grandkids or pets is possible without having to brace for back pain first. Quality of life changes like these are what most people are actually training for, even if they don’t realize it.
Progress isn’t always linear. Some weeks you’ll feel like you’re flying, others you’ll feel flat. That’s completely normal at any age, but it’s especially true after 60 when sleep, hydration, stress, and life in general affect your training day to day. The trick is to keep turning up. Six weeks of consistent training will always beat two weeks of perfect training followed by giving up. Show up three times a week, do the work properly, and the results will come.