The Ninja Foodi Deluxe Is the Magical Appliance I’ve Been Waiting for My Entire Life
Calling all meal preppers: If you haven’t gotten your hands on the Ninja Foodi Deluxe, you need to. Why? You can whip up your entire meal prep in it without having to use any other equipment. That’s right, no need to turn on the stove or pre-heat the oven—this machine does it all.
You may recall the first Ninja Foodi multi-cooker appliance that debuted last year, but this new and improved model is slightly bigger and has an enhanced user interface so you can air fry or pressure cook food more efficiently.
I love to pack my lunch, and the Ninja Foodi Deluxe helps me prepare it all. Here’s how I meal prep a week’s worth of lunches with it.
Before I show you just how I use the appliance to prepare a week’s worth of lunches, though, here’s a little explainer on all of its functions.
What is the Ninja Foodi Deluxe?
The Ninja Foodi Deluxe is the multi-cooker that does it all—whether you want to air fry vegetables instead of sautéing them or pressure cook a roast in a fraction of the time it would take in the oven. This new and improved appliance has nine different functions: Pressure cook, air fry, steam, slow cook, yogurt (yes, you can make your own yogurt with this), sear/sauté, bake/roast, broil, and dehydrate (apple chips anyone?).
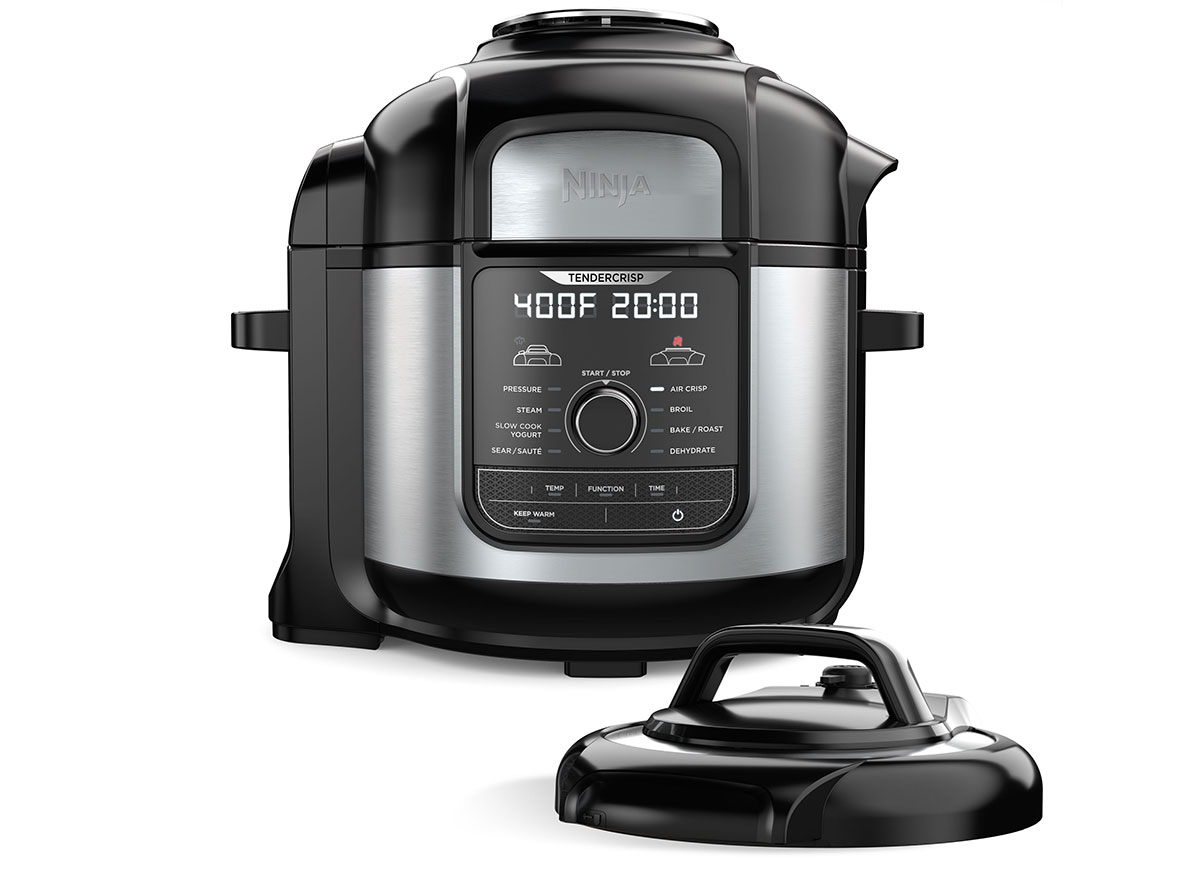
The 8-quart pressure cooking pot is non-stick and free of man-made chemicals PFOA and PTFE and can cook up to 8 pounds of meat, including a whole chicken. It’s also a breeze to handwash. The 5-quart Cook and Crisp air frying basket is also free of toxic chemicals and even dishwasher safe. You can fit as large as a 7-pound chicken in the basket.
The interface allows you to easily select the function you wish to use as well as the time and even the temperature, should you want to manipulate the temperature that’s already pre-set in the respective function.
What makes the Ninja Foodi Deluxe better than traditional cooking methods?
It’s a more efficient and healthier way of cooking and crispening foods. Want to make French fries? No problem. Slice the potato into slivers and drizzle them with olive oil and seasonings. Much healthier than dipping the potato spears into a vat of bubbling frying oil, right?
While you cannot air fry and pressure cook at the same time, you can pressure cook two different foods at once thanks to the stainless steel rack, which enables you to layer foods!
Now that you have a better idea of what all the Ninja Foodi Deluxe encompasses, here’s how I use it to complete my weekly meal prep.
First, I used the pressure cooker to cook meat.
This week I picked up a 1.65-pound turkey boneless turkey breast from Whole Foods and lightly coated it in olive oil as well as an assortment of seasonings including a blend of Tuscan spices, sage, garlic salt, and smoked paprika.
First, I poured about 1 cup of water into the pressure cooker basket, and then placed the wire rack inside, followed by the seasoned turkey breast. Next, I sealed the top with the pressure lid, which is separate from the air crisper lid that is attached to the appliance. On this lid, you’ll see a little knob at the top. This allows the food to ventilate when twisted to the right. During the cooking process, you want to twist the knob to the left so that it’s sealed. I then turned the dial to the pressure function on the top left side of the interface and set the cook time to 25 minutes.
Just like an oven, the Ninja Foodi Deluxe also takes a few minutes to pre-heat. After the 25 minutes were up, I let the meat rest for 10 minutes in the “keep warm” function that inevitably follows after pressure cooking. After 10 minutes, I used a wooden spatula to gently move the knob to the right so that the meat could ventilate. Note, it’s important to avoid using your hand to move the knob as the steam that comes out could potentially burn you.
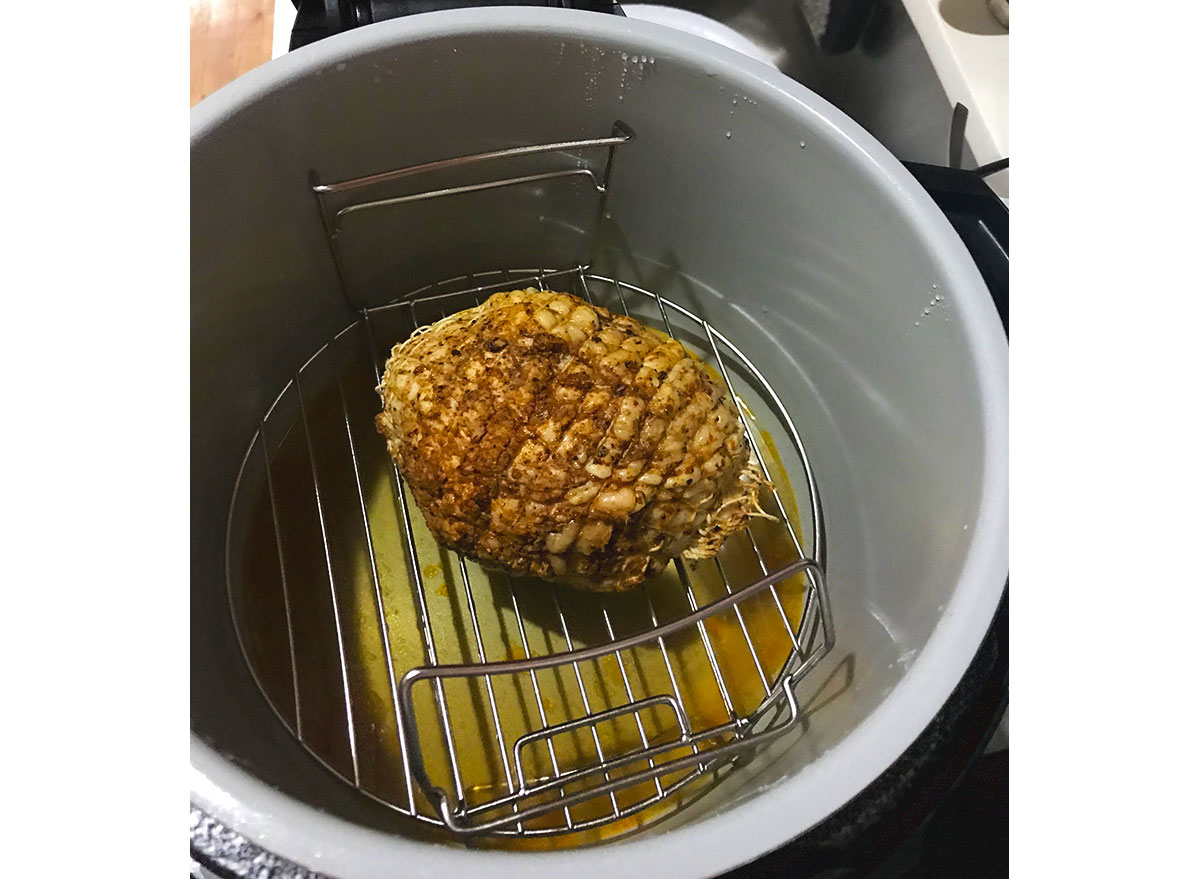
Here’s what the turkey breast looked like after it had time to rest. I then stuck a meat thermometer into the center of the meat to ensure it was at the desired internal temperature of 165 degrees (for red meat, it’s less). The meat came out tender and perfectly seasoned.
Next, I air-fried sweet potatoes, broccoli, and mushrooms.
While the turkey was cooking, I sliced and cubed four sweet potatoes as well as tossed them in a light drizzle of olive oil and spices. I used Jamaican curry, rosemary, and ground black pepper.
After the pressure cooking pot cooled off, I washed it and then put the air fryer basket into it. I then dumped the bowl of seasoned sweet potatoes into the basket, turned the dial to the top right function called air crisp—which is automatically set to 390 degrees Fahrenheit. I set the cook time to 25 minutes. For the air frying function, you’ll use the lid that’s attached to the appliance. Halfway through cooking, I stirred the potatoes with a wooden spatula.
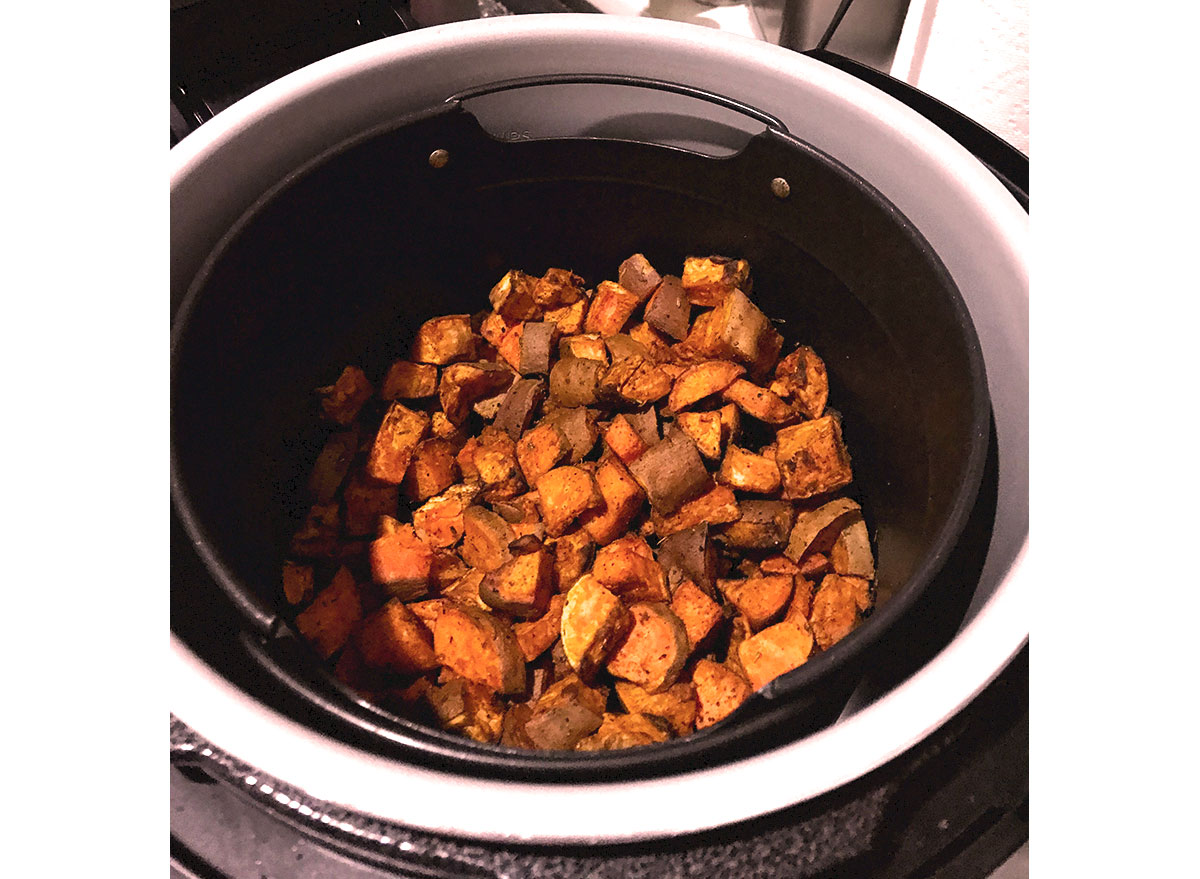
The texture was perfect! Nice and soft on the inside, while slightly crispy on the outside. After the sweet potatoes, I air-fried a small head of broccoli, three packaged containers of fresh mushrooms, and half of a small (chopped) red onion, all coated in a little olive oil as well as various spices. I followed the same steps as the sweet potatoes, but only air-fried for 20 minutes.
Finally, I made hard-boiled eggs.
You can’t forget about breakfast, right? I used the 5-5-5 method using the pressure cooker function. I put about a cup of water into the pressure cooker pot, followed by the wire rack and a half dozen eggs.

I used the pressure function for five minutes, let the eggs keep warm for another five minutes, moved the knob on the lid so it could quickly vent, and then using tongs, removed the eggs from the appliance and into a pre-made ice bath for five minutes. Tap the top and bottom of the eggs lightly on the table and then gently roll them along the surface. This will help you easily peel the softened eggshell off.
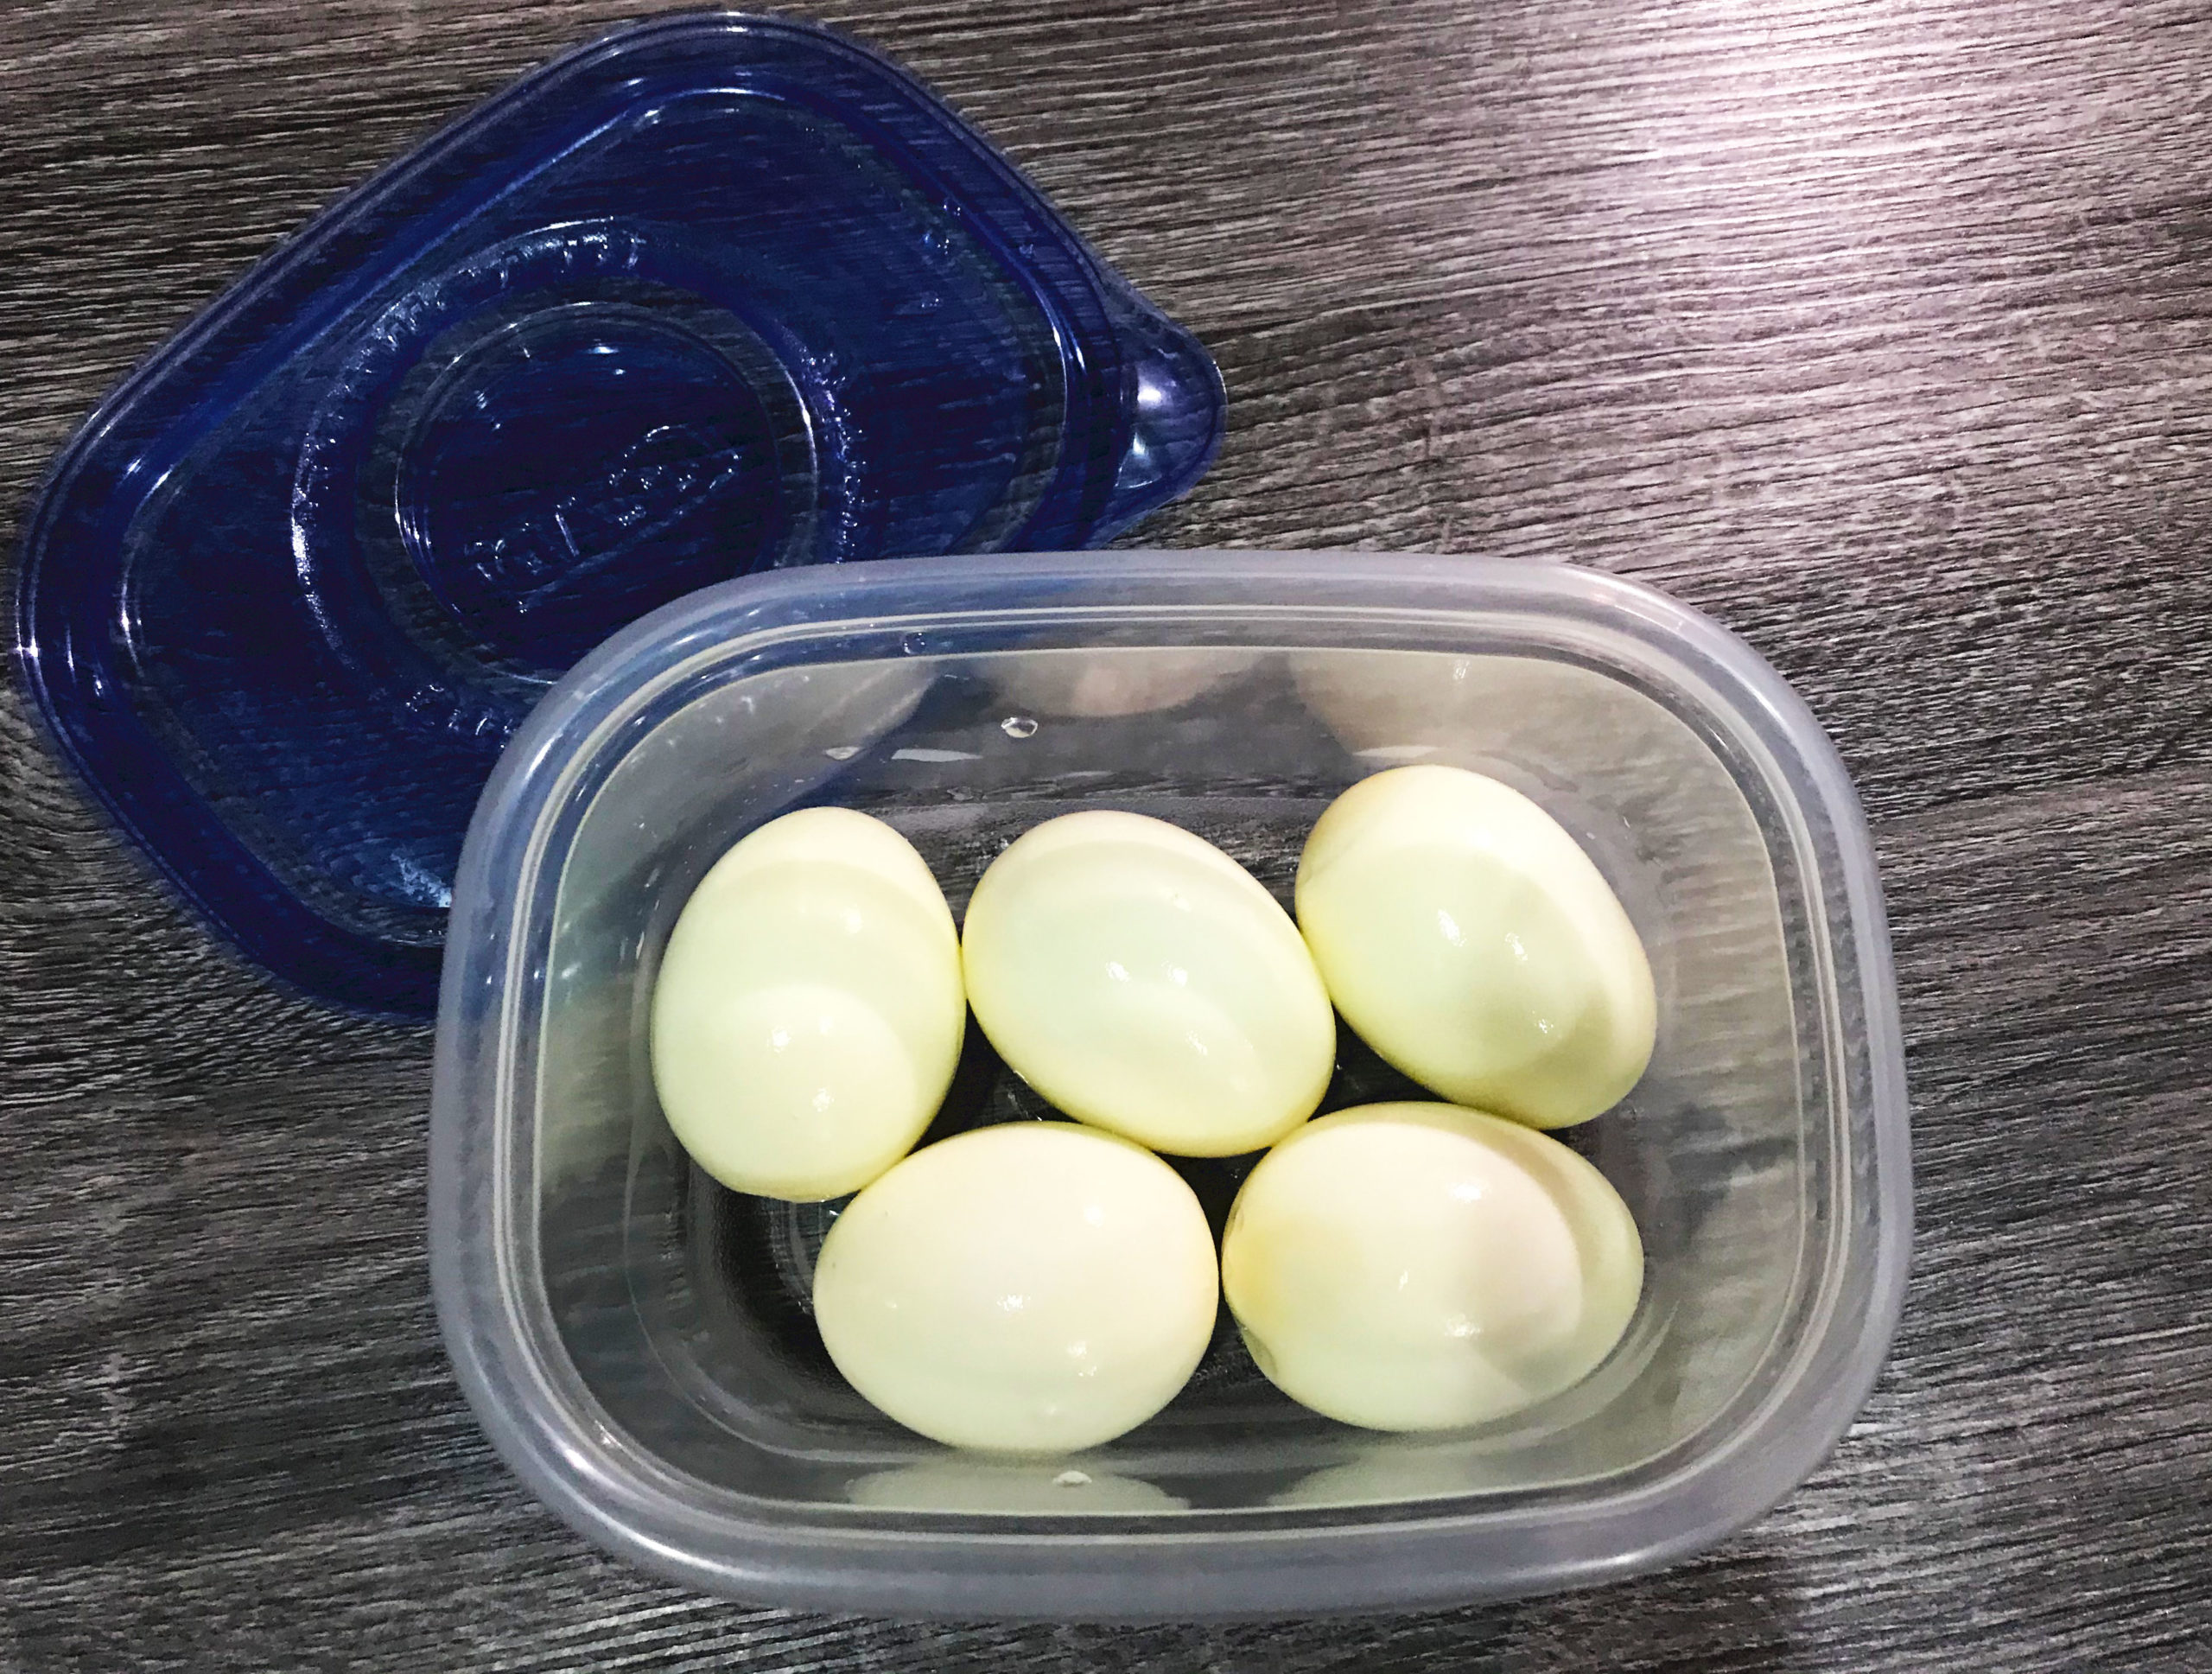
I had one egg casualty during the pressure-cooking process. It was still OK to eat, but for the sake of the picture, I did not include it.
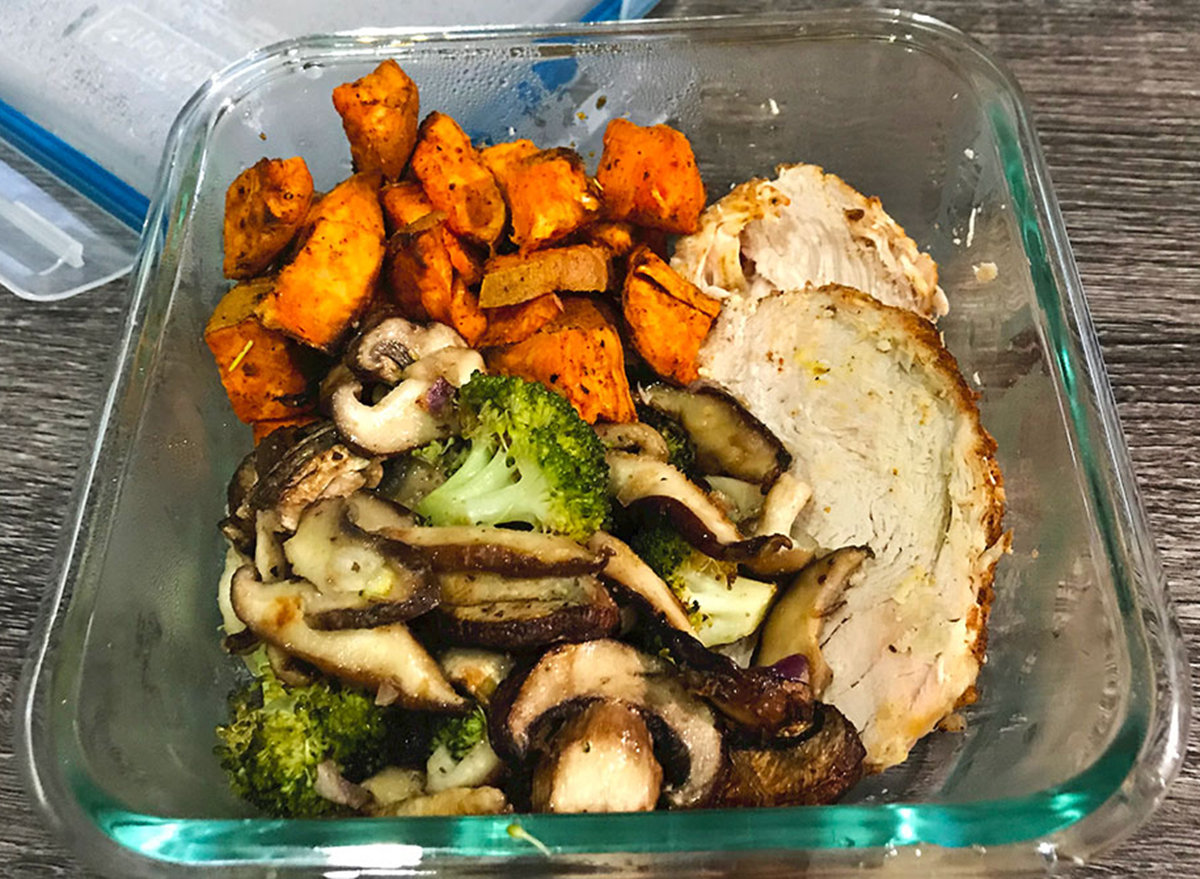
Now, my lunch is ready to go.
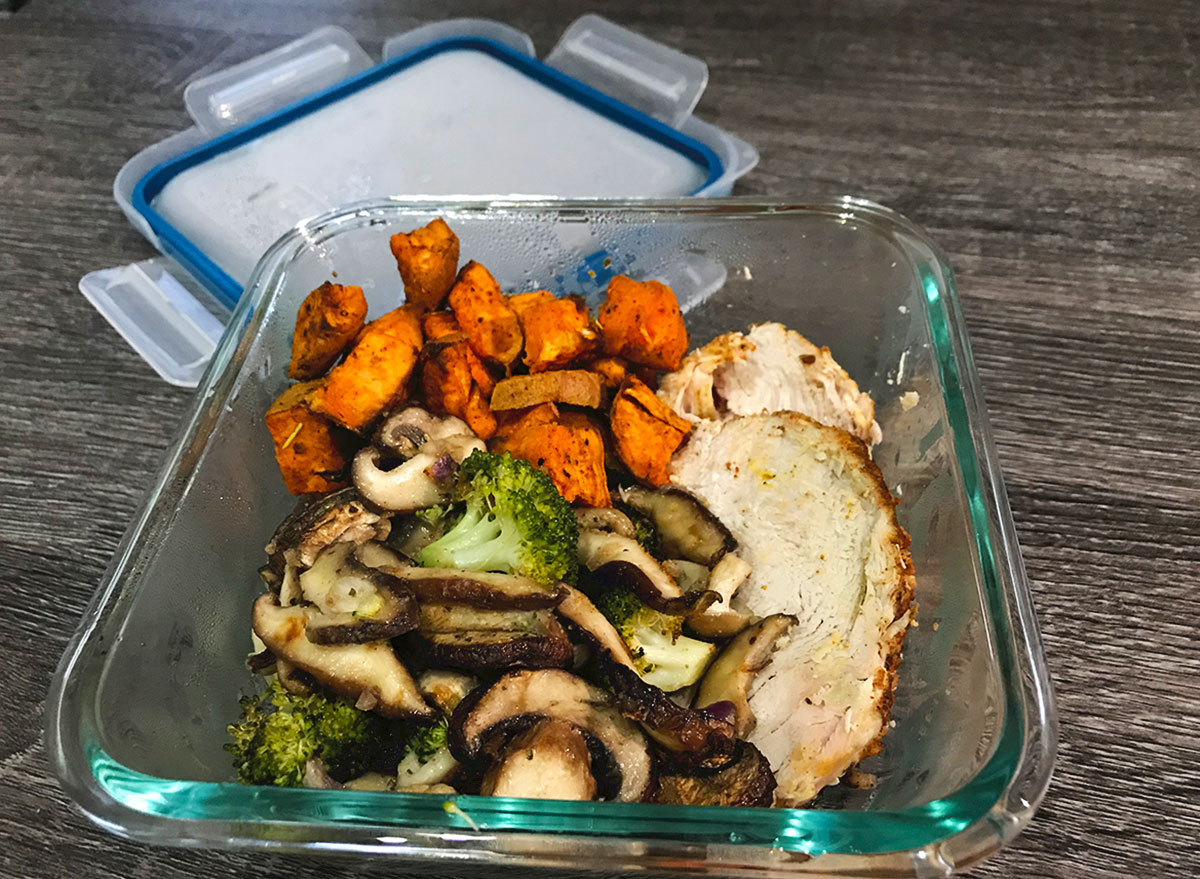
Voila! I made enough food for about four to five lunches. I loved how I didn’t have to dirty a bunch of pans or have a lot of different foods cooking all at once because I have definitely burned things that way. The Ninja Foodi Deluxe certainly makes cooking so much easier.