4 Low-Impact Standing Exercises That Flatten Stomach Fat Faster Than Crunches After 60
Stomach fat in older adults is one of the most common concerns clients bring to me, and there’s a huge amount of misinformation about how to deal with it. I’ve been working as a personal trainer for almost 40 years and training the next generation of fitness professionals at TRAINFITNESS for the past 20. The good news is that low-impact standing exercises, combined with sensible eating, can make a real difference at any age. These four exercises can help you start chipping away at stomach fat without battering your joints.
Why Most Approaches Fail After 60

People over 60 are working against years of accumulated changes, and they’re often using exercise approaches that worked when they were younger but no longer suit their bodies.
The first issue is muscle loss. From around the age of 50, we lose about 1% of our muscle mass each year if we’re not trying to maintain it. Less muscle means a slower metabolism, which means the same eating habits that kept us lean at 40 now contribute to fat gain at 60. Most people don’t realize this is happening until they look in the mirror and wonder when their stomach started to change.
The second issue is hormonal. After menopause for women and as testosterone declines for men, bodies become much more efficient at storing fat, especially around the midsection. This visceral fat, the deeper fat that sits around our organs, is the most stubborn type and the most concerning for long-term health.
The third issue is that older clients often try to tackle stomach fat with high-impact workouts. Exercises like burpees, jumping jacks, and mountain climbers put a massive load through joints that may already be dealing with arthritis, previous injuries, or general wear and tear. The result is often a flare-up that stops training entirely for weeks, exactly the opposite of what you need when you’re trying to build consistency.
Low-impact standing exercises solve all three problems. We build and preserve muscle mass without battering the joints. We keep the heart rate elevated long enough to start chipping away at body fat. We engage the core through stabilization rather than through hundreds of repetitions on the floor, which is much more functional and far gentler on the spine.
Why Standing Beats Crunches
Crunches have been the go-to ab exercise for decades, but they’re genuinely one of the worst choices for most people over 60.
Crunches create repeated flexion of the spine. If you have any disc issues, osteoporosis, or simply the natural disc thinning that comes with age, that repeated forward bending is asking for trouble. Research has shown that this kind of spinal flexion under load can contribute to disc problems, and given that around half of women over 50 will experience an osteoporotic fracture, the last thing we want is to repeatedly load a flexed spine.
Crunches also primarily target the rectus abdominis, the muscle that runs down the front of the stomach. They do almost nothing for the deeper core muscles, the transverse abdominis and obliques, which are the ones actually responsible for keeping the midsection tight, supporting the lower back, and giving that flatter look around the waist.
Standing core exercises work the entire trunk as a unit. Our core has to fire to keep us upright, balanced, and stable while our arms or legs move. This is exactly how the core works in real life: when we reach for something on a shelf, carry shopping, or turn quickly to avoid bumping into someone.
There’s another benefit that gets overlooked. Standing exercises burn more calories than floor work because more of the body is working to stabilize us. We’re getting the strength benefit and a metabolic boost at the same time, which is exactly what we need for reducing stomach fat.
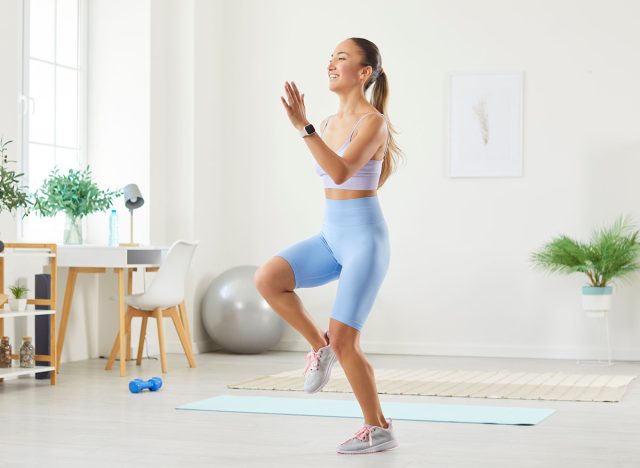
Standing March with Core Engagement
This exercise looks simple, but it’s working a lot of muscles at the same time. Each time we lift a knee, the standing leg has to stabilize (working the glutes and outer hip), the deep core has to fire to keep us balanced, and the hip flexor on the moving leg has to work against gravity. The fact that we’re constantly shifting weight from one leg to the other keeps the heart rate elevated, which is what we need for fat loss. It’s also brilliant for improving balance, which becomes really important as we get older.
Muscles Trained: Glutes, outer hips, hip flexors, deep core (transverse abdominis)
How to Do It:
- Stand tall with feet hip-width apart, arms at your sides
- Pull the belly button gently towards the spine to engage the deep core
- Lift the right knee up towards hip height in a controlled manner
- Lower the foot back down with control; don’t let it drop
- Lift the left knee up to hip height
- Continue alternating for the prescribed time
- Add opposite arm movements (right arm forward as left knee lifts) once the basic version feels comfortable
Avoid These Mistakes:
- Don’t let the standing leg collapse inwards; keep the knee tracking over the foot throughout
- Don’t round through the upper back; keep the chest lifted and imagine being pulled up by a string from the top of the head
- Don’t push through with poor form as fatigue sets in; slow the pace down rather than continuing with broken technique
Recommended Sets and Reps: 45 seconds of work per round.
Standing Wood Chop
This is a rotational movement, and rotation is something we do every single day but rarely train. The wood chop targets the obliques, the muscles on the sides of our stomach, which are responsible for that tighter waistline appearance. Because we’re using the whole body to generate the movement, we’re burning more calories than with isolation exercises, and we’re training the core in a way that translates directly to real-life movements like getting in and out of the car or putting the shopping away.
Muscles Trained: Obliques, hips, shoulders, full trunk
How to Do It:
- Stand with feet slightly wider than hip-width apart
- Hold a light dumbbell or a water bottle with both hands (start with 1-2kg)
- Bring the weight up to the right shoulder, keeping the arms relatively straight
- Pivot on the right foot as the weight comes diagonally down towards the left hip in a chopping motion
- Engage the core throughout, allowing the trunk to rotate naturally
- Return slowly to the starting position
- Complete all reps on one side before switching
Avoid These Mistakes:
- Don’t use only the arms to move the weight; the power should come from rotation through the trunk and hips, not from the shoulders
- Don’t rush the movement; if you’re feeling it in the arms more than the stomach, slow down and let the hips and core do the work
Recommended Sets and Reps: 10 to 12 reps each side per round
Form Tip: Think of the arms as along for the ride. The hips and core drive everything.
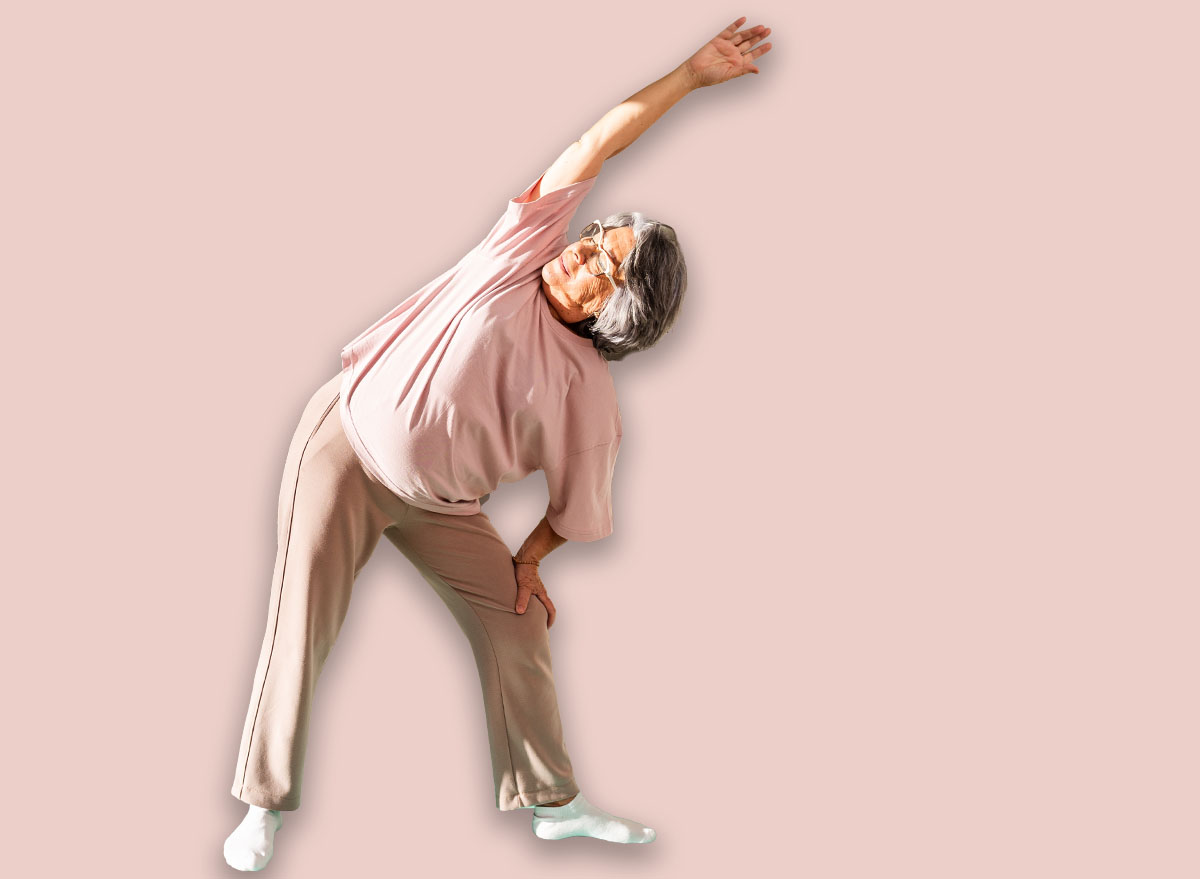
Standing Side Bend with Reach
This targets the obliques directly while also improving the mobility of our spine, which tends to stiffen as we age. Reaching overhead lengthens the side of the body and creates a stretch through the lats and the side of the torso, then the controlled bend works the obliques on the opposite side. It’s a two-for-one exercise that improves how we look around the waist while also helping with the kind of side-to-side flexibility that makes daily movement easier.
Muscles Trained: Obliques, lats, spinal stabilizers
How to Do It:
- Stand with feet shoulder-width apart, knees soft (not locked)
- Hold a light dumbbell in the right hand at your side
- Reach the left arm straight up overhead
- Slowly bend to the right, letting the dumbbell slide down towards the right knee
- Feel the stretch through the left side and the engagement on the right side
- Use the obliques to pull back to the upright position
- Complete all reps on one side, then switch the weight to the left hand and repeat
Avoid These Mistakes:
- Don’t bend forward, instead of directly to the side; imagine standing between two panes of glass with movement only possible sideways
- Don’t let the chest rotate, or the shoulders drop forward; keep the chest open and the shoulders facing forward throughout the entire movement
Recommended Sets and Reps: 10 to 12 reps each side per round.
Standing Knee-to-Elbow
This brings together rotation, hip flexion, and core engagement in one move. Bringing the opposite knee and elbow together activates the obliques powerfully while also working the rectus abdominis. Because we’re standing on one leg for each rep, we’re getting a balance challenge as well, which keeps the smaller stabilizer muscles working hard. It mimics walking patterns, which makes it incredibly functional, and the constant change of position keeps the heart rate up.
Muscles Trained: Obliques, rectus abdominis, hip flexors, balance stabilizers
How to Do It:
- Stand with feet hip-width apart, hands behind the head with elbows wide
- Lift the right knee up while simultaneously bringing the left elbow down to meet it
- Aim to touch knee to elbow, but get as close as comfortably possible
- Return slowly to the starting position with control
- Repeat on the other side, lifting the left knee to the right elbow
- Continue alternating, focusing on the squeeze in the stomach as the knee and elbow meet
Avoid These Mistakes:
- Don’t hunch over to force the knee and elbow to touch; the point is the rotation and the squeeze, not the contact itself
- Don’t round the back to close the gap; keep the chest open and let the movement come from the obliques rotating, even if the knee and elbow finish a few inches apart
Recommended Sets and Reps: 10 to 12 reps each side per round.
How to Structure Your Weekly Routine
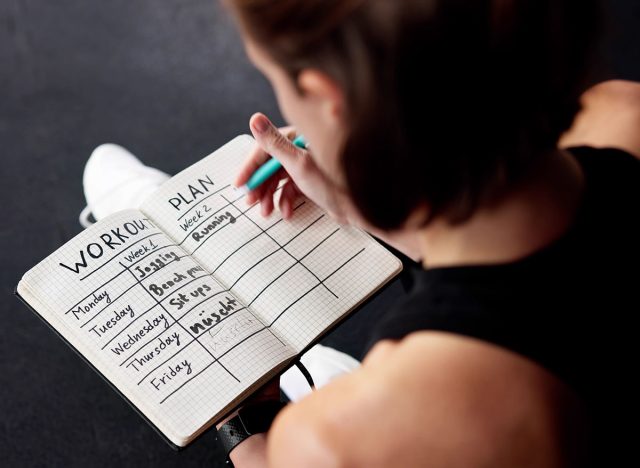
For people over 60 just getting started, three sessions per week is the sweet spot. It gives the body enough stimulus to drive change but enough recovery between sessions to come back stronger each time. As you progress and feel more comfortable, you can build up to four sessions per week, but I’d avoid going much higher than that. More isn’t always better, especially when the body needs a bit more recovery time than it used to.
Work through all four exercises in a circuit format:
- Standing March: 45 seconds of work
- Standing Wood Chop: 10 to 12 reps each side
- Standing Side Bend with Reach: 10 to 12 reps each side
- Standing Knee-to-Elbow: 10 to 12 reps each side
Rest for 60 to 90 seconds at the end of the circuit, then repeat. Beginners should aim for 2 rounds, building up to 3 rounds over 4 to 6 weeks, and eventually 4 rounds as fitness improves.
Each session should take somewhere between 20 and 30 minutes including a proper warm-up. Don’t skip it. Five minutes of marching on the spot, gentle arm circles, and some hip rotations will get the body ready and reduce the risk of injury.
For maximum fat loss results, add 20 to 30 minutes of brisk walking on the non-training days. Walking is the most underrated exercise for older adults. It’s gentle on the joints, sustainable, and makes a real contribution to the weekly calorie burn without leaving you exhausted.
Here’s the thing that matters most: three sessions a week done consistently for six months will get better results than five sessions a week done sporadically for two months and then abandoned.
Safety Tips and Modifications
If you have underlying health conditions, particularly cardiovascular issues, recent surgery, or significant joint problems, please speak to a GP before starting any new exercise programme. This isn’t a formality; it’s about making sure we’re starting from a position where exercise is going to help rather than cause problems.
For balance issues, do these exercises near a wall or stable chair. For the standing march and the knee-to-elbow, having a chair within arm’s reach means you can lightly touch it for support if needed. As balance improves over the weeks, the chair becomes less and less necessary. Don’t see it as a sign of weakness; see it as a sensible safety measure that allows you to actually train rather than worrying about falling.
For knee pain, the standing march can be modified by lifting the knee less high. A smaller range of motion that doesn’t aggravate the joint is far better than forcing the full movement and ending up unable to train for a week. The same applies to the knee-to-elbow; just reduce how high the knee comes up.
For lower back issues, the wood chop and side bend should be done with very light weights or no weight at all initially. Master the movement pattern first, then add load gradually. If any movement causes lower back pain rather than just muscle work, stop and reassess. Pain in the back during these exercises usually means core engagement has been lost and the back is taking the load instead.
For shoulder issues, the side bend can be modified by keeping the lifted arm bent rather than straight overhead. You’ll still get most of the benefit without aggravating the shoulder.
The general rule for everyone is this: distinguish between productive muscle fatigue and joint pain. Muscle fatigue feels like the muscle is working hard. Joint pain is sharp, specific to a joint, and usually gets worse as you continue. Work through fatigue but stop for joint pain.
Hydrate properly before, during, and after sessions. Older adults are more prone to dehydration than younger people, and even mild dehydration affects balance, energy, and recovery.
What to Expect in the First 4 to 6 Weeks

There’s a lot of misleading content online promising dramatic results in unrealistic timeframes. Real change takes longer than the internet would have us believe, but it’s also more rewarding when it comes.
In the first couple of weeks, you won’t really see physical changes. The changes you’ll notice are more about how you feel. Sleep generally improves, and along with that, energy levels during the day get better. Day-to-day movements feel more manageable; things like getting out of a chair or carrying in the shopping. Early wins like these are important. Small signals like this are what keep us training.
By weeks three and four, you’ll start to feel stronger through your midsection. Posture will improve as the deep core muscles start to properly do their job. Your clothes may feel slightly different, particularly around the waistband. Some people see a small reduction in waist measurement at this point, but visible changes in stomach fat are usually still subtle.
By weeks five and six, you should be able to complete more circuit rounds than when you started, and exercises you found challenging at first will feel manageable. Your balance will be significantly better. Activities that used to be harder, such as stairs, getting in and out of the bath, or putting your shoes on, will feel easier.
The most important thing to remember is that visible fat loss depends heavily on nutrition, not exercise alone. You can do these workouts perfectly three times a week, but if eating isn’t supporting fat loss, your stomach won’t get flatter. Most people in this age group need to focus on getting adequate protein (around 1.2 to 1.6 grams per kilogram of body weight), reducing ultra-processed foods, and being mindful of portion sizes. The exercises build the muscle that makes the midsection look tighter; the nutrition reveals it.
Visibly reducing stomach fat will generally take eight to twelve weeks of consistent training combined with sensible eating. By that point, you should see real changes in how you look, not just how you feel. You’ll get the best results if you treat this as a long-term lifestyle change rather than a quick fix. Our bodies didn’t get the way they are overnight, and they won’t change overnight either. But they will change if we keep showing up.