This 10-Minute Daily Standing Drill Flattens Belly Overhang Faster Than 40 Minutes at the Gym After 50
Stubborn belly fat becomes increasingly difficult to shift as the years go by, and those endless gym sessions don’t seem to deliver the results they once did. I’ve worked as a personal trainer for the past 35 years and have delivered personal training courses for the past 20, and between me and my students, we’ve trained a huge number of older adults. Here’s what I’ve learned: as we get older, it’s harder to lose stomach fat—but it’s not impossible. You just need to know what to focus on. Read on to discover a simple 10-minute standing drill that targets belly overhang more effectively than traditional workouts, plus exactly how to do it safely for maximum results.
Why Your Belly Gets Harder to Lose After 50

After 50, hormonal changes hit hard—especially for women going through the menopause. Their oestrogen level drop which changes the areas where the body prefers to store fat—rather than it being distributed evenly around the body, it tends to be deposited more around the middle. In men, testosterone declines gradually—which has a similar effect. Unfortunately, we’re literally fighting our own biology.
Our metabolism slows down significantly. We lose muscle mass at about 1-2% per year if we’re not actively working to prevent it, and since muscle tissue burns more calories at rest than fat tissue, this creates a downward spiral. We’re burning fewer calories just existing, which means the same eating habits that maintained our weight at 40 suddenly lead to weight gain at 55.
Insulin sensitivity decreases as we age. Our bodies don’t process carbohydrates as efficiently, which means more of what we eat gets stored as fat, particularly around the belly. This is why people often say they’re eating the same way they always have but suddenly gaining weight.
Why Traditional Gym Workouts Fall Short
Traditional gym workouts generally fall short because their focus is on the wrong stuff. Non-stop crunches and sit-ups burn so few calories they don’t have a chance of making a dent in belly fat. You can have super strong tummy muscles that are hidden under a layer of fat—which will stay hidden until you reduce the fat that’s covering them. Abdominal exercises make your stomach muscles stronger—but don’t spot-reduce fat from your belly.
Machine-based gym workouts also miss the mark because they isolate muscles rather than working your body as a complete system. When you’re trying to lose fat, you need to burn calories, and the most effective way to do that is through movements that engage multiple muscle groups at once and get your heart rate up. A leg press machine works your quads, but a squat works your quads, glutes, hamstrings, core, and stabilising muscles all at the same time, burning far more calories.
Many traditional gym programs are also too intense for people over 50 who are just starting out. High-impact exercises and heavy lifting can lead to injury if you’re not conditioned for them. People get hurt, they stop training, and the belly fat stays exactly where it is.
What Makes Standing Drills So Effective for Your 50+ Belly

They keep you on your feet. This means you’re constantly keeping the core engaged for balance and stability. Every time you move your arms or legs, the core needs to work to keep you upright. This non-stop activation burns more calories and strengthens your midsection in a way that’s actually functional—so it translates to real life.
They are also low-impact—which is super important after 50. An older adult’s joints have been working for decades and high-impact movements (like running and jumping) can cause pain or injury. Standing drills are still hard work and they burn a load of calories—but they do it in a way that doesn’t pound your knees, hips, or back.
Moving continuously elevates your heart rate and this is what actually burns fat. You’re not just giving your abs a workout—you are creating a calorie deficit through sustained activity. This is why standing drills are so much more effective for getting rid of belly fat than traditional core exercises—you’re combining cardio and strength work.
Standing exercises like these also give postural improvements—immediately making your tummy look flatter. When you stand up properly with an engaged core, your stomach pulls in naturally. As your core gets stronger over time, being strict with your posture becomes automatic and not something you need to constantly think about.
Standing exercises don’t need any equipment and they need hardly any space—something that a lot of people see as barriers to a new exercise regime. It also makes it easier to be consistent (which is the real secret to losing belly fat). The best exercise program is one you will actually do—and standing drills tick that box for the majority of people.
10-Minute Standing Drill To Trim Stomach Overhang After 50
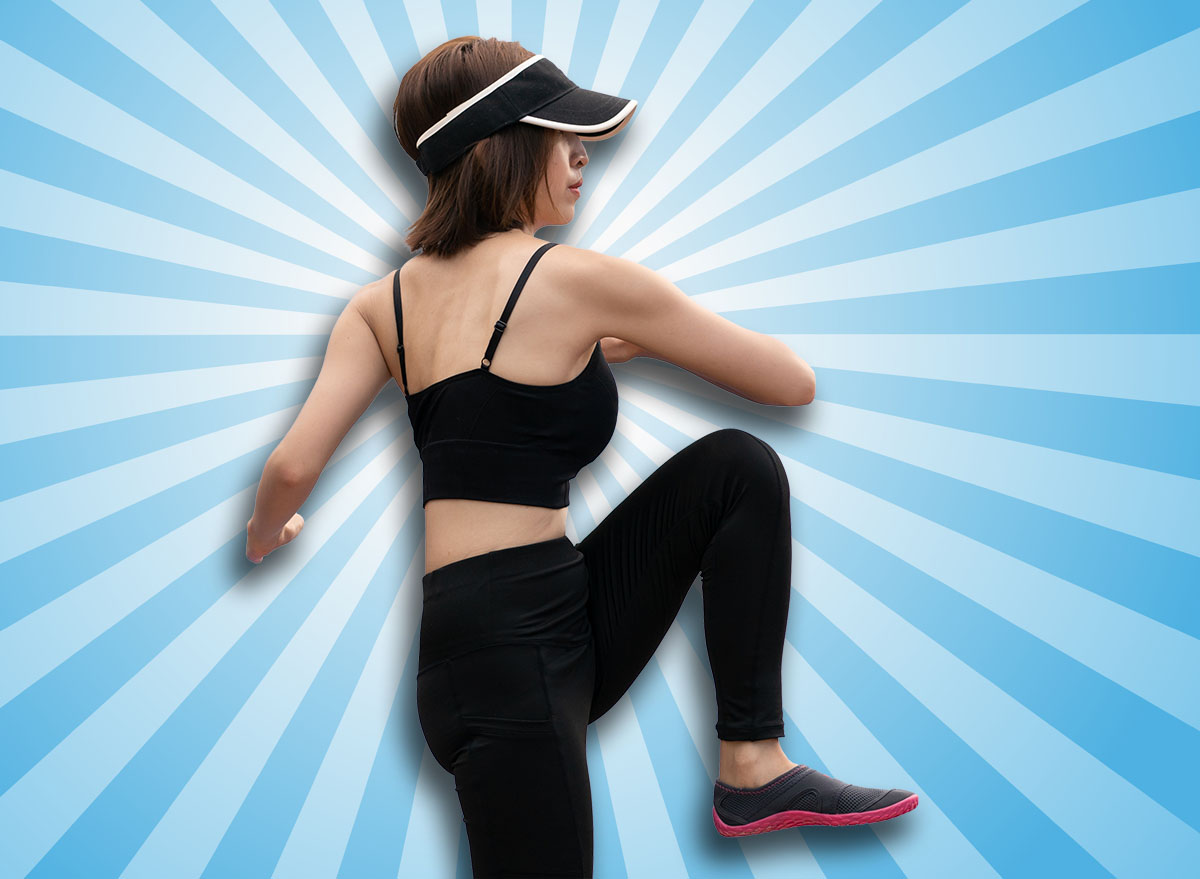
Exercise #1: Standing Knee Drives

What it does: This movement engages your entire core, particularly your lower abs, while also getting your heart rate up. The rotation and balance required activate those deep stabilising muscles that support your spine and help flatten your midsection. Each knee drive also works your hip flexors and helps improve the mobility in your hips.
How to do it:
- Stand with your feet hip-width apart
- Raise your arms overhead
- Drive your right knee up towards your chest while simultaneously bringing your arms down, as if you’re pulling something down from above
- Return to standing and repeat on the left side
- Keep alternating sides at a steady, controlled pace
- Your core should stay tight throughout—imagine someone’s about to poke you in the stomach and you’re bracing for it
Mistakes to avoid:
- Don’t lean back as you lift your knee—stay upright or lean very slightly forward
- Many people also rush through this, turning it into a sloppy movement. Keep it controlled
- Another common mistake is not driving the knee high enough—aim to get your thigh parallel to the floor if you can
- Also watch that you’re not holding your breath. Breathe out as you drive the knee up
Beginner modification: If balance is an issue, hold onto a chair or counter with one hand. You can also reduce the height of the knee drive—any amount of lifting works the right muscles. If your shoulders are tight, you don’t need to reach all the way overhead. Just lift your arms to shoulder height.
Exercise #2: Standing Oblique Crunches
What it does: This targets your obliques, the muscles on the sides of your waist that create that defined look when you lose fat. Strong obliques also improve your rotational stability, which helps with everything from getting out of the car to reaching for something on a shelf. This exercise burns calories while directly strengthening the muscles that help reduce love handles.
How to do it:
- Stand with your feet shoulder-width apart and place your hands behind your head, elbows out to the sides
- Lift your right knee out to the side while bringing your right elbow down to meet it
- Squeeze your oblique muscles on that side
- Return to standing and repeat on the left
- The movement should be controlled, not fast
- You should feel your side muscles working with each rep
Mistakes to avoid:
- The biggest mistake is pulling on your neck with your hands. Your hands are just resting behind your head for balance—they shouldn’t be yanking your head down
- Another error is leaning forward instead of truly crunching to the side. The movement should be lateral, not forward
- Also, many people just go through the motions without really contracting their obliques. Squeeze deliberately on each rep
Beginner modification: Instead of putting your hands behind your head, place one hand on your hip and reach the other arm overhead, then bend to the side. This gives you better balance and takes strain off your neck. You can also reduce how high you lift your knee or how far you bend to the side. Any movement is better than no movement.
Exercise #3: Standing March with Arm Raise
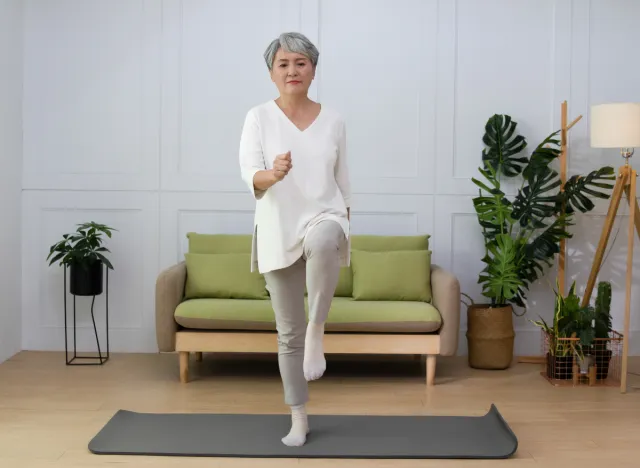
What it does: This keeps your heart rate elevated while working your core stability. The marching movement engages your lower abs and hip flexors, while the arm raises work your shoulders and upper back. The combination forces your core to stabilise your body while your limbs move, which is exactly what your core needs to do in daily life. This burns calories steadily without being so intense that you can’t sustain it.
How to do it:
- Stand tall and march in place, lifting your knees to a comfortable height
- As you lift each knee, raise both arms straight up overhead
- Lower your arms as you lower your foot
- Keep marching with a rhythm that feels sustainable but still makes you work
- Your core should stay engaged—don’t let your lower back arch as you raise your arms
Mistakes to avoid:
- Don’t lean back when you raise your arms. This is incredibly common and puts unnecessary strain on your lower back
- Keep your ribs down and core tight
- Another mistake is letting the movement become too casual—you should feel like you’re working
- Many people also hold their breath when they raise their arms, which is exhausting. Breathe naturally throughout
Beginner modification: If raising your arms overhead is uncomfortable, just raise them to shoulder height or keep them down by your sides. You can also march with smaller knee lifts. If balance is a concern, march next to a wall or counter where you can touch it lightly if needed. You can even do this sitting in a chair if standing for the full duration is too much at first.
Exercise #4: Standing Torso Twists with Knee Drive
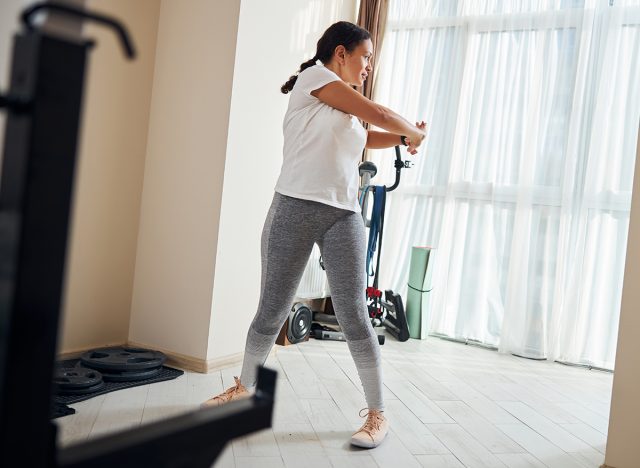
What it does: This is one of the best exercises for working your entire core while burning calories. The twisting motion engages your obliques and the deeper core muscles that wrap around your midsection like a corset. The knee drive adds intensity and works your lower abs. This movement also improves rotational mobility in your spine, which most people lose as they age.
How to do it:
- Stand with your feet hip-width apart and hands behind your head
- Twist your torso to the right while simultaneously driving your right knee up and across your body towards your left elbow
- Return to centre and repeat on the left side
- The twist should come from your core, not your hips
- Your hips should stay relatively still while your upper body rotates
- Keep the movement smooth and controlled
Mistakes to avoid:
- Spinning your whole body instead of truly twisting at the waist. Your hips should barely move
- Another mistake is cranking your neck to the side—your head should follow your torso naturally without straining
- Many people also rush through this exercise, which reduces its effectiveness. Slow down and feel your obliques working
- Don’t pull on your neck with your hands
Beginner modification: Skip the knee drive entirely and just do standing twists. You can also do the twists with your hands on your hips instead of behind your head, which is easier on your neck and shoulders. If balance is difficult, do this movement standing in a doorway where you can reach out and touch the frame if needed.
Exercise #5: Standing Bicycle Crunches

What it does: This is essentially a standing version of the bicycle crunch, which is one of the most effective abdominal exercises according to research. It works your entire core, particularly your obliques and lower abs. The standing version adds a balance component that forces your stabilising muscles to work harder. It also keeps your heart rate elevated, burning more calories than the floor version.
How to do it:
- Stand with your hands behind your head and elbows wide
- Drive your right knee up and across your body while twisting to bring your left elbow down to meet it
- The twist should happen in your core—really contract your obliques
- Return to standing and immediately repeat on the other side
- Keep alternating with control
- Your standing leg should stay strong and stable throughout
Mistakes to avoid:
- Pulling your head forward with your hands instead of twisting from your core. This strains your neck and reduces how much your abs work
- Another error is barely lifting your knee—you need to drive it up high enough that you can actually twist to meet it
- Many people also lean back, which disengages the core. Stay upright or lean very slightly forward
- Don’t rush—this should be deliberate
Beginner modification: Reduce how high you lift your knee and how far you twist. Even small movements work the right muscles. You can also do this with one hand on a counter for balance, using just one arm behind your head. If this is too challenging, simply march in place with a small twist of your torso with each step—no arm movement needed.
How to Do This Drill Safely

Start three times per week, with at least one rest day between sessions. Monday, Wednesday, and Friday work well. Your body needs time to recover, especially when you’re beginning. If you try to do this every day right from the start, you’ll likely end up too sore to continue or risk injury.
Begin with 30 seconds of each exercise, moving through all five exercises in order. That’s one round, and it should take about 2-3 minutes. Rest for 60-90 seconds, then repeat. Start with just 2-3 rounds total, which means your workout will be about 10-15 minutes, including rest periods.
After two weeks, if you’re recovering well, increase each exercise to 45 seconds. After another two weeks, move to 60 seconds per exercise. Once you’re comfortable with 60-second intervals, add another round instead of making the intervals longer. Eventually, you can work up to 4-5 rounds, but there’s no rush to get there.
Always warm up first. March in place for 2-3 minutes and do some gentle torso twists and arm circles. Your muscles need to be warm before you start the actual drill. Jumping straight into it cold is asking for an injury.
When to Skip Your Workout

Skip the workout if you’re ill, particularly if you have a fever. Your body needs its energy for fighting infection, not for exercise. Also, skip it if you’re experiencing unusual pain—not normal muscle soreness, but sharp or persistent pain in your joints or back. That’s your body telling you something’s wrong.
If you have high blood pressure, this type of continuous movement can be beneficial, but check with your doctor first. The same goes if you have any heart conditions or have been sedentary for a long time. A quick conversation with your GP can give you peace of mind and ensure you’re safe to start.
People with balance issues should do these exercises near a wall or counter that they can touch if needed. There’s no shame in using support—it’s far better than falling. As your balance improves over weeks of training, you’ll likely find you need the support less and less.
If you have a weak pelvic floor, be cautious with the jumping or explosive movements. The exercises in this drill are fairly gentle, but if you find yourself leaking urine during the knee drives, reduce the intensity or height of the movement. This is common after 50, particularly for women who’ve had children, and there’s no reason to feel embarrassed—just modify the movement.
Stop immediately if you feel dizzy, lightheaded, or experience chest pain. These are signs you need to rest and possibly seek medical advice. It’s normal to breathe hard and feel your heart rate increase, but you should still be able to hold a conversation. If you can’t speak in short sentences, you’re working too hard.
Don’t do this drill right after eating. Give yourself at least 90 minutes after a meal. Exercising on a full stomach is uncomfortable and can cause cramping or nausea.
What Results You Can Expect

After two weeks: Don’t expect to see dramatic changes in the mirror, but you should notice functional improvements. The drill will feel less difficult. Your breathing won’t be as laboured. You’ll probably be able to do more reps or rounds than when you started. Many people also report feeling more energetic throughout the day and sleeping better at night. You might notice your posture improving—standing taller with less effort.
In four weeks: You should start seeing some actual changes. Your clothes might fit slightly better around the waist. When you tighten your core, you’ll feel stronger muscles underneath. The overhang won’t have disappeared, but it should feel firmer and possibly smaller. You’ll likely notice it’s easier to bend over, get up from chairs, or carry shopping. Your balance should be noticeably better.
By eight weeks: You should see visible reduction in belly fat if you’ve also been mindful about your eating. This doesn’t mean you’ll have a flat stomach—that’s not realistic for most people in eight weeks—but you should see measurable progress. You might have lost an inch or two around your waist. Your core will feel substantially stronger. Movements that were challenging at the start will feel easy. You’ll probably be doing longer intervals or more rounds than you started with.
Other Habits That Support Your Results

The drill alone won’t get you there, though. You need to support it with other habits.
Sleep is absolutely critical. When you don’t sleep enough, your body produces more cortisol, which promotes fat storage around your middle. Aim for 7-8 hours per night. Poor sleep also makes you hungrier and more likely to reach for sugary foods. I’ve seen people’s progress stall completely when their sleep deteriorates, and accelerate when they sort it out.
Your eating habits matter more than exercise for losing belly fat. You can’t out-train a poor diet. You don’t need to follow a complicated meal plan, but you do need to create a calorie deficit. Focus on eating more protein, which helps maintain muscle while you lose fat and keeps you feeling full. Reduce your intake of processed foods, particularly those with added sugar. Don’t drink your calories—sugary drinks are one of the worst culprits for belly fat.
Stay hydrated. Aim for 8-10 glasses of water per day. Being dehydrated can make you feel tired and hungry, which often leads to overeating. It also impairs your exercise performance.
Manage your stress. Chronic stress raises cortisol levels, which tells your body to store fat around your middle. Find ways to reduce stress that work for you—walking, reading, spending time with friends, whatever helps you feel calmer. Even 10 minutes a day of deliberate relaxation can make a difference.
Be patient and consistent. The biggest mistake people make is expecting too much too soon and giving up when they don’t see rapid results. Fat loss after 50 is slower than it was when you were younger, but it’s absolutely possible. Two months of consistent effort should show you clear progress, but the real transformations happen over 3-6 months. Trust the process and keep showing up.
Track your measurements rather than just relying on the scale. Weight can fluctuate daily due to water retention, but measurements tell a clearer story. Measure around your waist at belly button height once per week, first thing in the morning. Take a photo from the front and side every two weeks. These will show progress that the scale might miss.
Most importantly, understand that this isn’t a quick fix. This drill is a tool for building the strength and creating the calorie burn needed to reduce belly fat, but it needs to become part of your life, not something you do for eight weeks and then stop. The people who keep their results are the ones who make this type of movement a permanent habit.